Amie took this picture with my phone.
Be joyful though you have considered all the facts
Amie took this picture with my phone.

They took a surface picture of Betelguese, only just, a couple of hours ago!
Betelgeuse is close, only about 600 light-years away in the constellation of Orion. It is one of the largest stars known, a red super-giant with a radius around 1400 times larger than the Sun’s. It’s also pretty young, just about eight million years old, and it won’t last much longer, heading for a supernova pretty soon.
When that happens, the resulting explosion will be visible from Earth, even in broad daylight. I hope I’m around long enough to see it, but then again “short” for stars and “long” for humans rarely overlap. Though they must, sometimes.
What a world to be alive in!
(This is a cross-post with the Transition Wayland blog)
It’s been over a month and our carbon/biochar and Korean Natural Farming inputs trial at the Transition Wayland plot in the Community Gardens has been running smoothly. Yesterday we harvested for the first time and the differences between the four beds are already noticeable!
Check out the five lettuces we transplanted in May.
Bed 1 (loose soil – biochar – no Korean Natural Farming inputs):
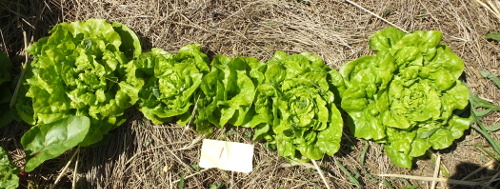
Bed 2 (loose soil – biochar – Korean Natural Farming inputs):

Bed 3 (tight soil – biochar – no Korean Natural Farming inputs):
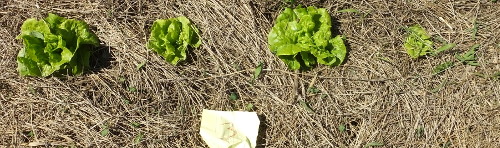
Bed 4 (tight soil – biochar – Korean Natural Farming inputs):
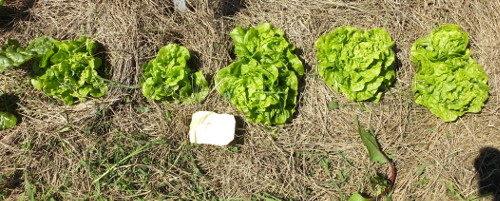
I harvested the largest of each bed’s lettuce as well as some chard leaves (blue – KNF inputs):
| HARVESTS | in oz. | |||
| Bed 1 | Bed 2 | Bed 3 | Bed 4 | |
| Largest lettuce | 5 | 7.3 | 0.5 | 5.3 |
| chard leaves | 5.7 | 4.5 | 0 | 0.9 |

The nice, loose soil in the long bed that makes up beds 1 and 2 is obviously much better than the tight soil in beds 3 and 4. The KNF has been of benefit in both, a smaller benefit in the loose soil beds (2.3 ounces heavier), and a much larger benefit in the tight soil beds (the KNF lettuce there was a whopping 10.6 times heavier than in the no KNF bed). So the KNF overcame whatever the deficiencies are in that soil.
This larger benefit is less pronounced, but still visible for all the other plants (chard, beets, peppers, tomatoes, tomatillos, broccoli, onions and parsley). Those in Beds 3 and 4 (tight soil) are obviously smaller than in Beds 1 and 2 (loose soil). There is less of a noticeable difference between Beds 1 and 2, but again more of a difference between 3 and 4. So again the KNF shines in overcoming a tight soil.
Of course, these are only our first data points! We’ll keep measuring and recording – and eating – all season long.
Can you see we’re having fun?
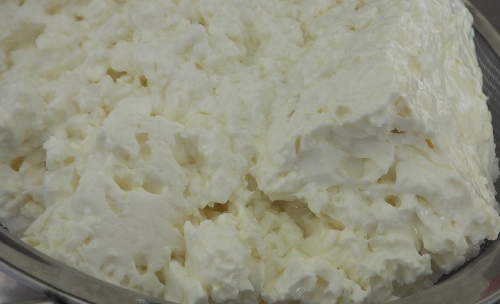
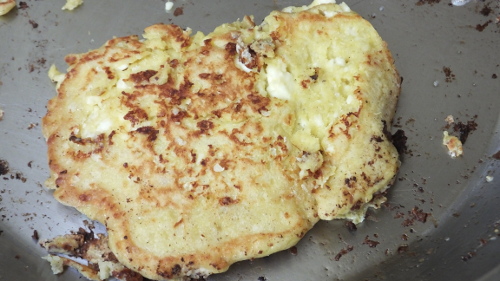
My LAB making rendered a lot of whey, and even more curds. I was planning on turning that into cottage cheese, but after straining and pressing it remained too crumbly. So this morning, for Father’s Day, I got experimental and after a couple of trials put some yummy curds/egg/gluten-free flour/salt and sugar “pancakes” on the table. With homemade blueberry jam they reminded everyone of blintzes, only better. Crunchy and melted, salty and sweet, with a hint of sour, it was a hit!
And just as I wrote how “my” creatures were doing so well, our little runt, Pebble, who had held her own and was doing so well, got a wing torn off, through the wire fence of the chicks’ extra run, in broad daylight. We isolated her, and I looked at the wound as best I could on my own. She seemed alright, roosting, eating, drinking. But then chickens never want to show they’re hurt or in pain; the flock weeds out the weak links instantly and viciously (we’ve seen it). Still, foolishly we thought, “let’s give her a chance.” After a while I was able to look at the wound, with DH helping, and she was smelling bad already. I sharpened my cleaver, speaking gentle words took her to the back of the garden, laid her down on a tree stump, and without thinking about it took off her head. Amie and I buried her in the pet cemetery. RIP, Pebble.
The Little Coop they’re in has a coop (box) and a run made of welded wire, impenetrable by predators and their claws. It is getting too small for them, so I had made an extra run out of some garden wire staked into the ground, a garden wire ceiling. Not knowing what got Pebble (we thought a cat), I let them in their extra run and stuck around, reading a book (Alphonso Lingis, The Imperative, in case you’re wondering). After an hour or so I looked up to a commotion near the big chickens’ run: it was a racoon. At 3 in the afternoon! Aren’t they’re supposed to be nocturnal? Then I realized he/she was inside the run, but how? I was sitting right in front of the only entrance. My exclamation of surprise sent it scurrying through the hole he/she had made, giving it away: a narrow gap between the fence top of the run and the coop. So that’s why I was blasting through chicken feed so fast: each evening before dusk we closed the run, but this raccoon had been partaking of the buffet, night and day. And yesterday I also took Pebble’s wing.

So we’re somewhat stuck. We’re letting the big chickens out, hoping they can fend for themselves, but we also closed the gap and now that racoon may be getting hungry enough to go after them. The little chicks are cooped up in their too-small run, except when I am in the chicken yard with them, reading books (not a bad thing). It’s not sustainable. Stay tuned.
I checked on the nucs we took off the big Sam hive and one after the other they turned out queen right with laying queens. 100%! One hive became seven, just like that. The chickens are robust and healthy and laying too many eggs to keep up with, and the six chicks are thriving too (and starting to croak instead of cheep!). The garden is perking up now that the weather has shifted to warm. The ferments on my counter top are abounding.
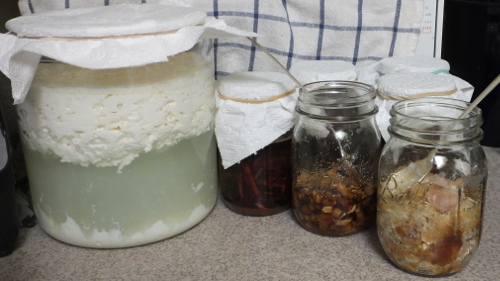
Big jar of LAB, and the five ingredients for OHN, fermenting in their brown sugar.
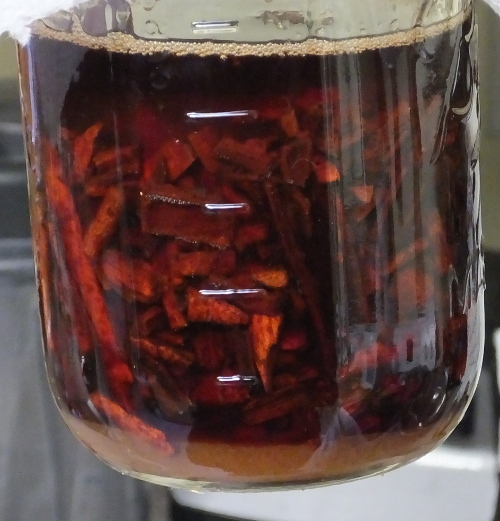
You can imagine the smell of the cinnamon bark just by looking at it’s color.
These milk curds are so rich! They’ll be paneer tomorrow.
After building my Air lift Mini Microbulator, I checked out these compost tea recipes. At the aforementioned candy store I bought some Coast of Maine Stonington Blend Growers Mix, a complex “super soil†nutrient blend with mycorrhizal fungi, kelp, fish bone and alfalfa meal, as well as worm castings, peat, coir and lobster compost. Yum! But I didn’t use it, yet. Instead I went with Mr. Tim Wilson’s recipe for a fungal brew.
For 1/2 gallon of water, the recipe is:
| Fungal dominated compost | 1.5 fluid oz |
| Black strap molasses | 1 tsp |
| Fish hydrolysate | 1 tsp |
| Alfalfa meal | 2 tsp |
So for my 5 gallons of tap water that stood around for a couple of days to dechlorinate, and some greenish rain water from the barrel, that made:
| Fungal dominated compost (1/2 cups from deep down underneath my leaf mulch pile,and 1/cup from a garden bed I haven’t planted into yet) | 15 fl.oz = about 2 cups |
| Black strap molasses | 10 tsp = 1/8 cup |
| Home made FAA | 10 tsp |
| Alfalfa meal | 20 tsp = 1/4 cup |
I also added 1/4 cup of worm castings (also Coast of Maine). Couldn’t help myself.
I turned on the pump at 9:45 am. It’s not too loud. The splashing and gurgling is actually louder than the pump.
This is my first ever real ACT – Aerated Compost Tea. I’ve made brews with a tiny little aquarium bubbler before – those would have been pretty anaerobic brews. I can’t wait to try different recipes. How to judge them, without a microscope, though?
In the meantime, here is some further reading on humates, another great resource, and info on spray equipment that won’t shred your fungal hyphae and larger micro-organisms, and a PDF on foliar applications.
{IMPORTANT UPDATE 6/9} The pump cannot handle the difference between the intake/output ratio if you eliminate the brass adapter. It becomes MUCH louder and the short-circuit-like noises it makes indicate it’s not working properly. At first I thought it was the pump malfunctioning, but when the second one also did this, the store cleared up the mystery for me (thanks, guys!). So, the brass nipple went back in, and I went back to the hardware store for the 3/8″ ID hose…
I had ordered the KIS aeration compost tea brewer ($290 + $30 shipping), having read the glowing recommendations by Dr. Elaine Ingham and Jeff Lowenfells of Teaming-with fame, but unfortunately something is up with their manufacturing process and they’re on back order until July (or indefinitely?). I cancelled my order and settled on Mr. Tim J. Wilson’s new and improved Mini Microbulator. Also check out his website, full to the brim with info on brewers, brewing, complete with microscope assays (this one for the mini microbulator).
Here is his Mini Microbulator – love that name! – at work.
This one is also for sale, but I just bought the plans ($7 – thanks Mr. Tim!). I got the Elemental O2 Commercial Air Pump (951 gph) from my local hydroponic store – this cool place, it’s like a candy store! In the end it cost me: $7 for plans, $33.43 for the pump, $38.08 for the fittings and hose (and tax) = $78.51.
Though in his plans Mr. Tim uses a 3/8″ ID (inner dimension) hose (with a 3/8″ barb) I followed the advice he gave in a comment on this video:
Your airlift will run with extreme more efficiency if you use a larger diameter airline. Just eliminate the little brass nipple which screws into the pump and use an airline which goes over the nub on the pump, * score the nub with a hacksaw to create something for the airline to grip * clamp the airline securely, * use a similar size air input nipple into the base of the airlift. This way you will get full efficiency and higher capacity dissolved oxygen from the bioreactor.
So I used a 1/2″ ID vinyl hose (and a 1/2″ barb) instead. I didn’t score the nub on the pump because it probably voids the warranty. I clamped it tightly and will keep an eye on whether it pops out. HOWEVER…
{IMPORTANT UPDATE 6/9} The pump cannot handle the difference between the intake/output ratio if you eliminate the brass adapter. It becomes MUCH louder and the short-circuit-like noises it makes indicate it’s not working properly. At first I thought it was the pump malfunctioning, but when the second one also did this, the store cleared up the mystery for me (thanks, guys!). So, the brass nipple went back in, and I went back to the hardware store for the 3/8″ ID hose…
The base of the airlift fits very tightly (almost not) into my bucket, but it’s a good thing. It makes it super stable and wedges everything together, which means I don’t have to glue any of the fittings together and will make for more through cleanup after each brew.
The riser sits in the middle of the bucket, which prohibits the formation of that vortex everyone likes (Mr. Tim’s 50 gallon microbulator does create a vortex). From what I could see from my first test runs, a lot of air gets pumped into the water/tea, though. Mr. Tim writes that “the dissolved oxygen (DO2) of a finished batch has been over 7 ppm for us with water TDS at around 75 ppm but as high as 9 ppm DO2.” Elaine Ingham writes (here for a pdf of the best scientific primer on compost tea ever) that the tea should remain in the aerobic range at all times, that is, above 6 ppm or 70 to 80% dissolved oxygen. At some point I’d love to buy an oxygen probe to do my own tests. After I get my microscope!
But first, I can’t wait to make my first brew {UPDATE: I did!}. But I’ll have to find a good place to locate this operation first. The pump is pretty loud, as well as all the splashing, and as a brew usually take over 24 hours, preferably 36 hours, I’m not sure I can get away with it in the basement under our small, one-story, house…
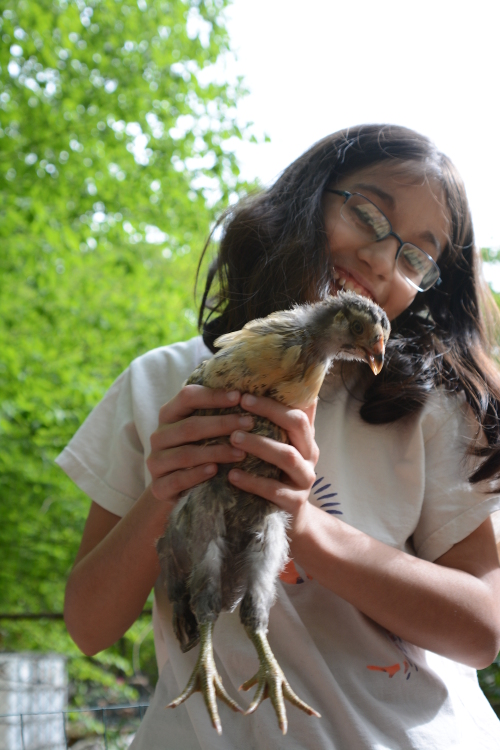
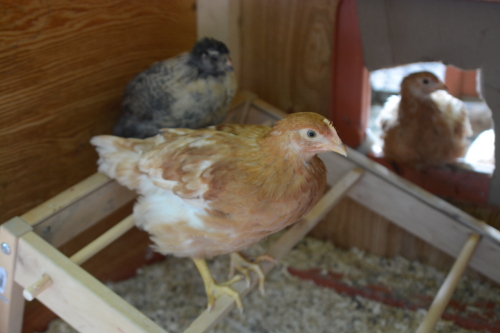
The six chicks are now 6 weeks old and last week I put them outside in the Little Coop. The dust from their food was driving me up the walls while they were inside the house! It hasn’t really warmed up yet, so I had the heat lamp on in there at night. But yesterday it was 50, so I didn’t turn it on: their first night in the dark. The little ones seem to bear it well. They are fully feathered out, growing fast, eating lots, and the Easter Eggers are growing their whiskers. But they still pip-squeak like little chicks.
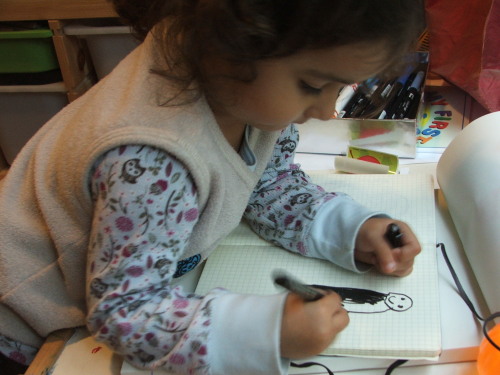
They still don’t have the hang of going inside the coop when it gets dark. When I turned on the red heat lamp after dark, they’d all skedaddle in, but now I need to coax them in with a flashlight. I thought it might be the lack of a roost, so I made them one out of Amie’s IKEA toddler table (the one in this picture, where has the time gone?).
You were wondering why I kept it for nine years?
But nope. I still need to haul them in. They’ll get the hang of it, I hope, because the raccoons come a-prowling not long after the automatic coop door opener on the Big Coop closes. Any stragglers are shut out and had better hope the humans get there to correct the situation first!
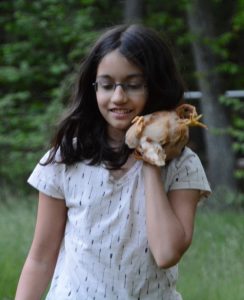
Amie loves playing with the little ones. I created a quick fence around the back of the Little Coop so that when we open the back door and they run out, they’re contained. For one, they’re fast and small, hard to catch. Second, if they get out they’re at the mercy of the big hens, who have somewhat gotten used to their presence in their yard, but who might still give a mean peck to any that come within range.
The picture to the right is of the runt, Pebble. She is holding her own, she’s just smaller. Compared to her, Jiggle, also an Easter Egger and the biggest one of the lot, is a giant. It makes sense they hang out together.
And then there is other fowl.
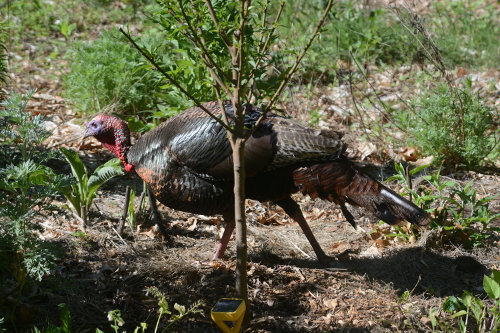
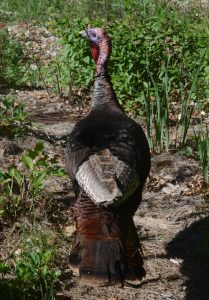
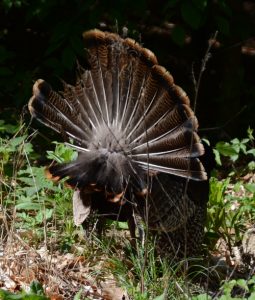
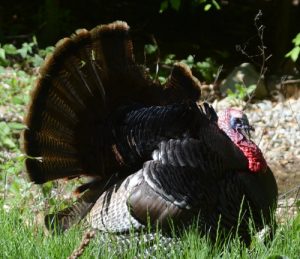
We’re not used to seeing wild turkeys in our neighborhood, but one day two came strolling through our front yard on their way to the aquaduct (which runs behind our house). We’ve seen them a couple more times. They bypass the veg garden (thank goodness / so far) and go via the bee hives. The female goes first, the tom follows ten feet behind. He tries to get her attention by displaying and calling when she doesn’t deign to look back (which is mostly). He is quite handsome but it looks like something took a bite out of his tail feathers. We’re careful around him – I’ve seen wild turkeys go after people and it isn’t pretty.
Today I was finally happy with the seedlings planted in the garden. The lettuces, for instance, have been in the ground for three weeks and in those weeks hardly put on any weight. The peas are pathetic. The cold and rain would be fine for those, but for being followed instantly by heat wave weather. The up-and-own has been holding back everything, except for the weeds. (And the mushrooms have all turned to sludge.) But on my morning tour of the garden today, everything looks perked up. Must be yesterday’s perfect 70F, perfect mix of sunshine and clouds, a not-too-cool night and this dewy, overcast morning. And yesterday’s dose of this KNF!
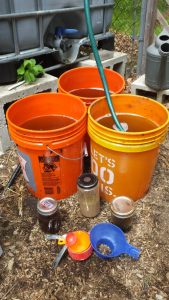 Hail the ugly Homer Bucket! In went harvested rainwater, OHN (Oriental Herbal Nutrient), FAA (Fish Amino Acids) and FPJ (Fermented Plant Juice), the inputs for stimulating basic vegetative growth during the plant’s consumptive stage and egging new organs towards maturity. At 500:1 dilution (FAA) and 1000:1 dilution (OHN and FPJ), these went into each 5 gallon bucket at respectively 2 tbsp + 1 tsp and 2 tsp. A little goes a long way.
I also added a tablespoon of micronized Azomite, a splash of liquid kelp and of EM1. Six buckets of this went out onto the veg garden as a foliar and soil soak. I still have three “unsettled” garden beds waiting for the squashes, zukes and cukes to harden off. Once those are in, and once the plants are bigger and need more, I’ll need to figure out the irrigation. I enjoy the watering and face time with each seedling in this perfect weather, but when it gets to 90F, I’d rather open a valve. More on irrigation soon!
My KNF/biochar trial partner and I also planted tomatoes and peppers into our Community Garden beds. I tucked in some lettuce, chard, celery, and scallions. We ran out of time to apply KNF (same as above) to half those beds, but I’ll run over there and do it today. The sun exposure int that plot is out of this world, as are the massive amounts of worms. And weeds and pests… can’t have it all perfect. Those seedlings were the same batch as the ones I planted here. I’m curious about the difference between the trial beds and the difference between the Community Garden plot and my own garden, where I apply biochar/KNF throughout.