Garden Photos on a Gloomy Day

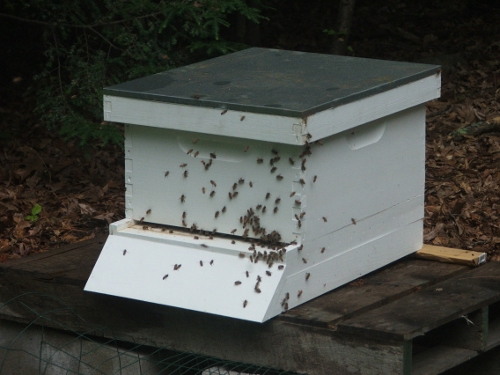
Bees bearding the hive? Or just lots of traffic. Here’s a little video. Most of the noise is generated by the bees:

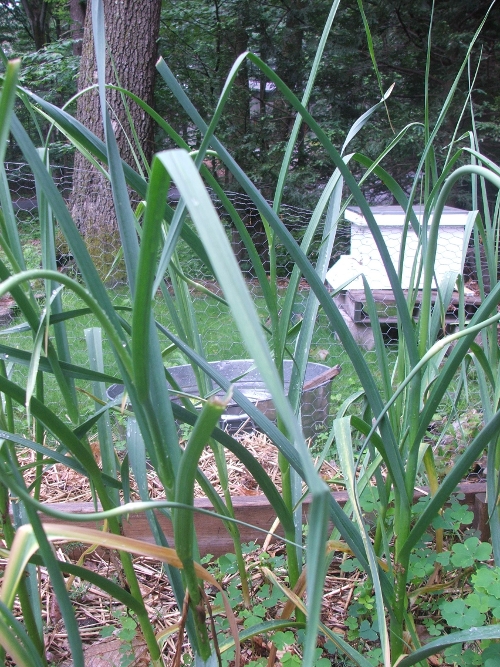
Garlic scapes ready to pick – I’m waiting for a hot afternoon

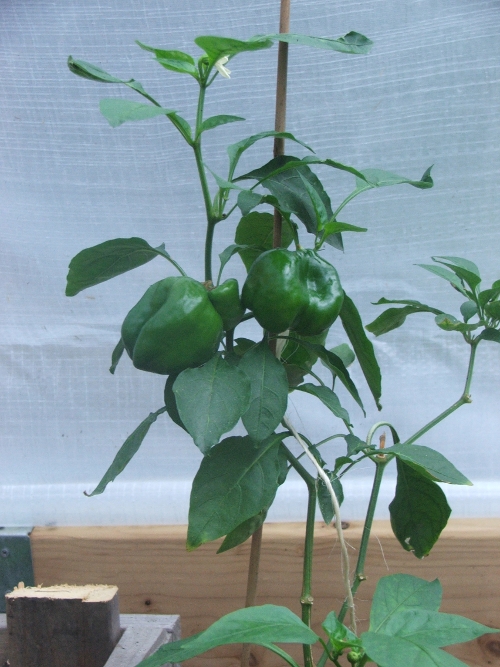
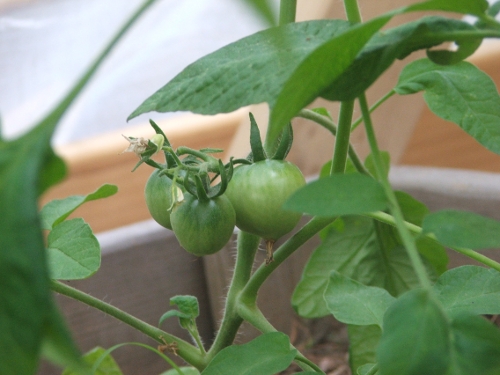
These are ready as well, but I’m holding out for red peppers  (these are the overwintered pepper plants)

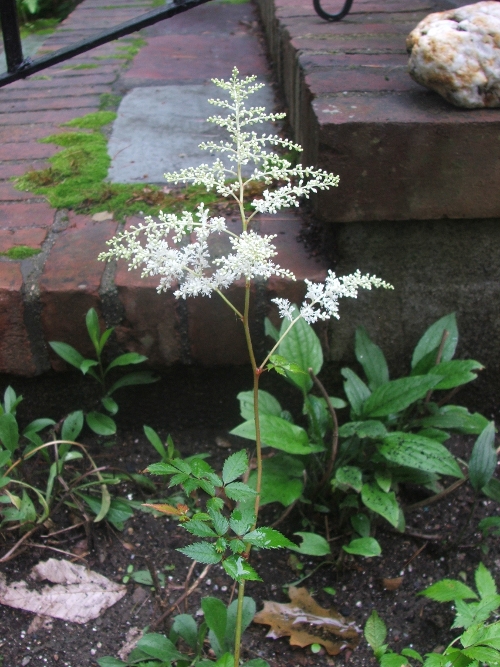
Something pretty in the side bed, don’t know what

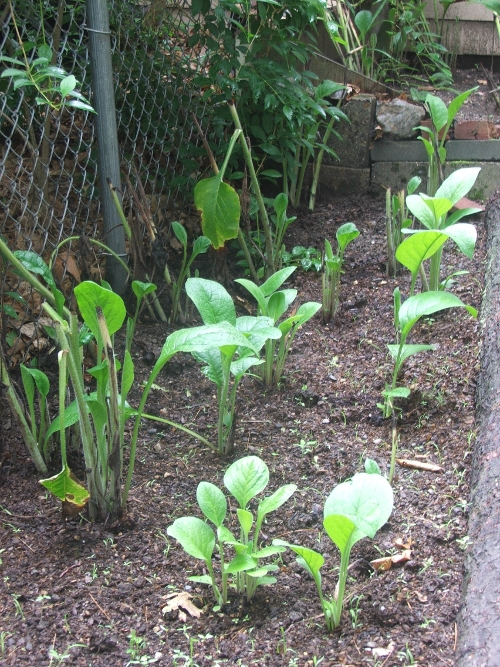
The comfrey patch: all the transplanted roots and shoots made it

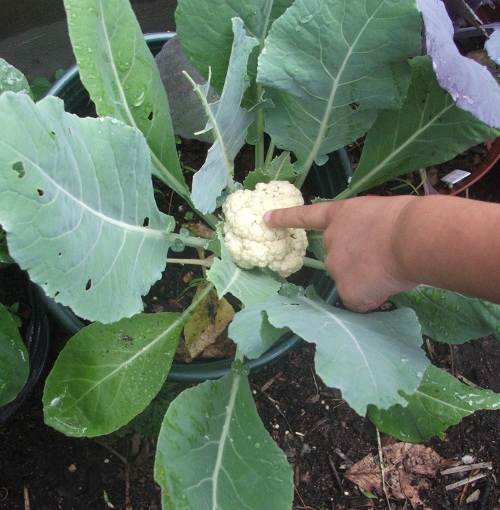
This was the best surprise in one of the potted cauliflowers. It was not there two days ago, and now it is. I’ll have to wrap it up as soon as it stops raining. The cauliflowers in the beds are bolting, I’m afraid.

Fun with the Hive

I wrote last time about my concern that my colony is behind. At my last inspection they still hadn’t drawn out (built wax comb onto) enough frames to warrant the second brood box. Still, my inspection indicated that the queen would soon run out of immediately available space to lay eggs. In the summer a good queen can lay 1500-2000 eggs a day!

So yesterday I went in to move one of the empty outside frames in couple of spots in.

When bees build comb and then fill it up with brood lives in two boxes, they will always use it for brood {UPDATE: this turns out not to be true: the bees can clean out honey and use the cell for brood}. As the new bee emerges from her cocoon, her pupal lining stays behind and is not cleaned out – neither are waste and bits of pollen and propolis. Over the years, brood comb, then, gets darker, even black. Since the chance of disease rises and the cells become smaller with each new shedding of a cocoon, brood comb needs replacing every four or so years (though it depends). Comb filled with honey will always use be honeycomb {UPDATE: nope}, which is lighter in color, because each cell always gets cleaned out totally when the bees go into their honey stores.

The brood nest (adult bees, eggs, larvae and pupae) forms a sphere in the middle of the hive. When you add a second box on top, the bees will gradually move the nest up. By winter, the nest will be in the top box. In spring you reverse the boxes, so the nest is in the bottom box again. And so forth.

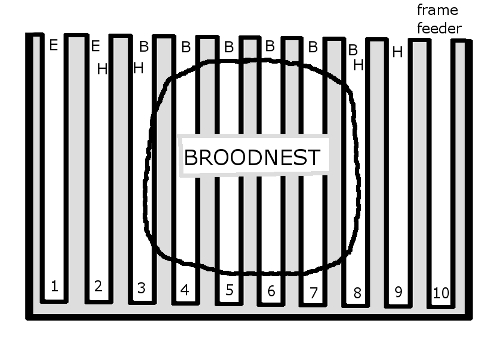
My brood (B) nest, confined as yet to one single box, was honey-bound: it was enclosed on both sides with honeycomb (H), and not large enough.

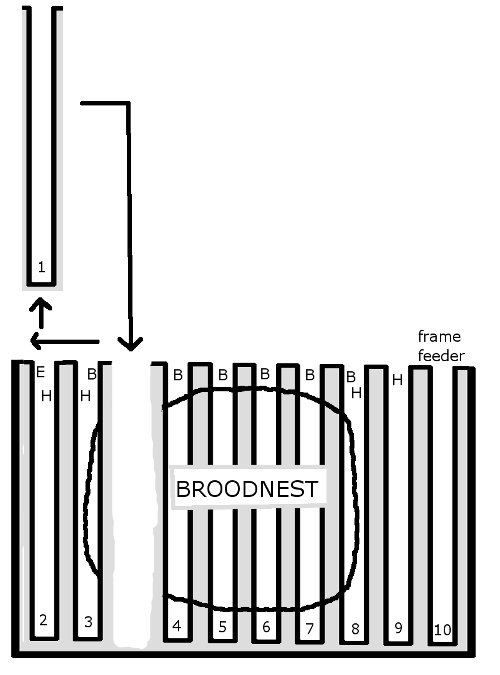
One of the solutions is to put the second  brood box on top: no less than ten empty frames. But it is desirably that the bees draw out all the frames in both boxes. This means the beekeeper often needs to move frames around. I moved the empty first frame into the third slot, in between two frames of brood, so the bees will draw it out and fill it with brood.

This is what I love about beekeeping (or what I have experienced of it so far). It is like a good game: rule driven, with a challenging array of variations. You observe patterns, deduce what is going on, and manipulate to get the best outcome. But the game is much bigger than that. All that the bees do, all that the weather brings, all that the flowers offer and all the interference from other animals and beekeepers, etc., it is all rule-driven: it has causes, reasons. Most of these are natural.  And nature is vast. We, beekeepers, have very limited insight in them. So the game is new every time. Keeps you on your toes.

Stung!

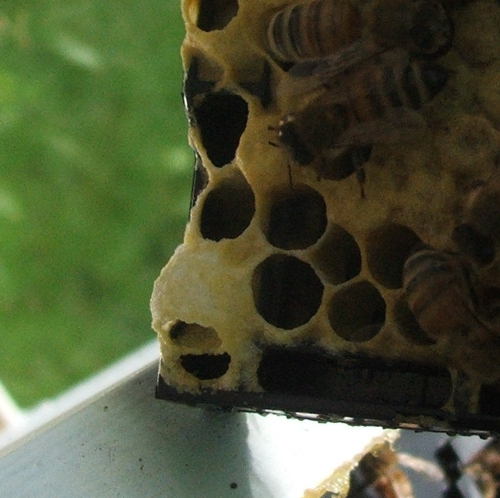
Honey comb is white, brood comb is yellow

I’ve had my bees for 5 weeks, and I’ve done 8 inspections, and yesterday I did a big one. I pulled out frame by frame, looked at each side for several minutes, spotting patterns, looking for mites and queen cups, just standing in awe of all those hardworking, generous creatures going about their business even as I was ripping their home apart. I checked for other insects or mouse droppings in the hive, and removed dead bees, leaves and burr comb. I topped off the sugar syrup in the feeder and checked the Apiguard mite treatment (still needs a couple of days). The queen looked fine, though at some moment the bees were on top of her, 2 to 3 layers deep. I thought: is this balling? But she got out from under them.

A friend who started his hive on the same day, with a package from the same  dealer, has had his second brood box on for a week now. This means that his bees drew out (built out wax comb) across 7 to 8 entire frames. He also noticed a marked explosion of the population.

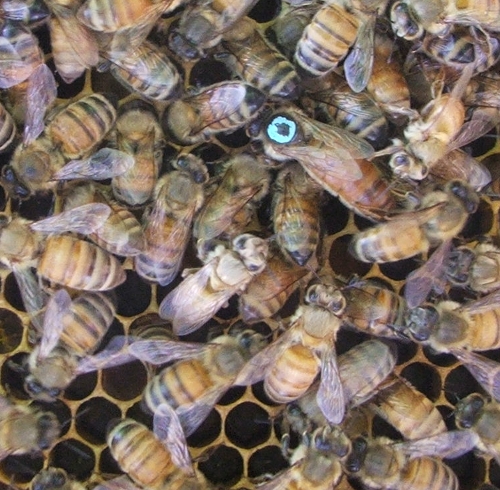
All the signs in my hive have been good: there are good brood/honey/pollen patterns, many frames of brood in all stages (even eggs, so the Apiguard didn’t stop my Queen from laying) and many frames with honey. The picture below shows several ages of bees (a callow is a newly emerged bee: they have more fur), as well as the queen laying an egg in a cell:

Several ages of bees

Still, my bees have still to draw out 1 1/2 frames to warrant the second box. I also found two (I think) queen cups under construction (they’re easy to spot as they face down), which may indicate that the colony is not happy with its queen and is preparing to raise a new one.

Queen cup?

I’m getting a little worried, because they’ll have to draw out 7-8 frames in the second box as well before I can put on a honey super. The honey flow is supposed to be going on right now, so we’re behind. I don’t care if we don’t have honey this year, but I want all the frames drawn out so the next generation doesn’t have to, and the honey supers filled with enough honey so that colony is ready to survive the winter.

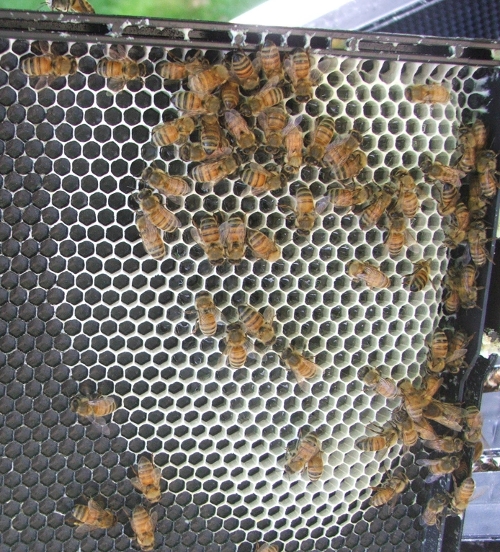
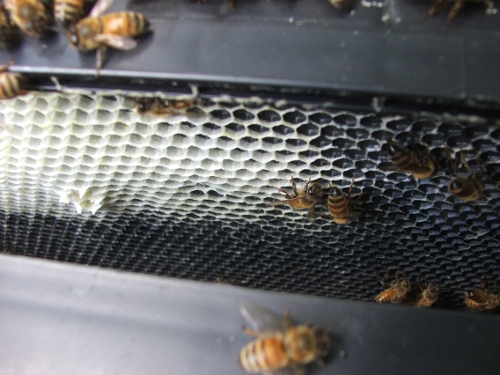
Drawing out comb

Well, in any case, this inspection lasted about 40 minutes. It was a great day: not too hot, though at the end the bees did start fanning inside the hive, getting up a wonderful buzzing sound that signaled that it was time to close up.

One last look

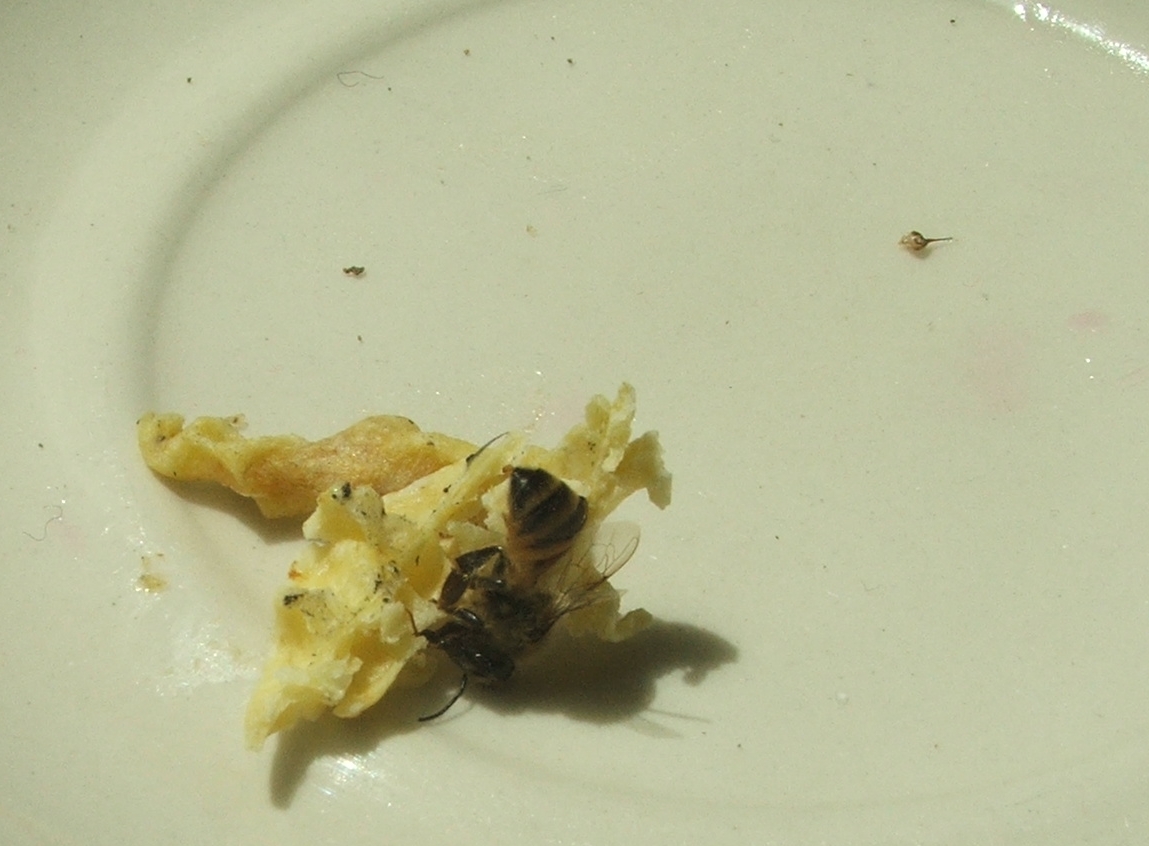
And I got stung for the first time. I don’t want anyone to blame think badly of my super docile bees, so I want to stress that it was totally my own stupid fault. I had scraped off some burr comb with what I thought was a dead bee stuck to it.  Back in the kitchen I picked it up to throw it in the trash and yowzah! Right in my index finger top (left hand, but that’s little comfort since I’m ambidextrous).

The bee and her stinger

I had forgotten how much it hurt. It took me three tried to scraped off the stinger (with my fingernail) and I marveled at the pumping action of that little venom sack. Then I sucked on it and spat out whatever venom. Then I scoured the internet for remedies. I tried calomine (nope), ice (nope) and onion, which really helped against the pain. So I walked around all day rubbing onion between my thumb and finger. I put the event on my facebook and have recevied several alternative remedies, which I will try next time.  We’re exactly 24 hours into the sting and my finger is still swollen, but at least I can type.

Peas

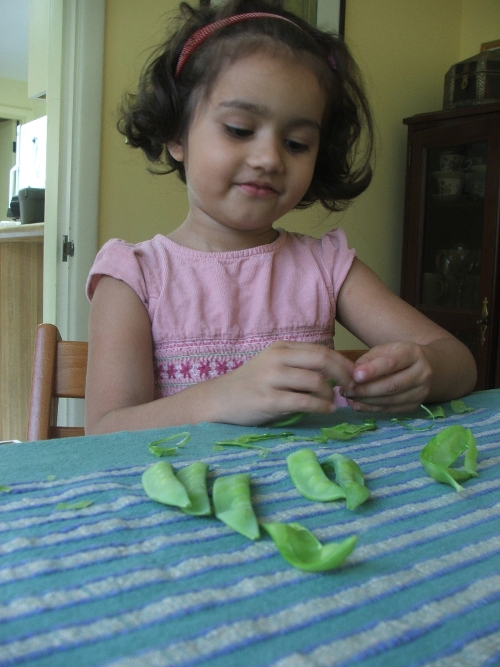
Every day now we have this ritual, Amie and I. We go out to the pea bed. She spots the fattest pods and I pick them – she can’t reach these ones but will be able to pick the next bed that will become ripe. Then we come in with our bounty, sit down at the table, and snack. She loves to break open the pods and go “one for you, one for me”.

My garden is paradise

Mycelium!

I checked the mushroom bed and just under surface there is this:

Mycelium, hopefully the King Stropharia that I sowed in it. There’s a chance it isn’t, of course. The pile of leftover woodchips, which I did not inoculate, looks exactly the same! Time will tell.

Herb Spiral

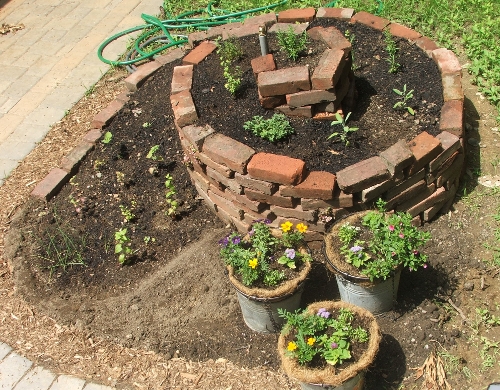
Our herb spiral was a long time in the making. It just kept getting shoved down the list of things to do. But the herb seedlings were languishing in their pots, so I put my foot down and we did it in two days.

We decided to build the wall with bricks from top to bottom (1) because we have so many clay bricks left from our old patio. (2) We’re also  planning to build the base of our earth oven with these bricks, so there will be a visual continuity in our backyard.  And (3) we like neither the look, nor the instability, of just placing a ring of stones around and on top of a mound of soil.

So our spiral involved a lot of lugging of bricks and of a surprising amount of soil, but all in all it only took about 12 man-hours to complete it. And it was good fun: what a great shape to work with!
  • Build it

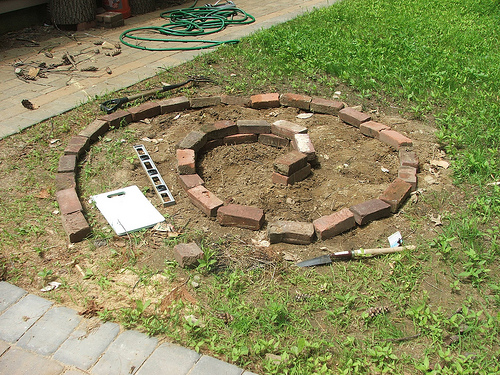
First you lay out the spiral on the ground with one layer of bricks. The spiral can go in either direction, but I guess clockwise with the sun makes most sense (even though ours goes counterclockwise). Count on the inner column reaching at least 3 feet high. You can make it as high as 4 feet, then the slope will be steeper. But keep in mind that the plants will also grow, some over a foot tall.

Make the whole thing not more than 5 feet wide, so you can easily reach the center without having to lean or step anywhere on the spiral. Walk around it to make sure that you can reach all parts for easy harvesting. Bear in mind plantings around the spiral, and plot stepping stones or narrow paths.

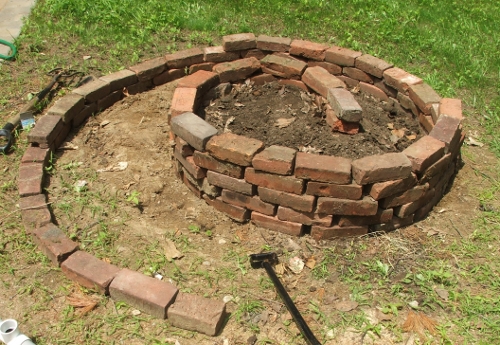
Then start building up the inner column. There’s no need to cement, but make sure the individual bricks don’t wobble. Also, don’t pay attention to the grade yet, just concentrate on the inner column.

When you’ve reached about 2 feet, fill it up with soil. Don’t put your best soil at the bottom. We used the small soil pebbles that we sifted out of our loam for the garden beds: great way to get rid of some junk. Some advise putting gravel or stones at the bottom for better drainage, but we figured this would create a barrier between the “bed” and the land with its nutrients and beneficial soil organisms.
  • Learn from our mistakes

Then curse, because you realize you’ve forgotten to put in the sprinkler (if you’re using one). Break the wall open and dig out the soil where you want the sprinkler system to go. Select from your large store of pvc pipes two pieces about 4 feet long for the horizontal part and one a little over however high you make your spiral for the vertical part, and any broken elbow connector from the trash. Through this assembly thread a short piece of hose (the box stores sell cheap “remnants” 15 feet long). Make sure to get the ends (connectors) right. Bury the system in the soil underneath the spiral.

Put the whole thing back together again and forgive your oversight: it is the cost of your enthusiasm. And that you put the hose in the wrong way, blame that on the hot sun beating down on your brain and the sweat pouring into your eyes. And in any case, they have adapters for that.

As you fill the inner column with soil, fill in the outer path as well, so the brick wall is pressed by the soil on both sides. Carefully tamp down the soil on both sides at the same time, adding to the stability. Once the first layer is done, add the last foot to the inner column.
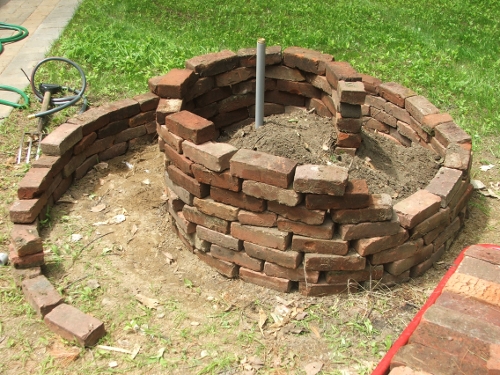
Now grade the slope by adding bricks to the wall and filling the winding path with soil. Use a hammer to gently tap the bricks here and there, moving them if they’re sticking out to much or have been displaced. This way also try to make the wall lean slightly inwards, for better stability.
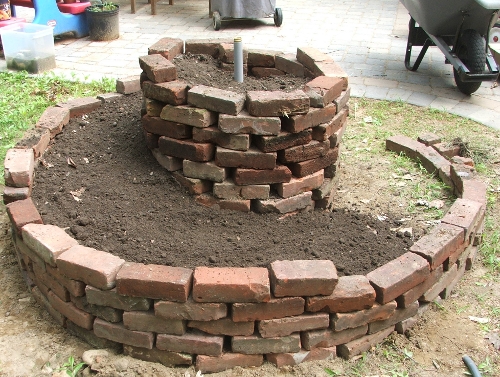
As you can see, a lot of the column will be visible when you’re done. So be sure that you like the look of your building materials. By the time the plantings have reached maturity, it should be lush with green, but some of the bricks will still be visible.

  • Zone it

The whole point of the spiral is to create a variety of microclimates out of many combinations of  wet/dry, cool/warm, sun/shade. This allows for a greater variety of herbs to be planted together, each in their favorite niche. The most important microclimate zones on the spiral are:

(1) The top, where the water begins but where it won’t hang around for very long. It is also always in full sun. So this is the driest part of the spiral.

(2) The slope, where the water runs, can also be dry, but you can adjust the level of water retention by creating small  cups and trenches around you plants so the water can pool. The side of the spiral that is facing North will get the most shade once the plants have grown. (In the beginning, when it’s just seedlings, or seeds, there’s isn’t much shade on a 3 foot high spiral.)

(3) The base, Part I. I divided the base into two parts. Part I is the end of the sloping path, where the runoff water will collect. Thus it is the wettest part. I augmented this aspect by creating a barrier that will keep the moisture in. I buried some bricks right under the surface of the soil.
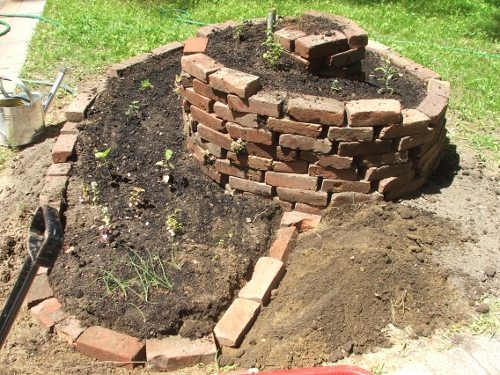
Then I covered them up so the visual of the spiral isn’t ruined. I also created a low retaining wall all around that area.
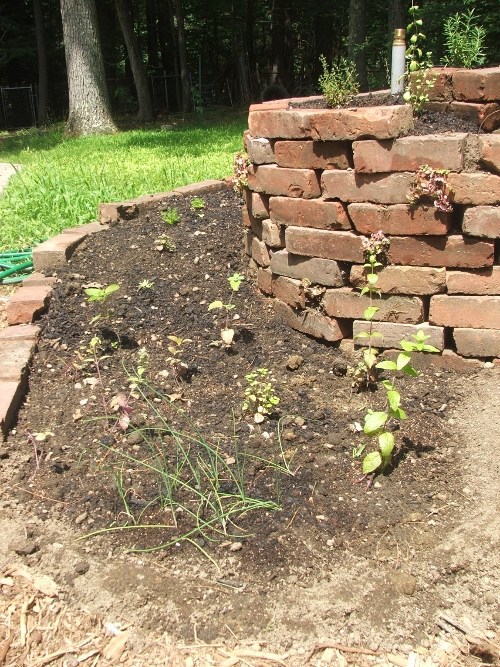
(4) The base, Part II. The part of the base against the clay brick wall is a real hot spot, at the moment. It faces South in our case, and the bricks soak up the sun, warming the soil behind them and radiating heat onto the soil in front of them.

(5) The gaps and cracks between the bricks.

  • Plant it

Now, to match the plants to the zones. Planting the herbs on the spiral first, top to bottom gives you a good idea of how reachable they will be come harvest time, so place your stepping stones strategically. So down the spiral they go:

The drought/heat/sun-loving herbs are: rosemary, thyme, then oregano, sage, , marjoram. You’re already well down the slope. Add chamomile, parsley, cilantro, etc.

In zone (3) put chives, and all the mints (contain the entire bottom area if you’re afraid they’ll take over your spiral). If it gets really wet down there (depends on the soil, the steepness of the slope and the orientation) you can put watercress.

In zone (4), I will put heat-loving basil – which IMHO would be out of place on the spiral because it is an annual and will yearly leave a gap, and because it can grow too tall.

In (5) the cracks, I put pennyroyal, which is a small mint that is not too invasive. It likes it wet, so I’m not sure if this is the best place for them.  So far they’re doing pretty well. We’ll see.

I can’t judge the plantings yet, as they’re all still seedlings. I’ll update as I learn more from my observations as the plants settle in and grow.

  • Conclusion

To me, a herb spiral is the emblem of permaculture design.

(1) It allows more plantings in the same space by cleverly stretching the surface into the third dimension.

(2) It allows for a greater variety of herbs to planted together, each in their favorite niche.

(3) It conserves water: runoff is used over and over again as it goes down the path.

(4) It is aesthetically pleasing, a marvel to the eye, and a story piece  too.

If you have a partner who needs convincing that this is a serious undertaking, I recommend you slip this schematic into their email. The herb spiral was originally conceived by Bill Mollison and was most recently popularized by Toby Hemenway, in his Gaia’s Garden.
(Mostly) All in Pictures Today

Unwanted things:

(1)

(2)

Things hung to dry:

(3)

Things newly trellised:

(4)

(5)

Flowering things:

(6)

(7)

(8)

Things bursting:

(9)

(10)

Take the quiz:

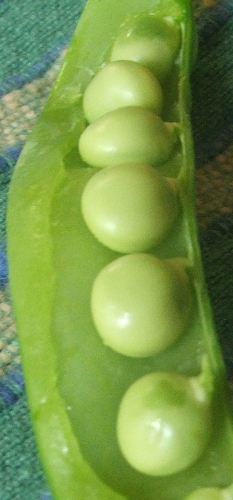
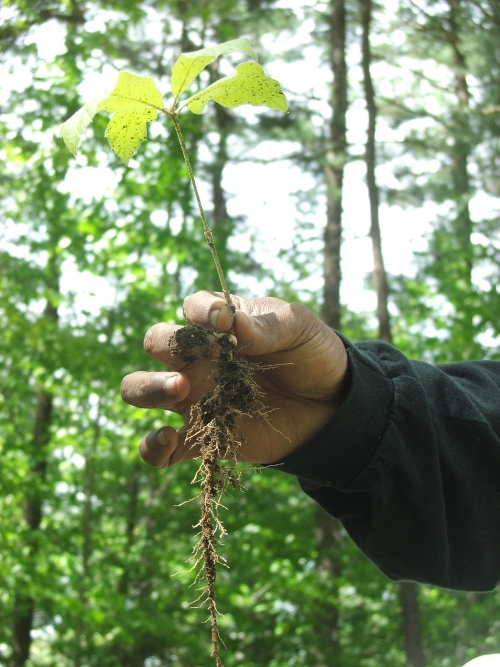
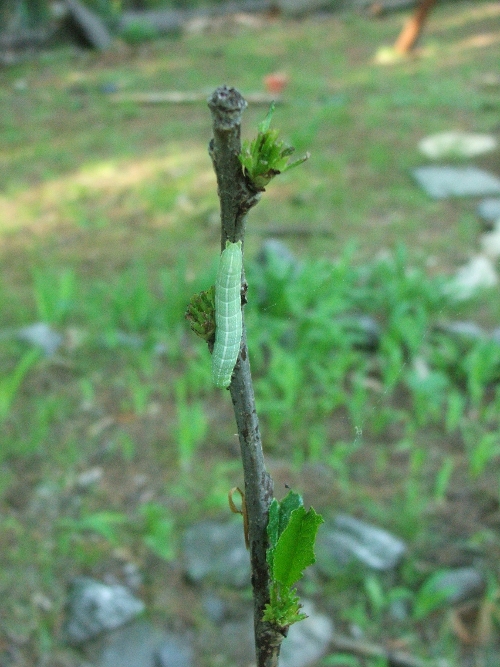
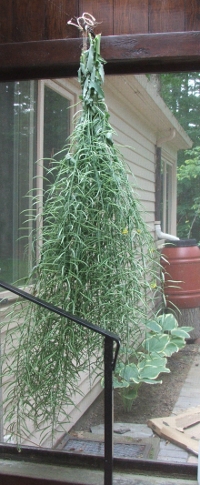
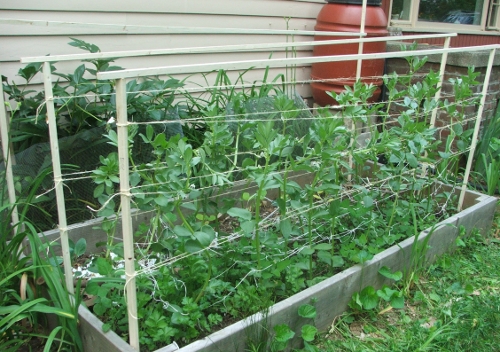
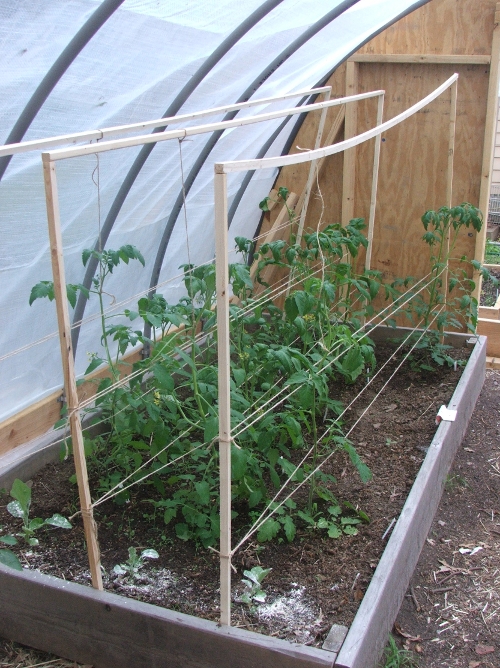
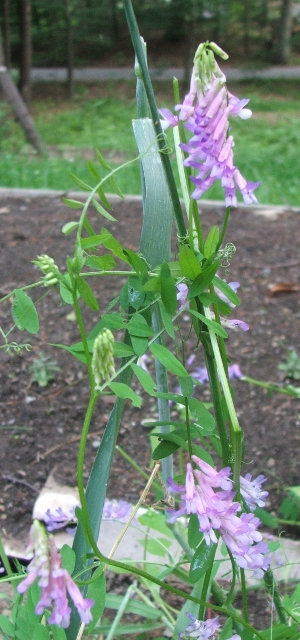
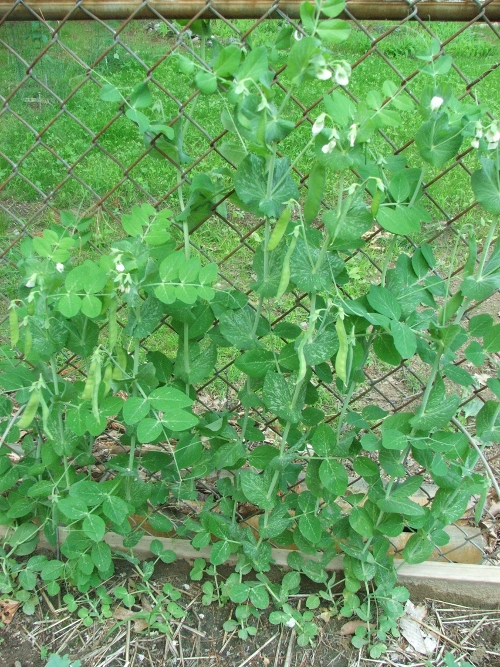
(1) oak seedling (2) caterpillar on cherry tree (3) kale seed pods (4) favas (5) tomatoes in hoop house (6) can’t remember, sowed it under the bird feeder, bachelor’s button cornflower? lupine! (Thanks Barb!) (7) overwintered vetch (8) strawberry (9) peas (10) tomatoes

Harvests of Radish and Lettuce, and More Planting

We’re harvesting enough lettuce thinnings for a large three-person’s-worth every two days. I’m also pulling radishes. Last year I hated these radishes, the Easter Eggs. They were maggot-ridden, tough and bitter. This year they are sweet and crisp and perfect. I am also about to pick the first peas.

I direct-seeded more lettuce and radish. I also filled in the gaps in the carrot bed. The Scarlet Nantes germinated well but the Atomic Red and especially the Tonda di Parigi proved spotty. No matter, I was planning on succession sowing carrots anyway, only in a more spatially orderly fashion.

Something ate all the lima beans that I had sowed inside the hoop house. The first leaves were chewed up all the way to the stem as soon as they emerged. I’m thinking it’s a bug and I’m thinking diatomaceous earth. I had better act soon because it moved on to my outside bean beds.

After pulling the chewed-up limas I now have an entire bed open in the hoop house. I can’t put the Solanaceae in since that bed had blighted potatoes in it last year.  But I’m thinking lots and lots of pesto basil. And some okra, to see if I can grow it.

I also pulled everything in the bolted kale bed. That kale eventually grew above all our heads, to 9 feet high. I pulled it because it started wilting and kept one plant to hang to dry in the porch, so I can harvest the fat seedpods. That bed also had lots of chard in it, but the seedlings, so carefully nurtured under the grow lights, just turned brown and withered. Then I noticed the ants. Ants usually don’t harm plants, but there are so many of them, they disrupted the soil too much: it is one ant heap. I’m thinking diatomaceous earth again. Then new chard seedlings, which I sowed in flats on my porch.

The strawberries are still tiny, but they have flowers. And the asparagus fern is shooting up very prettily.

These days it takes me an hour to water the entire garden (minus the berry bushes, the strawberries and the lavender and wormwood beds that I planted last week), but at the moment we’re having thunderstorms. I need to patrol my rain barrels because the fat pollen that gets washed down keeps clogging up the meshes that cover the holes in the top.

Mite Count Misadventures and Hive Inspection

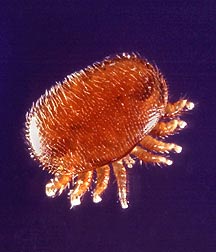
Honey bees suffer terribly from varroa mites: parasites that feed off adult bee bodies and even invade their cocoon to feed on them.

There’s plenty of other pests and viruses and whatnot out there trying to get the bees, but the varroa mite is the first to pay attention to. It’s also almost guaranteed to be in your hive. That’s why they say you can’t eradicate it, you can only manage it: keep its numbers down.

That’s why beekeepers do mite counts. There are several methods for doing such a count, one of which is the powdered sugar roll. This one appealed to me most because (1) it gives a pretty reliable result, (2) it doesn’t kill the bees that you do the test on and (3) I had all the necessary tools and ingredients handy.

I found this powerpoint slideshow on the net. It made it seem pretty simple.  The first step is to find a frame with lots of worker bees on it: a frame with open (uncapped) brood. Then you shake the bees off this frame into a bucket, from which you can then scoop half a cup (about 300 bees) into a mason jar with a mesh screw cap. It’s best to collect workers from 3 frames. Through the mesh you push 2 teaspoons of powdered sugar. Then you shake the jar to coat the bees with the sugar, during which process whatever mites are there are dislodged from their bodies. Then you you shake the sugar and mites out onto a white sheet or bowl, and count the mites. You return the shaken but still living bees to the hive. Et voila.

Well, let me tell you, it wasn’t that simple!

The bees were hard to shake off the frame, and boy did they get MAD. The moment they hit the bucket, the whole hive rose up in anger. I forged ahead, bees swarming all around me. There were still bees on the frame, so I returned it to its place in the hive.  By the time I had done that – as quickly as I could – most bees had flown out of the bucket. I shook down those still in it, so they balled up at the bottom, but then scooping up half a cup wasn’t so easy either, and all in all I got less than 2/8 cup into my mason jar.

Then I thought, well, I’ve gone through this much trouble, and the hive is in turmoil anyway, and they anyway recommend collecting bees from more than 1 frame, let’s shake another frame. This was even more difficult. The bees were all over me. And opening the mason jar again to add the new scoop allowed bees already in it to get out. Altogether I had gathered only 3/8 cup, perhaps even less.

Calm was quickly returning to the hive, and I didn’t have the nerve to do it again, so I aborted the attempt. I released the captured bees and had no trouble closing up the hive again. And I didn’t get stung, which is miraculous I should say. I just prayed I hadn’t enervated the bees into “balling” the queen (a theory is that they get so protective of her that they hug her to death). And I hoped that all those bees that I shook all over the place onto the ground and into the grass would find their way back.

This happened yesterday morning and I felt really bad about it the whole day and throughout the night. I guess this was one to learn the hard way. Next time I attempt it, I hope to have an extra pair of hands helping me, preferably the hands of an experience beekeeper. In the meantime I will buy some sticky board and mite screen, to do easier counts.

~

I felt much better after I did a normal hive inspection  this morning. It was good to get right back on the horse, and to see that the bees bore me no grudge. A hive inspection calms me, as all my movements are slow and flowing, and it feels like a meditation. I am so concentrated on the bees, I forget everything else around me. I hope the pure wonder of it will not go away as I get more experienced.

And the bees are so docile. They were going about their business as if nothing had happened. The queen was alive and well, the patterns of brood, honey and pollen beautiful. Some of the caps on the brood (brood caps are yellow,  honey caps are white wax) had been broken open, which means the first new bees must have hatched, but I have yet to see a major jump in population. There were still two frames that were entirely empty of comb: I moved one of those closer to the where the activity is. Once they’ve drawn out 7-8 frames I can add the second brood box.

I also added 1/2 gallon of homemade syrup (1 part sugar, 1 part water by volume). What was not nice was scooping all the drowned bees out of the frame feeder. Note to self: add a small teaspoon to my hive kit.

As for the mites, I decided to start mite treatment anyway. I use a natural product called Apiguard, which is a thymol fumigator that will also help against tracheal mite and chalkbrood. Usually two treatments of Apiguard are used in the Fall, but my bee teacher uses one in the Spring and one in the Fall. I am following his advice.

Rain

The rain came, in a thunderstorm at night. It has cooled everything down a fair bit and saves me from having to water the garden this morning, for which I am thankful. But it barely half filled four of the five  (food-grade) barrels (the second barrel in the line up on our most capacious downspout remains empty, because the first one in the line needs to fill up to overflow into it). Let’s see how long it lasts.

The bean beds (three of them) are looking neat. When Amie looked out the bedroom window she said: “The beans have finally squished out!”  And isn’t that exactly what beans seem to do?

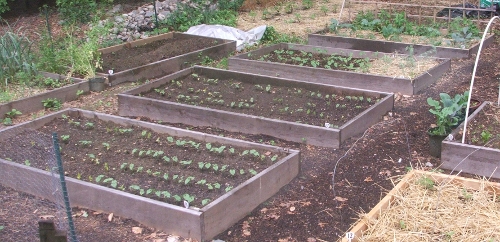
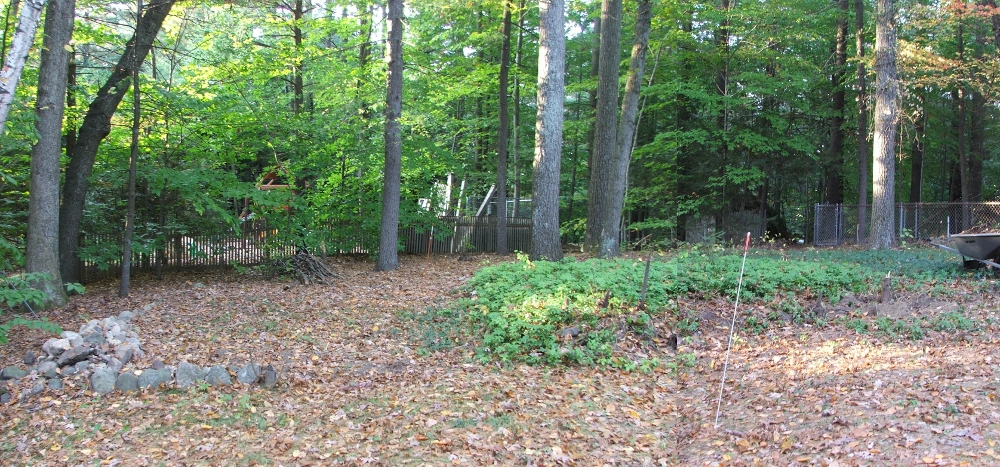
Here are some pictures, for your comparison.

This is what the veg garden looked when we moved in (summer 2008): leaves, stones, rusted pipes and fencing, lots of broken glass, poison ivy and pachysandra.

This is March 2009, when we had barely made a dent in the above jungle, but I love this picture so much:

I wish I had a picture of the peak of last summer – our first summer gardening. I’ll look around for some shots to cobble together. But this now is today:

I made a mistake in my calculations of the square footage of the garden yesterday. It’s not 650 sq.f. but 930 sq.f.  of beds (which includes the terraced beds and some herb beds by the side of the house, but not the as yet untouched lower front garden or the area with the berry bushes and hazels in back).

As you can see, the hoop house has its new poly cover. The plastic arrived yesterday and we installed it in the evening.  After pulling off the old plastic and putting on the new one DH and I were covered from head to toe with pollen. The stuff coated everything, until the rain washed it away. Something else to be thankful for.