The Earth Oven series:
- foundation
- base
- hearth
- thermal mass
- first drying fire and door arch
- insulating layer and chimney
- Patching up, and first pizza!
Wow, third blog post today! Be sure to scroll down!
Today we finished Phase 2 of the Earth Oven works, the Base. (Yes, we had a busy day today.) For Phase 1, the Foundation, read here.
We thought about building a circular brick wall with an opening in front and leaving it empty inside, so we could store wood there, but the issue was then what to top it with for the oven to rest on. The only thing we could think of that would hold the weight were the 4×4 pressure-treated landscape timbers that we could place side by side and cut to size and shape. But we didn’t like introducing the chemicals they treat those with, or the wood itself, as wood absorbs a lot of moisture. Again, you want to avoid moisture  because it expands when it freezes, thus moving the base and cracking the oven. So we decided to build the brick wall – having heaps of old bricks which used to make up our old patio – and filling that with more urbanite.
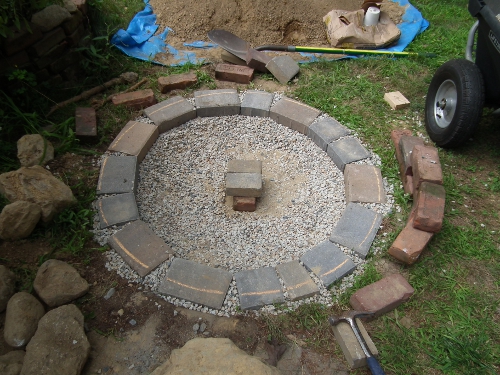
I had never put down brick before, but as DH was travelling it was up to me. (Not that he had laid brick before either.) I put down six rows in two days. On the first day I discovered it’s a lot easier and a lot more fun to work the mortar with your hands, not that clumsy trowel. At the end of that day I also discovered there’s a reason why masons don’t use their hands. By the time I became aware that the sharp sand particles had scratched up and even invaded my finger tips, it was too late. Ouch. On the second day I donned nitrile gloves, which afforded good enough protection and still allowed my more tactile approach.
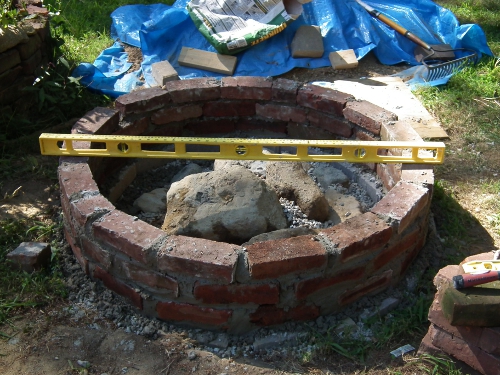
We filled up those six rows with more “urbanite” from a big pile of rocks and stones we dumped at the edge of the property five years ago, when we dug out the veg garden. Who knew that would come in handy some day! Then we added another three rows of brick yesterday, and another two today to reach a recommended, comfortable height of 36″ at which to have the hearth – so as not to have to bend over when filling with firewood or pizzas.
We thoroughly tamped down the fill so that it won’t move. Here’s me putting all my weight to/on it, the queen of the castle ordering:Â There is to be no moving!Â

Here’s DH and the finished base: 11 rows of bricks, tons of urbanite. Tomorrow we add Phase 3, the Hearth.

Leave a comment