Hiving the Bees

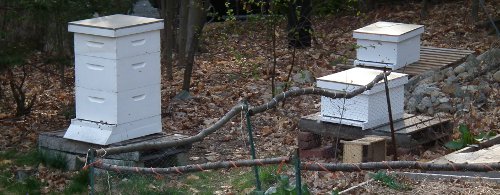
It was 90 F today. April 16 and 90 degrees! Poor Boston Marathon runners.  Poor spinach seedlings. Poor beekeeper in her hot bee suit. The bees didn’t seem to mind it much, probably because until Saturday they were in Georgia, where they were bred.  I shook two packages. So glad I got it all done (assembling the frames, building the hive boxes, and some last minute painting). Now there are three:

DH took footage of the hiving (almost) from beginning to end:

http://www.youtube.com/watch?v=-TL2onh8uMI

Building a Hive (ii): Building the Hive Bodies

After the frames, the boxes. The priority is two hive stands and four deeps, two for each of the new colonies and one for a swarm box. The four mediums as honey supers, and one shallow that I want to experiment with will be for later. I still had two bottom boards, among which is one full one which I need to transform into a screened one, and already picked up two assembled telescoping outer covers and two inner covers for a song.

We cut the wood to size  the other day, following this pdf.

You can’t use 1 x 10s for deeps, which are standardized at 9 5/8″  to fit frames that are 9 1/4″ (leaving the “bee space” in between frames). 1 x 10 are not true, not 10 inches wide. I found on the net that when the Langstroth hive was standardized, a 1 x 10  also wasn’t true: it was 9 5/8″ wide, so that’s what the beekeepers and supply manufacturers took as the size for a deep and a deep frame. Since then, 1 x 10s have shrunk some more, down to only 9 1/4″ wide. So you have to use a 1 x 12 to fit in a deep and cut of a bit. You can get one box out of an eight footer. Same for the mediums and shallows: you have to use a 1 x 8″ . The wood we cut off won’t be wasted, really, because we can use it for rim boards.

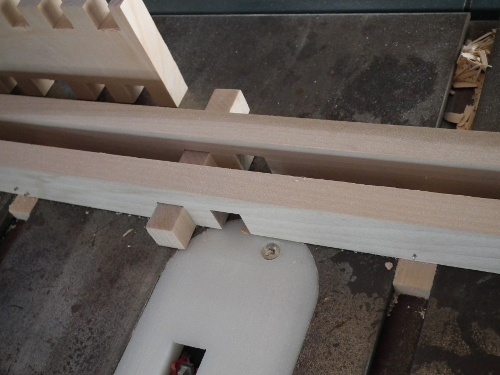
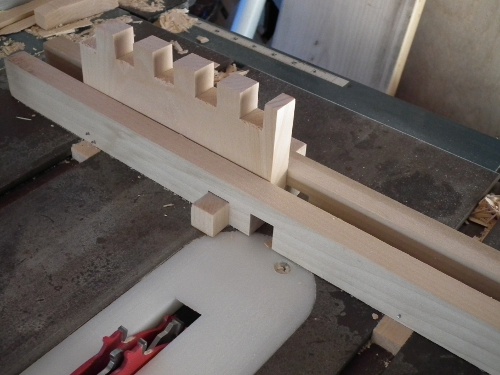
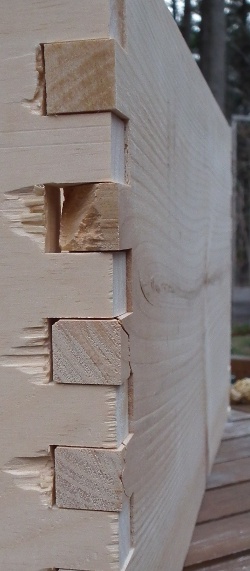
We routered the rabbets on the short sides that the frames will rest on. Then it was time to cut the box joints, which we did with a dado, a combination of blades on the table saw. Our first jig made the joints too  tight, making the wood split when we knocked it together.  We built a good one.

We  even waxed the sliders that fit into the grooves in our table saw with beeswax. Worked like a charm!

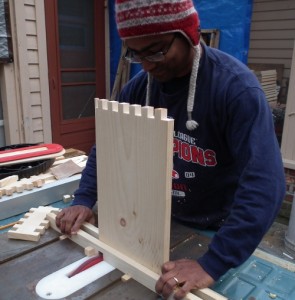
Here’s DH working the jig. He’s so good to help his wife with her slightly out of the ordinary projects!

Oh, did I tell you, that this would be a LOT more work without a router and a table saw? And a dado set?

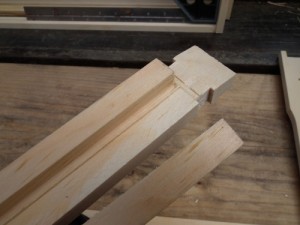
The pine was giving us some trouble. Some of the planks are bowed, making the fit less than perfect (but the bees will propolyze any gaps). The wood also split on us, like in the picture above. I’ll fix it with glue. It’s just one notch, so it won’t harm the overall strength of the joint.

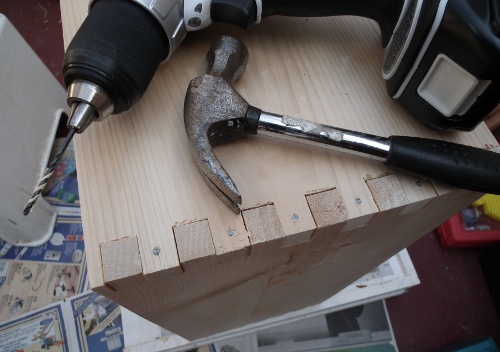
The frames fits. The box is square. Time to glue the corners together with a bit of Elmer’s exterior wood glue, then to immediately pre-drill a couple of the pins and hammer in the  1 1/2″ 6d galvanized nails so that the corners won’t shift as the glue dries. Then I pre-drilled and hammered  in each pin.

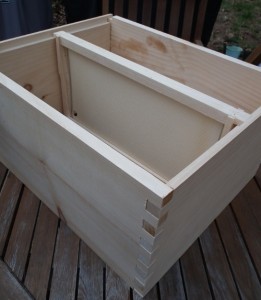
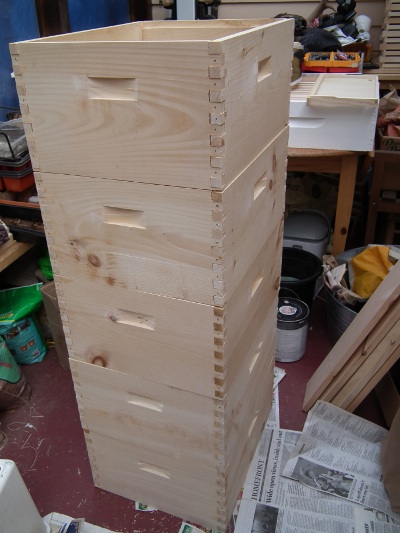
 Here’s the end result of a couple of days work (which could all have been done in one, long day), ready for some paint:

Check out how much it cost to build this and a comparison with a hive kit here.

New Pots, and Clay Creations by Amie

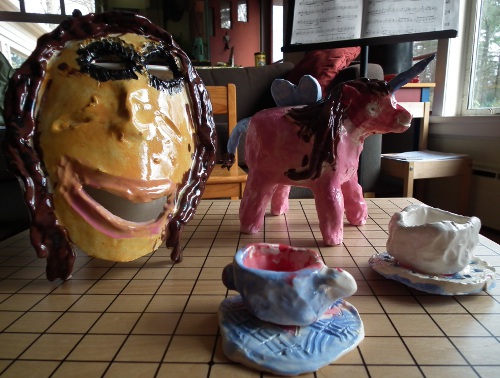
Last session Amie also took classes with my fabulous pottery teacher, Lisa Dolliver. These are some of the pieces she made:

The unicorn is a piggy bank. At the moment it has a clay blue heart sitting in its slot. Aren’t they lovely?

That, by the way, is a Go board: DH and Amie are learning the game together. Amie has quite the knack for it, and loves it. The read the book and play at least two games every night.

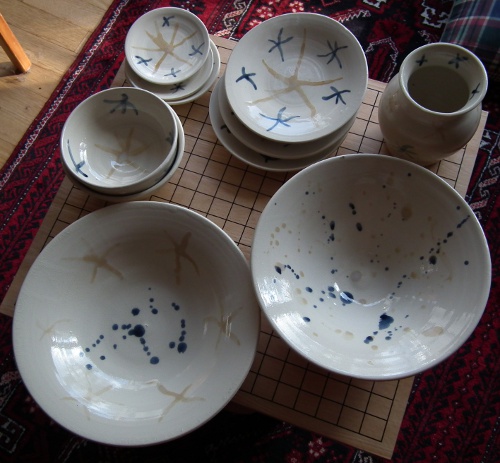
These are my pots.

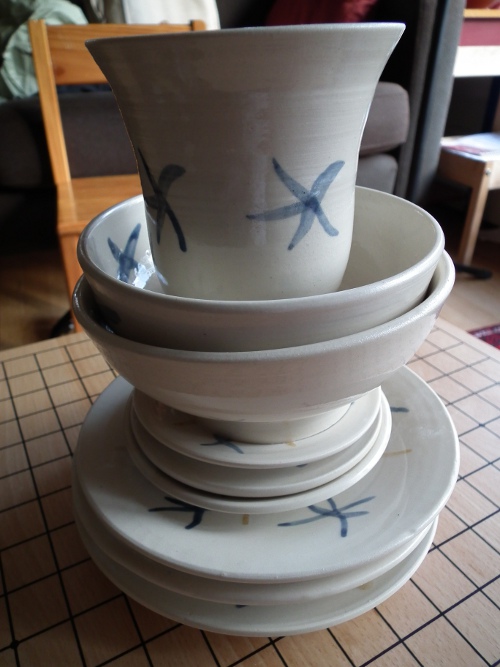
I was very productive: three small plates, three medium ones, one vase, two soup bowls, one tumbler (pic below), and two large bowls, the largest pieces I’ve ever thrown, but I needed help from Lisa to do it. As you can see if you compare with previous sessions, I’ve found a pattern in the glazing. The idea is to make a dinner set. Also to take the pressure off me when glazing – I don’t like glazing much.

They stack up!

Reversing Brood Boxes on the Dandelion

After planting hundreds of fava beans, peas and trellises, and transplanting chard, lettuce and spinach, I looked at that hive, saw the bees hard at work, and knew it was now or never to go deep into the hive to see if I needed to do a brood box reversal.

First I took off the outer cover, then the  and inner cover (with the rim board firmly propolized to it). Then I lifted the top brood box off  and set it aside. They get heavy, those deeps filled to the brim with bees, comb and honey!

I pulled two central frames from the equally busy bottom box and ascertained that it had only food in it, mostly pollen. No grubs, no eggs.  That meant the nest was all in the top box. This, according to many, is an precondition to swarming: the nest moves upward and if it finds there is no more space up there, they might leave (half of the colony leaves with the queen). I would not like a swarm! I’d want to catch it and keep it, of course, but there is no guarantee whether I would be able to.

I had supered the hive – put a honey super on top  – but the bees have only just started drawing out the comb on those frames. I also don’t want the queen in the super, which is supposed to be a honey super, not a third brood box. So I decided right then and there to reverse the two brood boxes. I had read on the forums that the best time to do this is “on the dandelion”. I looked around at the many fat dandelions in my yard and took that as a confirmation.

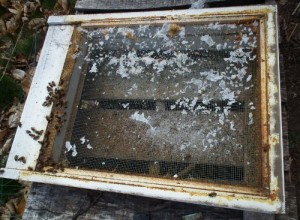
I was pretty curious about the bottom board. Last year when I lifted off the brood boxes it was carpeted with an inch of dead bees.  Not so this time:

Not one dead bee. The white stuff is the wax paper my sugar slabs were served on. It had disappeared, and there it was, shredded. Did the bees harvest the wax off of it?

By now the ladies were pretty excited. Obviously. Foragers were returning to a hive that was cut up into many parts, all spread about, and there was light everywhere (bees like it dark in their house), and the wind was either chilling them or the sunshine was overheating them. The bees were all over me, taking a special liking to my gloves. I have never been stung through those calfskin gloves, and I didn’t want this to be the first time, just when I was handling a 60 lbs deep full of already agitated bees. So, no dwindling, no camera work – better get on with it!

Switch boxes, quick check for swarm cells (queen cells that will be at the bottom of the frames), then add super, rim board with inner cover, outer cover. Done! Walk away.

Reversing brood boxes is a pretty stressful action for the colony. Imagine someone comes to your house and reverses first and second floor! Some beekeepers won’t do it, as it’s unnatural, but others do it as part of swarm prevention. I did it last year but the situation was very different then (there was no action, no food, no bees, no nothing in the bottom box). Still, this colony is so strong, they’ll handle it. If not, they’ll swarm…

It’s one big puzzle of which I don’t have half the pieces. But the uncertainty and surprises are part of the fun.

Building a Hive (i): Assembling the Frames

Last week some of our BEElieve group met at the house of A., who was the first to pick up his bee package (that morning). The package looked very robust, with very few dead bees at the bottom. We went out to admire the setting of the hive, then A. hived the bees as I talked him through it. Seeing someone shake those 10.000 bees into the box is incredibly empowering. All went well and the bees seemed happy in their new home. A couple of days later it turned out the queen had been released and was moving about the hive, which means the colony accepted her.

Most BEElievers, myself included, will pick up our bees on April 16. On that day we’ll go from one home to the next, hiving.

I am adding two more hives to my apiary, bringing the total up to three. I ordered two packages ($100 each), then tallied up how much it would cost to house them. Well, whew! Forget about ordering the hive parts online: the shipping kills the deal (which is as it should be, of course). But even buying the hives locally came with too steep a bill. So I decided to buy the frames and foundation, unassembled, locally, and to assemble them myself, and to build the rest of the hive bodies myself (I should say, ourselves, since this requires major help from DH).

A friend who was being funny (you know who you are!) suggested we have a beehive building barnraising (tongue twister), using a human-powered staple gun, nails and hammers. Think of what a grand story that would make! The self-sacrifice, the endurance, the courage and solidarity, the hand cramps! I said I understand the power of stories and the importance of setting up occasions for them, but this ain’t one of them! Just consider the assembling of the frames, the one hundred and ten (110) frames, to be exact. Ten brads each.

That requires…. coffee, especially so early on Easter Sunday morning.
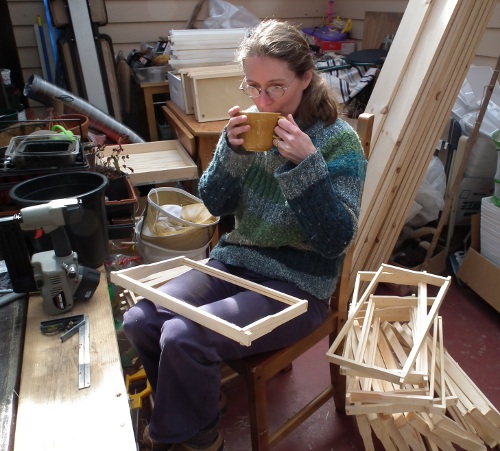
The beekeeper at her “desk”

So, first up, the frames. Unassembled frames come in five pieces: top bar, bottom bar, two sidebars, and foundation. It first looks like this:
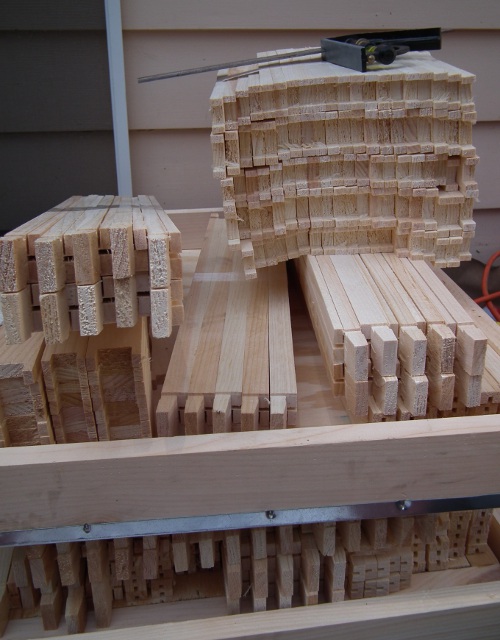
Straight from the beekeepers supply store

A little while later it looks like this:
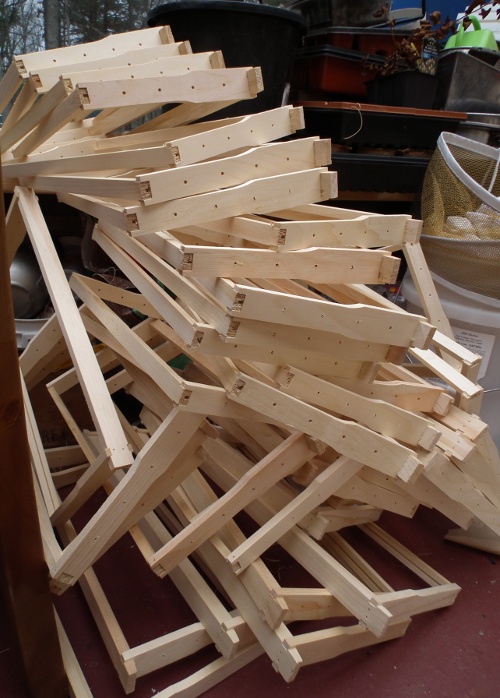
Frames without foundation

And then, eventually, likes this:
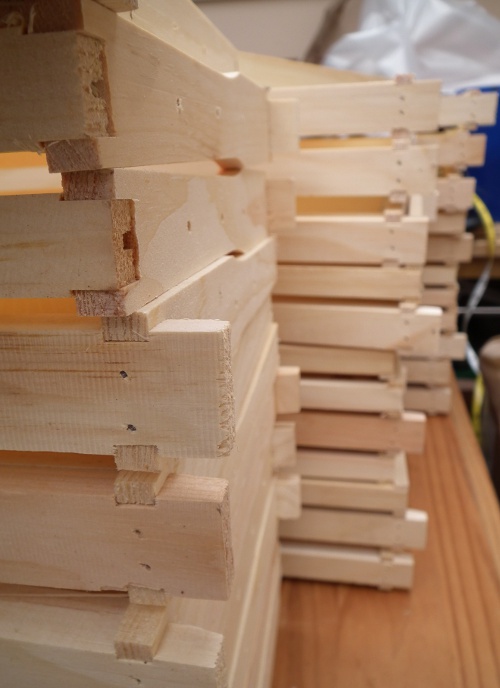
Frames with foundation, all ready to go

{What follows is a technical, detailed explanation about how these frames are put together.}

I bought frames with wedge top bars and grooved bottom bars, and my foundation is Duragilt, a very thin sheet of plastic entirely coated with clean bees wax that is stamped in the shape of cells, with a strip of metal on each side for strength.

Not finding a pneumatic or electric staple gun, I turned to our finishing nailgun: it’s pretty heavy and overkill, but it can handle the brads I needed, which  are 5/8″. The 1/2″ ones proved to be too long: when shot into the topbar at the installation of the foundation, they emerged on the other side, on the top of the top bar, a place where you want to be able to scrape without meeting sharp metal points.

Step One. Snap the wedge piece off the top bar and put it aside:
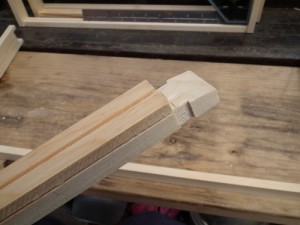
Step two. Assemble all the pieces and fit them together, tapping them snug with a hammer:
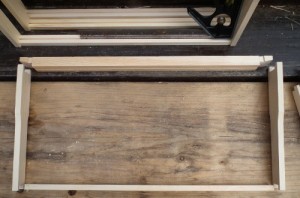
Step three. Nail the top bar into the side bars (two brads each I was told is sufficient). I used the square (see in the background)  to make sure the frames was squared. With well-milled pieces that fit together snugly, it shouldn’t be a problem:
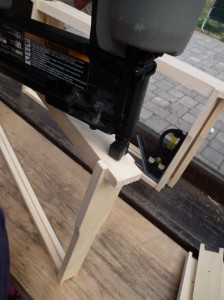
Step four. Nail the sidebars into the grooved bottom bar (one brad into each of the four corners). Again use a square:
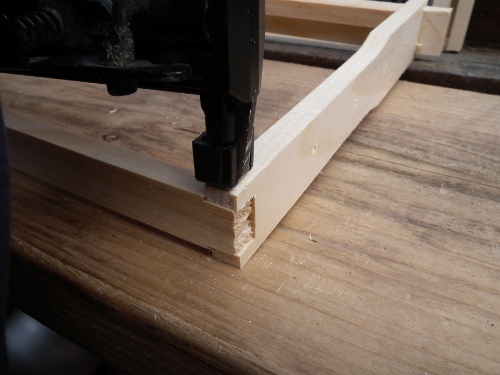
Repeat 110 times. I did this factory-wise: the same brads in the same place 110 times, then flip it over, next nails, etc. Gets boring but it’s more efficient and faster.

Step five. Install the foundation by first slipping it into the grooved bottom bar (make sure the communication holes are at the bottom):
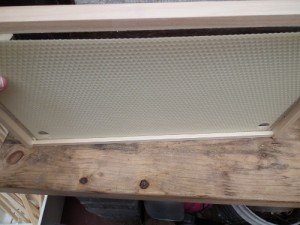
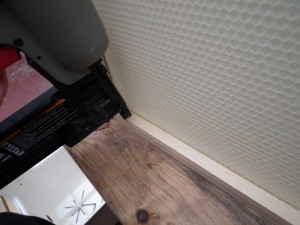
Step six. Lay the piece against the top bar and fit in the wedge piece that was snapped off earlier. This piece now keeps the foundation in place. Nail that in (three brads, this is where you need the 3/8″ brads – 1/2″ will poke through up and out of the top bar):
Done.
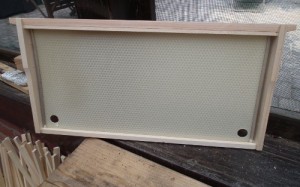
Next!

We also managed to cut all the boards for the hive bodies to size, and routered the ledges that frames will rest on. But then we lost time figuring out a box joint jig. With the first jig the joints  came out too  tight and the wood split on us. Not something you want happening to a box fill of bees! So we had to adjust the jig. Here’s DH pondering the puzzle:
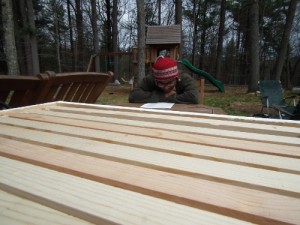
By the time we had a new one built, it was dark, and as we do the big woodworking on the patio, we had to pack up will have to wait till tomorrow to get started on joining those boxes. That will be for my next blog post.

Also check out how much it cost to build this and a comparison with a hive kit here.


Colony 1 and a Beautiful, Strange Bee

This has been some bee season already. Last year I was still mourning the imminent death of my colony (though it didn’t happen). This season we are, according to a local hive inspector, already in the month of May.

Yesterday, finding it suddenly quite warm and seeing all the bees hanging out “on the porch” (the landing board – a good indication that it’s a comfortable temperature for them for a hive opening), I decided to have a quick peek at how they’re doing with the second slab of sugar fondant. I found that the bees had drawn out comb all over in the empty space created by the spacer rim (for the sugar slab) and that they were filling it with honey! Already!

So I decided to add on a honey super. Why not? Maybe they’ll finally draw them out and fill them this year.
This entailed clearing away all that extra comb, of course, honey included (yum!) and the bees pretty much let me, which tells me they’re not stressed at all. After robbing the wax, I put the super on top, then the spacer rim with the sugar, shook all the bees still on the stolen comb off into the hive, and closed up.
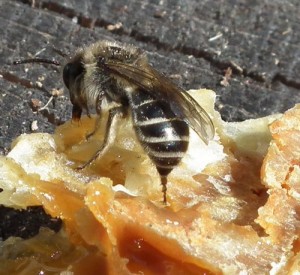
When I was taking the comb out of the container I found one lone bee. She was so delicate,  so strange. Look at that sleekness, that stinger. I also I took a video of her.
Then I sent this to my entomologist friend and bee-sleep specialist, Barrett Klein. He almost immediately put me straight: “That not a honey bee, that’s a leafcutter bee!”
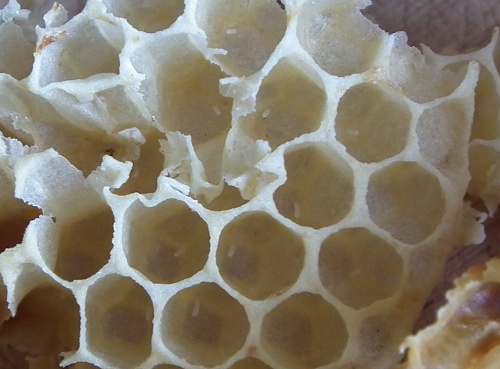
A closer look at the comb revealed eggs.

Some cells (not pictured here)  have two, even three eggs in them, which might be an indication of a laying worker or a failing queen – good queens lay eggs methodically, one per cell. But last year in the beginning I also observed this, and then I found the queen anyway and all turned out to be fine, so I’m not worried. What did worry me was the fact that the eggs were in comb up in the spacer rim on top of the two nest boxes, so the colony is expanding its nest upwards.  I don’t want grubs in my honey supers, so I’ll have to go in again and reverse the next boxes. Possibly there is no nest in the bottom box.
Also, FYI:

Fun Designing

This for the bees. I’m going to make my own hive bodies (boxes, bottom board, inner and outer covers). I’ll buy the frames and foundation.

This for the water catchment, on Craiglist, for $100. Just need to borrow someone’s truck to pick up two of them.

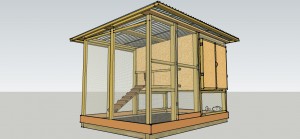
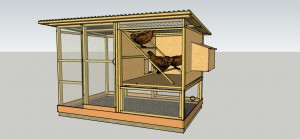
But the majority of fun is being had with this – with Google Sketchup. The footprint is 8’x6′ for four chickens. The plank comes off the floor because I plan to do Deep Litter Bedding and honestly I couldn’t make it come down in the program.


Resilience Gardening: Water and Animals

The last couple of days I’ve been in the garden. Mostly I’ve been cleaning up. I do most of my Fall cleanup in Spring, so that the fallen leaves can replenish and blanket the soil during Winter.  Soon I’ll put the leaf shredder to the humongous leaf piles.  That shredded stuff is great for the compost bins.

Speaking of which, I also dug out an entire bin (4x4x4′) of wonderful compost, which I spread around the garden. I also dug out a compost pile more or less the same size, which unfortunately has many weed seeds in it (going by how “green” it was last year!). That stuff I put on the more depleted beds, adding a thick layer of rotted cardboard on top and then a layer of straw as mulch. I’ll transplant into these beds straight through the straw and cardboard. I moved the slimy, anaerobic  Winter “compost” out of the Earth machines into the open bins – no unwanted critter will touch that stuff – turning it and mixing it with shredded leaves. The compost situation is looking good, though not optimal. I need more, and I’ve a couple of plans on the drawing board to make that happen…

All the plants that are in the ground – garlic, perennials, herbs, berry bushes, cherry, fig and paw paw trees received a good dose of compost: I pull away the straw, spread the goodies, then tuck the straw back around. Leaving the compost uncovered would be a waste, because the sun destroys the nutrients, and the worms won’t come up into it because they’ll dry out if it’s sunny or windy, or get pelted if it’s rainy.

Mainly, as I potter around the garden, I plan. If you recall, my garden can be divided in parts: 1. veg garden (all veg), 2. front (on top of hill, mostly herbs at the moment), 3. slope (strawberries), 4. the “pit” (this was and is still the plan), 5. the backyard, 6. the “utilitarian area” (“the area” for short). The idea over the Winter was to weed the pit and re-terrace the slope, remediate the soil with lots of compost and sheet mulch, then plant perennials  into it.  We also planned to re-terrace the front and to add two huge vegetable/herb/perennial beds and dwarf fruit trees. I’ve slowly backed away from that plan, and it has to do with the weather and animals.


“Heat Dome” on 8 a.m. March 22 (c) Wright Weather-top, University of Washington

We’re going through a “heat wave” here, not just some seriously messed up weather, but seriously messed up climate.

Everyone’s happy, of course.  So happy. They love this heat wave. My neighbors comment that I too must be happy as a clam, because they know I love gardening and see me out there, getting lots done.

In reality I am thoroughly shaken and freaked out, thinking what if we have this heat wave in Summer? 

So I decided we should consolidate what we have first:

  1. improve the compost situation, seriously improve on our soil building.
  2. optimize the hoop house.
  3. enrich the vegetable beds and get the food production up to snuff.
  4. strengthen the perennials, the medicinals and berries especially.
  5. put irrigation in, because I don’t want to kill myself lugging water buckets in the heat.
  6. and, IMPORTANT, adding two 275 gallon toters to our rain water catchment system, bringing our rain water capacity up to 900 gallons.

Also, strengthen the animal side of our operation:

  1. I ordered two more packages (colonies) of bees (pickup on April 16).
  2. I’m all set to order chicks (pickup on April 17).
  3. I’m also going to start breeding worms for real in the paths in my vegetable  garden.
Stay tuned!


Amie (6) Talks about Divine Punishment

The other night Amie didn’t want me to turn off the light in her room. She usually has no problem falling asleep without it, so I asked why.

– Because I don’t feel secure.

She used that word, “secure.” I asked what makes her feel insecure.

– The evil spirits.

– Evil spirits?

– Yes, the evil spirits that God sends when he is angry with someone.

Okay, it took me a few seconds to get my bearings.

– Why would God be angry with you?

– No one knows, Mama! No one knows the reasons God has!

I asked where she got this idea and she said an equally six-year-old friend of hers had assured her of this.  I said that I think that if there is a God, then that God has good reasons for everything he does, and that part of a reason being a good reason is that it is clear why it’s the reason. And even if she feels that she has done something very horrible that a God would feel needs punishing, then, anyway, I doubt that God sends evil spirits at all.

She assured me she hadn’t done anything really horrible. Still, she wanted the light on.

We are Universalist Unitarians. Or at least I am, and Amie goes to our Sunday School, but she is six so she’s not anything yet, and DH is an agnost. I understand she has some concept of God because we’ve talked about him/her/it before, she hears about God in Sunday School and from friends. That’s just fine. But this business of seemingly arbitrary or unfathomable punishment upset me a lot, or was it that she thought it was plausible? When DH and I make or enforce a rule, we always discuss with her the reasons for the rule. We’re big on rationality and reasonableness. I understand that we’re not the only influences in her life but this one, let me tell you, threw me for a loop alright!

Stay Positive

Insight of the day:

In this work you have to stay positive. Nothing is to be gained from becoming downhearted and negative. Nothing, not even your own personal satisfaction. And notice that I said “positive”. Not “hopeful”: that’s another thing.

More on this later!