Weird Comb and the Bee Space

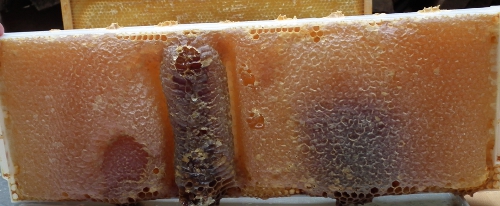
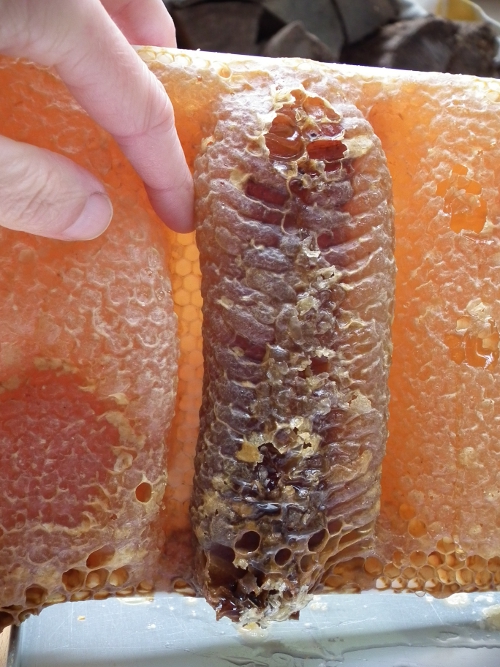
I really wanted y’all to see this. This is a crazily drawn-out (filled with honey and capped) frame.  Two things: the color and the shape.

Some of the comb is darker because the bees first used it for brood, and only after that did it became honey storage. The more comb is used, and especially when it is used for brood, the darker it gets as more junk is left behind on it. All the lighter colored comb around it was only used for honey storage.

Sometimes the honey is darker making the wax look darker too. Other dark spots may be cells filled with pollen.

This comb ripples and bulges because I probably didn’t push the frame tightly enough against the next frame. This violated the “bee space,” which is on average  around 5/16 or 3/8 of an inch. The bees will build excess comb in a space larger than that. If it’s not too much, they’ll make their comb a little deeper, making it uneven, like on parts of this frame. If there’s too much extra space,  they’ll build a whole “new” wall of comb, like the strip in the middle, which is actually mostly detached from the (plastic) foundation so it has cells on the back of it and the bees can crawl behind it: in effect, a “frame” on its own.


On (Not) Saving the World, One Element at a Time

(I’m thinking of this third post today as a Transitiony kind of post…)

When I show people around the place, I finally (after five years) feel like it’s all coming together, and that’s because I have started thinking in terms of elements.

Breaking the enormous task of creating a “sustainable place”  up into elements allows me to do several things:

  1. to accept that it will only happen one element at a time,
  2. thus to take a more realistic  longer-term view,
  3. and while digging the compost I can now enjoy digging the compost, while not also, at the same time, in my head,  digging the pond, pulling the weeds, cleaning out the coop, identify the mushrooms, building the earth oven…
  4. and I can take pride in the accomplishments, in what has already been done,
  5. thus also feeling confidence that we will succeed in making it even better.

Yes, this is all about feeling good! I’ve realized that, for me, only good feelings will (1) allow me and (2) even get me to act.  I am finally taking seriously the title of my blog: Wendell Berry’s

 Be joyful though you have considered all the facts

I’m not saying we shouldn’t keep track of the big picture, the reasons behind our actions, etc. I’m saying that too much talk (or thought), too much worry makes for a very frustrated activist.

Case in point: DH and friends were sitting around the patio table discussing ngo’s and having to make a living and what the world really, truly needs. They had snacks and drinks, and the umbrella was shading them from the Summer sun. Meanwhile, some 30 feet away, I was building a chicken run entirely out of materials scavenged from the property. My run took as long to build as their conversation took to resolve into agreeing-to-disagree. As all of us wrapped up, one of them quipped

“While we were discussing saving the world, you were saving the world”

However much it was a joke, it was revealing. Saving the world? I should never think if that as my job. Or yours, or any one’s. Putting systems, elements in place that may just contribute to a better world? Yes. That I can do, joyfully, efficiently, proudly.

How’s the Mead Doing?

Two posts in a day!

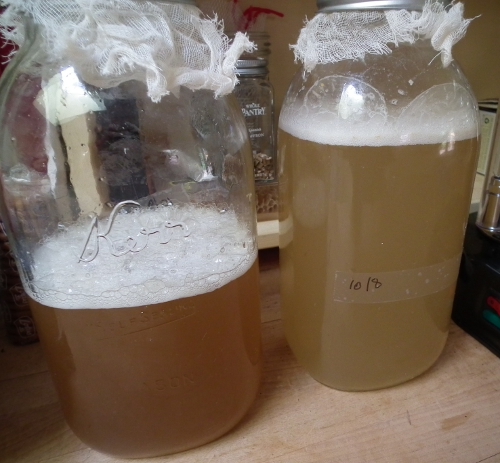
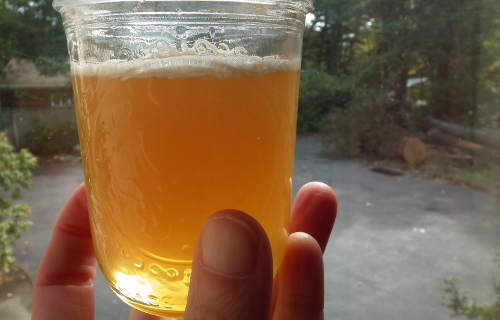
The mead’s doing well! I made two batches: one with honey from the first nectar flow (lighter colored), another, smaller batch with later honey (darker color).

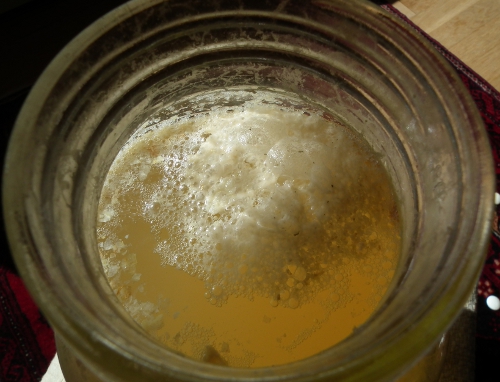
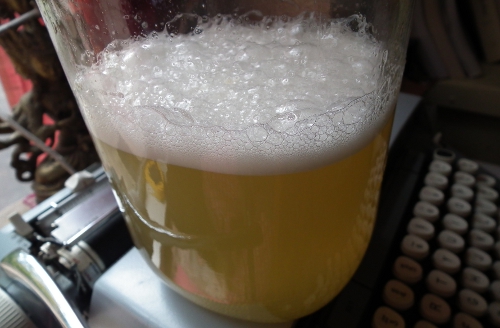
They’re about the same proportion water and honey – though, to be honest, I’m going the Sandor Katz-way, that is, I’m eyeballing it, adding a bit here and there as I see fit. The first batch is doing better: the yeasts are developing a nice foamy head on the must, and it smells yeastier too.

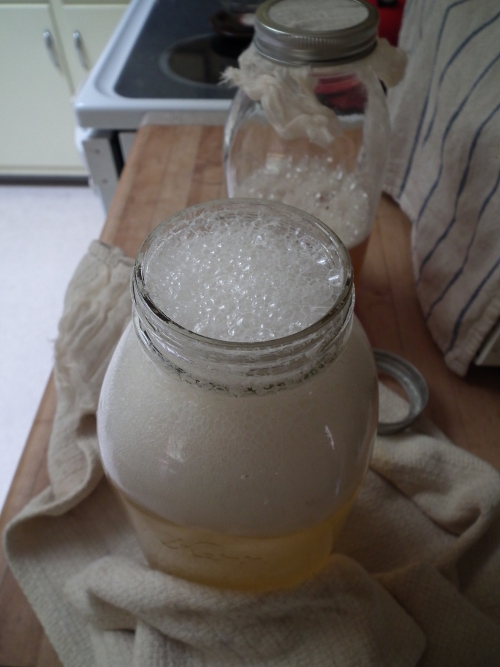
That picture was taken before the daily shake. When I opened it after its shake the other day, it fizzed so much it spilled over the rim.

I tried to capture this on video today  but the effect was less spectacular. Still, you can hear the fizz when I open the cap. Smells great, quite yeasty.

Edible Mushrooms in my Garden and Neighborhood

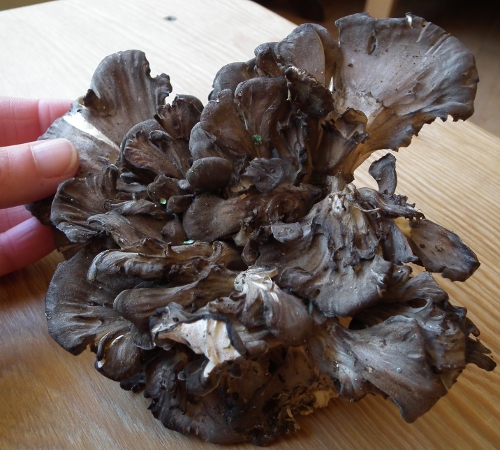
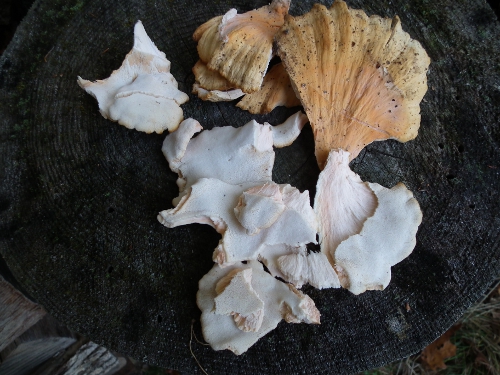
You may remember I tried to grow King Stropheria in a bed of sawdust and leaves. Unfortunately it dried out and I never got any shrooms from it. But my mushroom adventures just began anew. I learned a while ago that a neighbor is a hobby mycologist and I expressed interest. Today she came by with a chunk of hen-of-the-woods that she got from another neighbor’s yard.

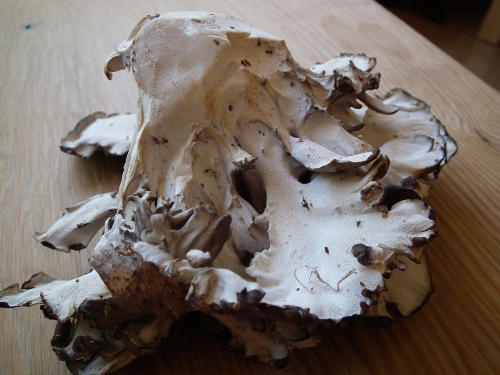
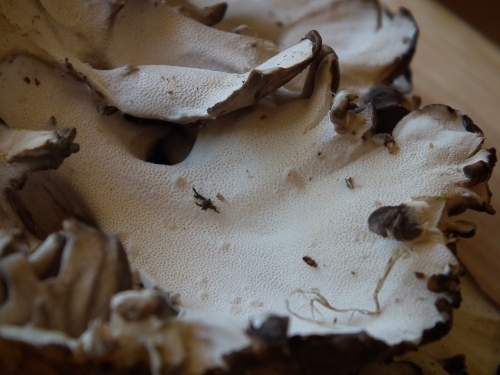
Hen-of-the-woods is a porous, not a gilled mushroom

I showed her the mushroom I found a week or so ago, growing next to the coop and the wood pile. After seeing the one she gave me, my hopes that it was hen-of-the-woods were already dashed, and she confirmed this. However, she said, this is chicken-of-the-woods and also delicious! This one may be a little old (fibrous and wormy) to eat, but I am going to give it a try at dinner time. How fitting that this fungal chicken grows right next door to my avian chickens!

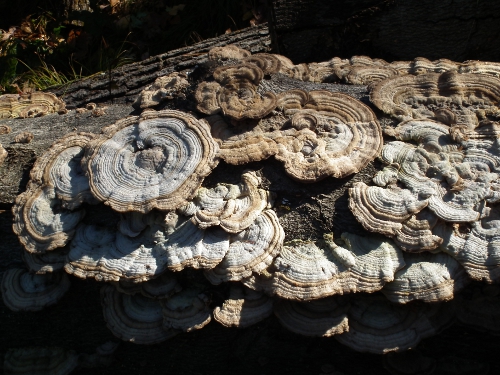
Lastly we admired the hundreds of Turkey Tail fruits on the logs that have yet to be cut up. These too are porous and edible, but too tough to eat. It’s even difficult to tear them off the log. Still, they’re edible and that’s good to know.

pores on the underside

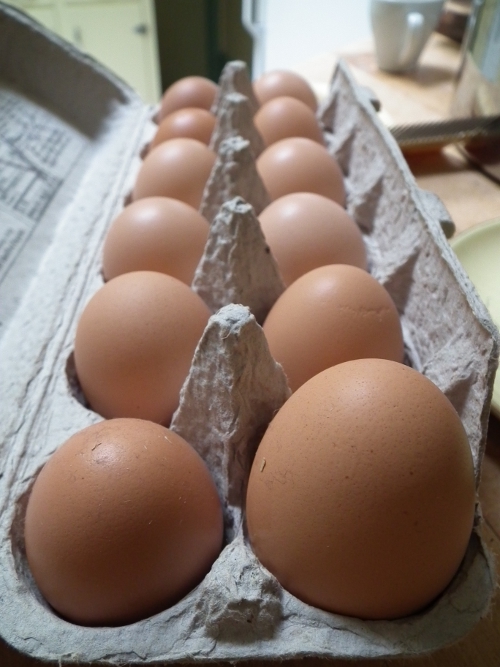
In exchange for the hen-of-the-woods I gave my neighbor a jar of honey and six fresh eggs.  Thank you, Pam!


More Fall Hive Management: Robbing honey frames and Mite Treatment

I wanted to treat my bees with formic acid against varroa and tracheal mite, but it kept being postponed. Just getting a hold of the treatment (MiteAway) was difficult. Then I had to wait for the free time and relatively warm, rainless day to do it.  Then, last week, it suddenly got colder and we even had our first frost. Not as hard as predicted, but enough to kill the basil. And enough for me to think it was too late. The treatment takes about 7 days and during those days daytime temperatures have to be between 50 and 90F.

But today it’s a balmy 74F (23C) and the next seven says it promises to stay warm enough. So I went for it.

I opened each hive and took out all the frames that had no more honey in them, either because they were never filled, or even drawn out, or because they had been filled, extracted by us and then returned to the bees for cleaning. That made for 20 frames.

While the supers were off the hives, I put one strip of MiteAway (not two as the instructions say: my bee mentor puts just one because he thinks that’s sufficient and more kills too much brood) in between the two nest boxes. That was some heavy lifting, even without supers on there. I think that for all three hives there is enough honey int he top nest box for Winter.

Then I put one empty super on top of the nest boxes (as described in an earlier post), then a super each with the frames that still had honey in them, as well as the eight last frames we had extracted but that were still dripping/oozing with honey (I gave those to the two weaker hives for cleaning out).

The twenty empty frames I took away. I knocked off most of the bees but there were still plenty of them hanging on, so I opted not to bring them into the porch but to leave them out so the bees can take the last they they can from them, and return to their hives by nightfall, at which point I’ll collect them.  Here’s a video of them buzzing around.


Winter Coop Prep and Eggs

We’ve not had a frost yet, but we will, this evening, and a hard one too: 28 F.  I have my thermometer out in the coop so we’ll know cold it will really get. I’ve harvested all there is to harvest, brought in all my potted plants, drained my rain barrels.  But, being a brand new chicken keeper, I am most concerned with the chickens, since their coop doesn’t have double walls or insulation (there is just particle board with siding).

In between drizzles I cleaned out the coop for the last time before Spring. I put down a sprinkling of diatomaceous earth to kill creepy crawlies like mites and fleas that may bother the birds. Then I shoveled in a thick layer of pine shavings, and on top of that I put straw, all adding up to about 5 inches.  This is the beginning of the deep litter method. I will simply add more shavings and straw as needed over the course of the Winter. The lower layers will decompose and give off heat, warming the coop. I also made sure that, apart from the ventilation which comes from the eaves, the little coop is draft free. I put extra bedding in the nest boxes – though I’m sure they’ll clean that out.  Our breeds – Rhode Island Red and Black Sex Link – are cold hardy, so they should be fine now.

We’ve been getting three eggs a day, and three days out of the week, four. So they’re good, consistent layers. The little pullet eggs have also been growing bigger, and yesterday we had a huge one.

Today I found a weird egg: the shell is all soft and crumpled and not entirely fused in places. The shape is squished. I hope this is a one-time problem!

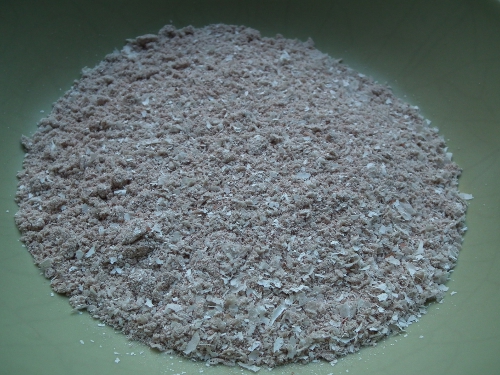
To help with egg shell/calcium problems we’ve been giving them crushed oyster shell (in a separate feeder). In the meantime I was saving up the egg shells and yesterday I had enough to crush. I washed them, then made them brittle and cooked whatever egg was left in the microwave, then ran them through a coffee grinder we don’t use anymore. What a great way to close the loop!

Fire Wood and the First Fire

Ah, that first fire.

Over the weekend DH and I hauled a bunch dried fire wood from the woodpile to the screened porch, and I cut up a lot of kindling. It was my first go with the small electric chainsaw that a friend gave us. It does the job! Another friend commented “My favorite environmentalist, using a chainsaw!” Well, I responded, this chainsaw is solar!

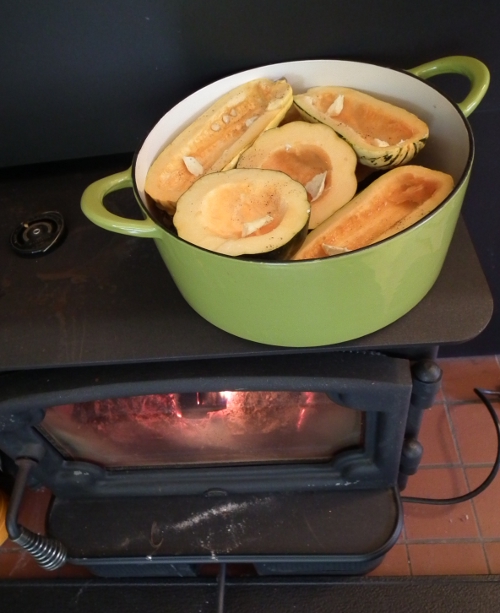
Today I was feeling a little under the weather, a bit chilled, so though it was  still 64F  in the house, I lit the stove.  It’s good to test run it anyway before it becomes a necessity. While the stove was burning real  hot – for the first fire of the season, burn it hot to clear out the chimney – I put on the Dutch oven and boiled water for a hot clothes wash, then filled it with squashes from our CSA. Then, when those were done,cooked a beef stew in it for dinner. We call that stacking functions, using one thing for many things. Feels good. Smells good too!

Making Simple Mead

I started my first mead – fermented honey wine –  today. I used my own honey, of course. This little jar was from our last extraction (09/26). All the air bubbles that were “invited” into the honey when spinning it had risen to the top, taking the wax and propolis that had hitched a ride up with it.

It creates a nice, creamy wax seal.

This stuff is okay to eat if you like the texture. I read in Katz’s book, The Art of Fermentation, that adding wax cappings during the first phase of mead adds flavor. So in it all went, 1 part honey with 5 parts dechlorinated (charcoal filtered and then boiled)  water. This is called the must. Shake it vigorously (for that, screw the cap on tight), then open the cap to release pressure buildup from the fermentation.

The honey is alive with yeasts, so it should start “boiling” soon. This phase of the process can take a couple of weeks, during which the must must be shaken every day.

We also extracted 13 more pounds of honey today. This from 6 frames (so about 37 oz. per frame). This was disappointing: our last extraction of 8 frames yielded 22 lbs, that is, 45 oz. a frame).  But these last frames had all kinds of honey in them: some light and runny, some (I presume the second honey flow) very dark and viscous, almost impossible to extract.  DH and I spent hours spinning it. Still, it’s another 13 lbs. This brings our total to 54 lbs and 12 oz.!

Two Ferments: Sauerkraut and Comfrey Liquor

The first one is sauerkraut. It is my first deliberately fermented food. A huge cabbage head came in our CSA box a couple of weeks ago. What to do with it? As I was reading Sandor Katz’s The Art of Fermentation, I couldn’t resist.

My mom and I went looking for a good crock, but all the right shapes we found (in non-specialty stores) had questionable glazes. Always know what glaze is on your cookware, and especially make sure there is no lead in it.

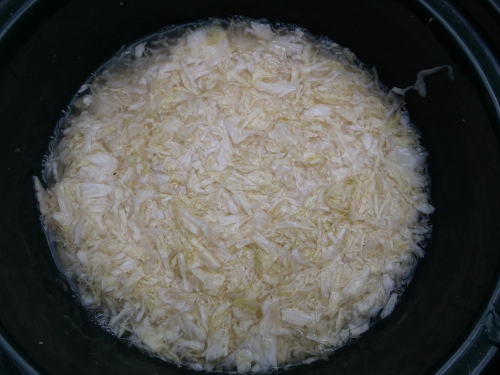
In the end we went with the ceramic liner of our crock pot.  We shredded the cabbage, layered it in the pot, with one tablespoon of salt on top of every inch of cabbage (except on the last layer), then submerged it in filtered tap water, crushing it down to get the air bubbles out, then weighed it with two plates, then a jar with water. We draped a towel over it so dust couldn’t get in.
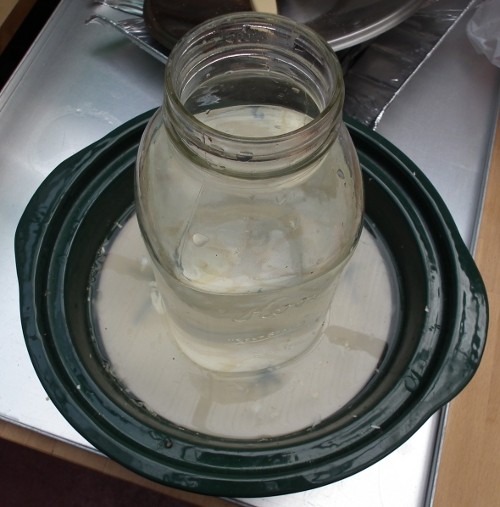
It smelled something awful three days into the process, so I put it on the porch. The potent smell lasted a few days, then it became more neutral. On day 10 there was some surface mold, which was easily skimmed off. All the cabbage under the water surface was unaffected. It is now two weeks and it tastes delicious!  I think it’s ready!

I transferred the kraut with the brine into jars – careful to keep it all submerged – and put them in the fridge to eat it over the next couple of weeks.
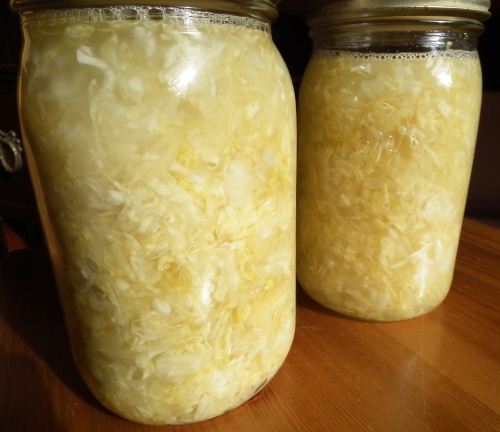
I gave the chickens the large leaves that we put at the bottom and they are loving it!

The second ferment is comfrey liquor. No, it’s not  edible. At least, I wouldn’t drink it!

It took much longer to make. I started it in July. It required three buckets that fit into each other. The bottom one captures the liquid which drips down through the holes in the second bucket, which I stuffed with comfrey leaves from my garden. I have a comfrey patch right across from the chicken coop. The chicken, by the way, love to eat it. On top of the leaves I put a heavy paver and then on top of that a third bucket heavy with sand. I stood this in the shed for a couple of months. I checked it a month later and it was pretty bubbly, but it didn’t smell,  even though my internet sources say it should stink to high heaven! I swear I took a picture then, but I can’t find it. This was the state today:
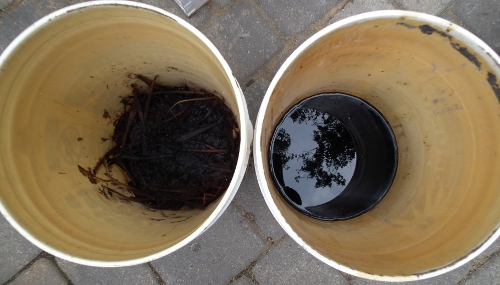
Now a little over two months into the process, the  leaves (left in the picture above) are just fiber. The  liquid (right) is no longer bubbly, and it doesn’t smell. It’s a coffee brown-black and somewhat viscous.
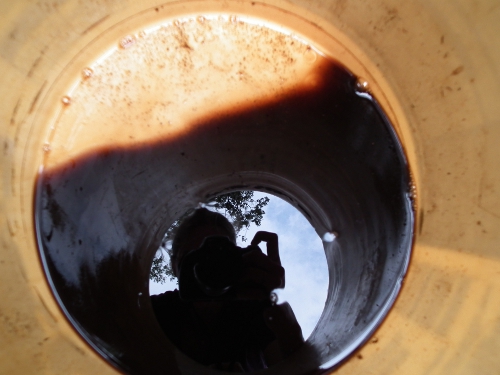
A 5 gallon bucket stuffed with leaves yielded a little under 5 cups of liquor.
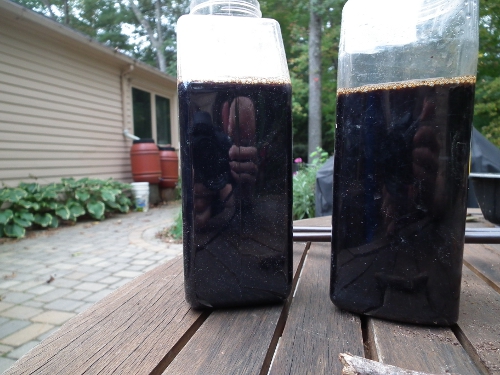
I will fertilize the berry bushes with this or keep it in a dark, cool place until Spring. I’ll dilute it as it’s very concentrated: one part of liquor per fifteen or so parts of water. Comfrey’s deep roots mine and bring up  especially potassium – comfrey is actually one of the few organic sources of potassium.