Mushroom Spawn Order

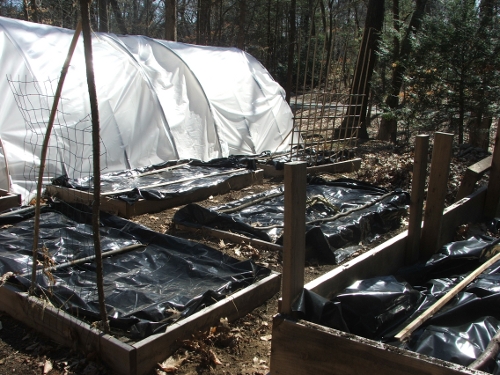
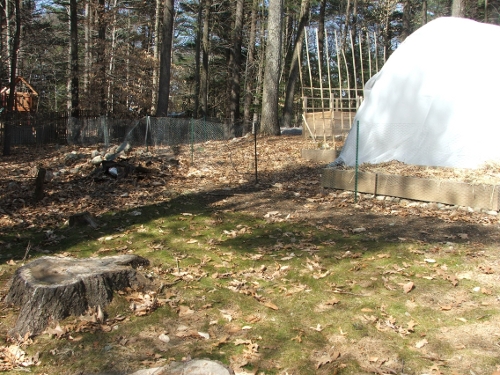
The mushroom growing in one of the veg beds in the hoop house is yet more proof that we have a fungal (as against bacterial) soil. We also have wild patches, which we call “the woods,” with plenty of room for  edible mushrooms of our own choosing.

From Field and Forest Products, for growing on substrates (wood chips, straw, pine needles, etc.) I ordered:

  • Italian Oyster (Pleurotus pulmonarius): 2 lbs of grain spawn
  • Blewit (Clitocybe nuda): 2 lbs of grain spawn {turns out they don’t carry this anymore}
  • Wine Cap (Stropharia rugosa annulata): 2.5 lbs of sawdust spawn

For on logs (oak):

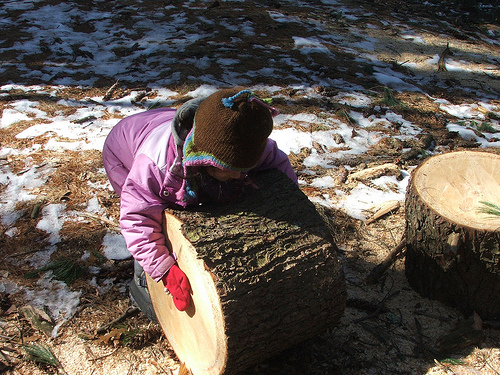
  • Shiitake (Lentinula edodes) WR 46: 250 plugs (inoculates 5 logs)

I can ask my neighbor, who cuts down trees and/or sells firewood, for wood chips. Those will be free, as are the billions of pine needles and twigs and old leaves strewn around our backyard. I chose more of the substrate mushrooms for this reason: we use what we have on the property. And I like the idea of beds.

I still haven’t made the bush and vine order. It’s a lot of money,  and I don’t know if we have enough sunlight – even for the shade loving ones. I don’t know how to prune… Another steep learning curve to climb and as always I need a bit of a run-up to get going. Reculer pour mieux sauter: taking a couple of steps back for a longer jump.
Wild Is Old (Owls)

The other night my birdwatching neighbor came over to tell me there are is Barred Owl (Strix Varia) nesting in the trees behind our property and that I should listen for its calls. That evening, there it was, that typical “Who Cooks For You” call. By the time we got the mike out there, the call had changed to:

owlhoot1 and owlhoot2

(We are thinking of placing a mike on top of our roof, and whenever we hear something – the fisher cat, or the owls – we plug it into a laptop and record it. Yet another scheme here on our Hill!)

As we listened that evening I said to DH how wild it was, how I love how wild this place is (I wrote about the contrast with Europe here). DH remarked that surely an owl is not that wild – maybe he had jaguars in mind, and grizzly bears.

I replied an owl is pretty wild. What do I mean by wild, or wilderness? It took me not a second to answer it: Wild is Old.

That owl up there, high up in the tree, in the wind and the total darkness, is calling for a mate as it has been calling, with that exact same call, for millions of years.

Compare this with us, humans, our many, many languages, our many more ways of wooing, of saying “I want you” and “here I am”. And we’re changing  those every thousand years, every generation, every day. We are constantly adapting, transforming, cultivating, culturing.

The owls, the fisher cats, the bees, they don’t change. They stay wild. Their wild ways work for them as they did millions of years ago. That is wild. Wild is Old.

Hoop House 3.0: Modular, Still Movable

{UPDATE} look here for the finished product!

Like I said in an earlier post, I would not recommend our present hoop house design to anyone who has gust of wind and lots of snow. It has served the purpose of getting us going, of experimentation, and we are still hoping for a Winter Harvest (I’ll be sure to harvest something before March 20). But the idea is to have a movable hoop house, and to move it on our last frost date (predicted by yours truly to be 1 May) to its Summer position. And before we move it, we want to redesign it.

We want it sturdier, more wind and snow-proof, more airtight, with more ventilation possibilities, and a sturdy tight door (or two). We’d like heavier, more durable and more transparent poly (this one looks good but it’s expensive).

To get all this, the new design will involve some wooden and metal parts (where at present the whole thing is pvc). And because we still want it to be movable in the sense of pick-up-able (so as to avoid soil and pest problems), we will have to make it modular. It will be made of pieces, fit together, that can be taken apart and moved and refitted by 2-4 people in the span of a couple of hours.

We are copying some ideas from this design (which is not movable).

So here is the first draft:hoophouse2_b

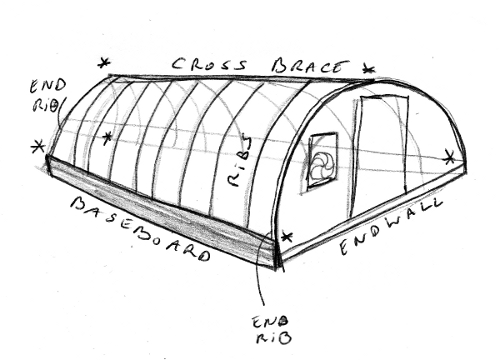
  • 20′ pvc pipes for the ribs, so they will be 1 piece across, so no breaking connectors (definitely the weak points in our first design).
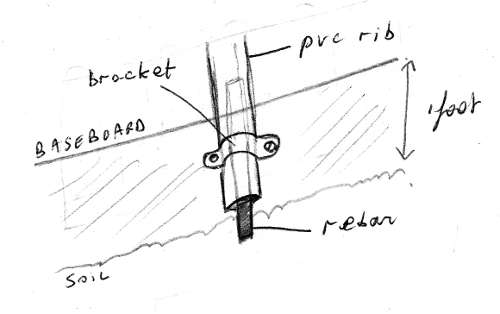
    Rebars are pounded into the ground and the ribs are fitted over them so they are tensed in an arc.
  • Along each long side of the house a wooden baseboard (of no less than 1 foot high, to guide sliding snow away from the base) is  attached to these “rebarred” ribs by brackets. This will prevent these 2 long baseboards from warping and will anchor the whole structure to the ground.

hoophouse2_a

  • To these 2 long baseboards are fixed (in a removable manner) (*) to the end walls.
  • These end walls are made of plywood. They will probably be the heaviest components. In each are cut two holes, for a door and a window.
  • These windows are opened either by automated arms or are fitted with fans that vent when it gets too hot inside.
  • The doors can be homemade of light wooden frames with poly stretched over it, or freecycled doors, preferably with glass in it, and frames, in which case they need to be easily removable by lifting them off their hinges.
  • The cross brace on top is 1 piece of rigid metal or pvc (probably pvc as that would be lighter). The apexes (apices?) of the ribs are fixed to this bar by ties.
  • Also this cross brace is fixed (again in a removable manner) (*) on either side to the end walls by brackets.
  • The poly is 2 big sheets bonded or glued (still have figure this one out) so it makes 1 seamless sheet.
  • The poly is stapled (permanently) to 1 of the wooden baseboards (call it A). On the other side, it is (permanently) stapled to a long wooden piece that gets screwed to (and can be unscrewed from) the other baseboard (call it B).
  • Along the end walls the poly is stretched over and around and fastened to the end ribs with the pvc clips we have at present (they’re pretty sturdy and handy). These end ribs are then fastened to the end walls with removable brackets.

So you get the idea. When we move the house, we

  1. detach the end ribs from the end walls (unscrew)
  2. detach the poly from the end ribs (undo the clips)
  3. detach the poly from baseboard B and move it over the ribs, setting it aside next to baseboard A to which it is still attached.
  4. detach the top cross brace from the ribs (cut the ties) and from the end walls (unscrew the brackets) and move it aside.
  5. detach the ribs from the baseboards (pull ’em out of their brackets and off the rebars).
  6. pull the rebars out of the ground.
  7. detach the baseboards from the end walls and move the end walls aside (possibly remove the doors first).
  8. move the baseboards (poly still attached to one) to the new position.
  9. reverse process.

We’ll be playing around with this. We also need to figure out how to make the 6 crucial structural attachments – (*) of baseboards to end walls and of top cross bar to end walls. A simply click system would be great, or some kind of bolting system. All removable screws and bolts need to be durable enough to stand up to repeated bolting and unbolting.

We still want this thing to be inexpensive, but we know that, with a better poly, the venting system, the wood and the hardware, we’ll be looking at something twice the price of what we have now. What we have now cost us about $200 – and we’ll reuse it as a shelter for our woodpiles.

Let me know what you think!

~

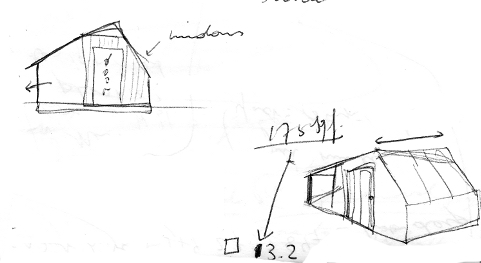
I’m also playing with some potting shed designs…

shedddrafts1

{UPDATE} look here for the finished product!

Cost of Beginning Beekeeping

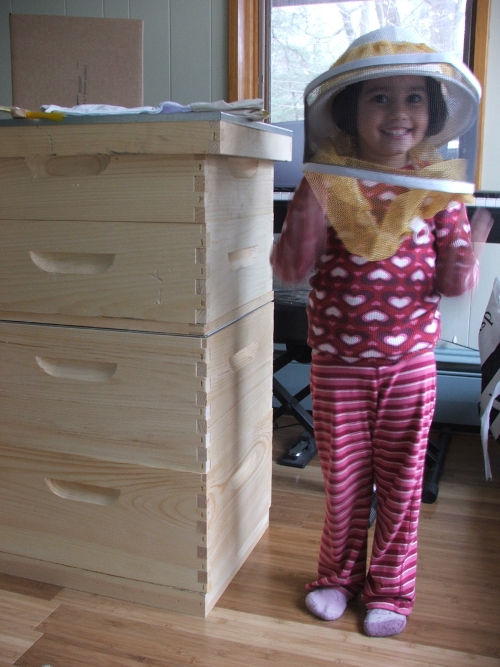
dscf1031

“When I grow up I’m going to be a beekeeper because i really like the hat”

I brought home the hive yesterday. Amie is so excited about it; it is finally becoming real, as in, not just Mama talking. She’s going to help me paint it, though she’s not happy about it having to be white or something close to that.

Having just purchased all the stuff necessary for begin a hive, I can break down some of the costs for you.

  • Beepackage: $88
  1. 3 lbs of bees
  2. 1 Italian queen (marked)
  • Hive kit: $209
  1. bottom board
  2. two deep supers with 20 one-piece Pierco frames
  3. metal queen excluder
  4. two medium supers with 20 one-piece Pierco frames
  5. inner cover
  6. outer cover
  • Accessories and clothing: $119
  1. one standard hive tool
  2. one hook end hive tool
  3. one 4×7 in stainless steel smoker
  4. one bee brush
  5. one protective veil (hat and veil)
  6. one set of goat skin gloves
  • Medication and feed: I’ll know more about this next week, but my informed estimate is about $40.
  • Others: entrance reducer, open bottom board, mouse excluders, etc.: next week, but about $30. Add around $35 for extra set of veil and gloves, for DH, perhaps.
  • Honey extraction: Professional beekeepers and beekeeping clubs rent equipment for honey extraction. One harvest costs about $20.

Total: $541

Garden Work

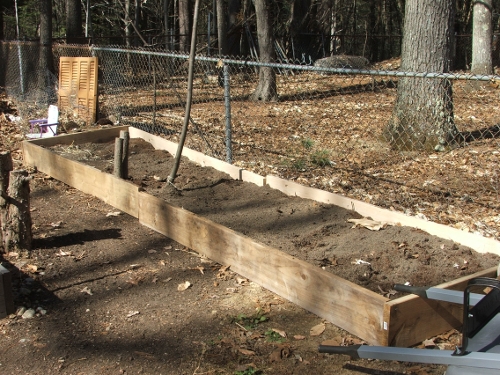
I did a lot of work in the garden today, another glorious Spring day. I filled up almost the entire new bed against the fence (4 x 16 feet). I am using the soil from the potato towers, which after sitting still for a good 7 months is showing its true nature: it’s full of pebble-sized cement crumbs. I’m sifting them out. The bed is about 2/3 full. It was back-breaking but feel-good work.

dscf1008

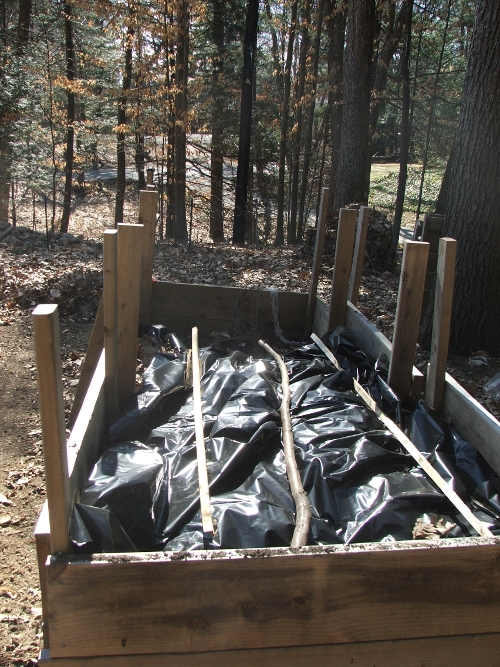
I’m only able to take off the top foot of the soil in the towers, the rest is still frozen. I covered it with black plastic so it will defrost quicker.

dscf1011

I also covered up most of the beds. They have straw on them, which has a high albedo, being light-colored and shiny, and the soil underneath it is more frozen than the beds without it. Amie said they finally do look like “beds” now.

dscf1012

She also laughed when Laura and Ma speculate that the moon is made of green (unripe) cheese, at the end of Little House in the Big Woods. “That’s so silly,” said Amie. I asked here “So what do you think the moon is made of, then?” And she very seriously replied: “Creamy soy milk.”

Well, that aside.

I brought my beehive home today, along with the veil, smoker, gloves and tools. I’ll write about that tomorrow. I’ll be moving the hive around on the property to see where it would be best – and to see how the neighbors react! About those neighbors, I have more ideas…

Tree, Bush, Vine, Mushroom

dscf3898

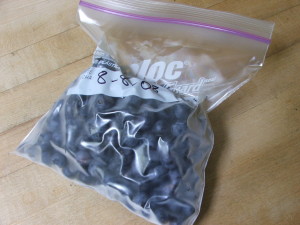
last of the frozen blueberries (rinse out baggie, reuse)

Today was fabulous. Almost 60F, sunny, a mild breeze. Amie and I went outside and worked – well, she sat and drew, I worked. I made a new 4’x16′ bed near the fence, for peas and lettuce (it will be shaded by the summer hoop house). Still have to fill half of it in, with the soil from my potato bins, only the top twenty inches of which weren’t frozen. Ooph, my back! Feels good. I also bought enough timber for 4 more beds and 5 trellises, which means…

… that I am going through with the tree, bush and vine order. This is the order I am contemplating:

  • 1 BARCELONA HAZELNUT (Corylus avellana), layered
  • 6 BUSH HAZELNUT (Corylus americana), 1-2 foot seedlings
  • GAMMA HAZELNUT (Corylus avellana), layered
  • 1 MEADER PERSIMMON (Diospyrus virginiana)
  • 2 PAW PAW (Asimina triloba)
  • 1 ATREANO FIG (Ficus carica)
  • 3 PATRIOT BLUEBERRY (Vaccinium corymbosum)
  • 2 ANANASNAYA FEMALE HARDY KIWI (Actinidia arguta)
  • 1 MALE HARDY KIWI /POLLINATOR (Actinidia arguta)
  • 3 CHINESE MAGNOLIA VINE (Schizandra chinensis)
  • 1 ROSA RUGOSA / ALBA (Rosa rugosa alba)
  • 1 RUBY AUTUMN OLIVE (Eleagnus umbellata)
  • 1 SWEET SCARLET GOUMI (Eleagnus multiflora)
  • 2 SOCHI TEA (Camellia sinensis)
  • 2 RED HUCKLEBERRY (Vaccinium parvifolium)
  • 2 RED OSIER DOGWOOD (Cornus sericea)
  • 3 ARONIA SEEDLINGS (Aronia melanocarpa)
  • 2 YORK ELDERBERRY (Sambucus canadensis)
  • 2 JOHN ELDERBERRY (Sambucus canadensis)
  • 3 SNOWBERRY (Symphoriarpos alba)
  • 2 SERVICEBERRY (Amelanchier alnifolia)
  • 2 HiGHBUSH CRANBERRY (Viburnum trilobum)

I’m still trying to find these:

  • WITCHHAZEL (Hamamelis)
  • WINTERBERRY (Ilex verticillata)
  • SHADBLOW SERVICEBERRY (Amelanchier canadensis)
  • APPLE SERVICEBERRY (Amelanchier grandiflora)]
  • STRAWBERRIES

Mot of these don’t mind shade, and not a few of them don’t mind it wet, either. All are edibles – except the Red Osier Dogwood, which we want for coppicing, for basketry.

I just need to do some more fine-tuning, placement in the garden plan, sourcing and price matching. So far Burnt Ridge seems my best bet (they have all the ones in the first list). A pity it has to come from so far away: we’re talking seedlings, 3 foot trees, and some pots!  I wonder how all that can survive in the mail. But my local garden center is too expensive, and they don’t sell half of what I want – same with the few Massachusetts nurseries I found. If anyone knows of one: I’m near Boston…

Workshop/Studio, Root Cellar, and Future

4416712683_767158671c

Turns out we won’t be replacing our old, rotting, dirt-floor small shed with a new and larger, insulated workshop/pottery studio. The previous owner had an unwieldy septic system put in, and some digging today confirmed that part of that system lies within 10 feet of the corner of the old shed – and closer than 10 feet we may not go. We’ll try to appeal to our Town’s Board of Health, but I’m pessimistic.

My idea now is to keep the old structure, to reorganize its shelving, and to build a platform for a floor so DH can still have a small workshop in it. We might put up a small potting shed nearer to the vegetable garden.

Well, at least we saved $13.000 today! Should this make me feel better about that pending $400 order from Burn Ridge (for paw paws, hardy kiwis, rosa rugosa, elderberries, among others)? The $350 for the hive and accessories? Shall I throw in some extra mushroom spawn too?

~

Then we have the root cellar. The asbestos tiles were removed so we’re a go. But since our future in this place is (dare I say it) not as certain as it once was (aargh), we may not go ahead until we know that future better (more news at the end of April). Let’s just say that taking a large chunk out of a basement room that could be finished as a tv room (gack), so as to install a root cellar (a what?), would not be a good “investment decision” (in case we sell).

That of course also makes the bushes and trees order and the spawn order problematic.

The hive and the bees are movable.

4416713055_4581ca80e2

A Phenological Ambition, More Mice, Naps

dscf0959

One of my ambitions is to make a phenology of this place. I’d love to use many media. Words foremost, then drawings, paintings and photographs, and  occasionally audio recordings and videos (but those I wouldn’t be able to stick in my favorite “container”, the book). To make a little drawing every day, of the newly arisen chipmunks, a flock of Robins, the daffodils finally poking through or the flowering buds on the bushes?

In any case, it’s not going to happen today, or tomorrow. Though a wonderful day, the first day of Spring, I should say, the only time I made it outside was to release three more mice (the full count is up to 10 now). Also got the Mama mouse this time, so perhaps it will be the end of them! They got themselves trapped but not before eating half my tomato seedlings. And there I was, yesterday, gleefully entering “100% !” in the germination chart for nearly every one of them. I resowed.

So last year the garden was weather-doomed (“dimmest summer on record”, wet and blighted). This year will be pests and varmints? Wish we could get all the plagues over and done with in one year (i.e., last year)!

So why didn’t I get out there? Amie has caught a bad cold and she (and I) got no sleep last night, and today she spent on Mama’s lap, hip, or shoulder, and then next to Mama taking a long nap (Mama too!). I did love the way the sunlight flooded our bedroom, so bright and warm as I drifted off to sleep.

Hopefully I can get out there tomorrow to do some surveying, bed and hoop house cleanup, compost turning, and perhaps even some tucking in of peas and favas.