On Thursday I enjoyed no less than three hours visiting my four hives. The idea was to inspect, do a varroa mite sugar roll and assess if the bees need treatment, check for swarming, and assess which hive(s) I could split.
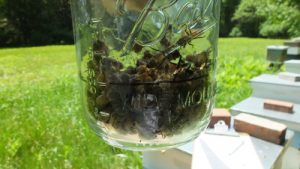
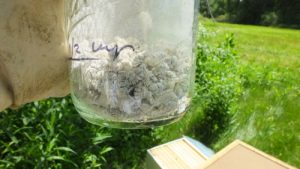
Hive 1 (Italian Queen: Borgia), was doing well: good population, all types of brood, eggs included. I didn’t see Borgia herself, but there were many fresh eggs, so the hive is queen right. Their mood was good too, so I did a sugar roll. I tilted a crowded brood frame toward myself and rolled the rim of the mason jar down over the backs of the bees. They fell right in, but I had to be fast to keep them in! Still, after two tries I had about half a cup.
about half a cup of bees?all sugared up
Just look at that field! Who wouldn’t want to enjoy three hours in that field?
No mites came off them at all. That made my hard decision about treatment easy. I will keep monitoring. I returned those ladies, all sugared up, to the hive. Only one had perished. The rest went right back in.
Hive 2 (Italian queen: Constanza) was a bit worrying: less people, and I also spotted only a few eggs. Also no Constanza, and I was looking for her. For each hive I was going through frame by frame, recording what I found on my data sheet, so it was taking me a long time. I decided not to do a sugar roll. The brick atop this hive was replaced vertically: a flag.
Hive 3 (Italian queen: Beatrice) was a bit light on population but looked good brood wise. Lots of eggs. I even spotted Beatrice herself, cowering in the corner of a frame, not very queen-like. But the brick went back on, lying down.
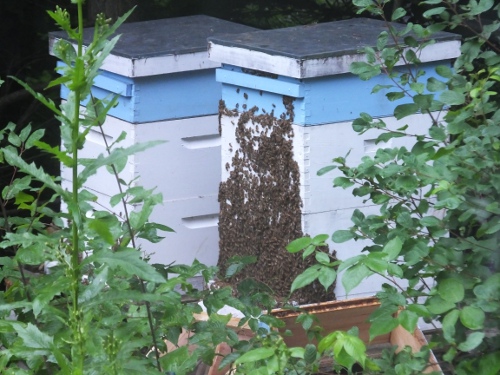
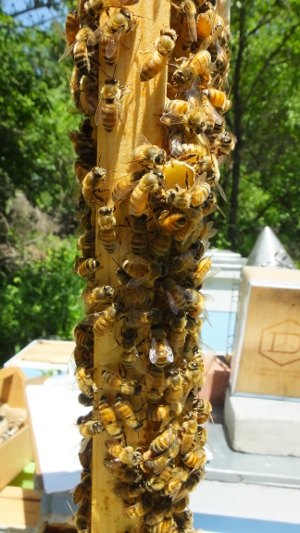
Then came hive 4 (Italian queen: Bianca). Even visually, walking into the bee yard, she was clearly the heaviest in population. As I started my visitation of each frame, a suspicion was soon confirmed. These girls were getting ready to swarm! No eggs at all, and no less than six massive, occupied, but as yet uncapped swarm cells.
Look at those big grubs, swimming in royal jelly.
I cursed a little, because it looked like perhaps I had wrecked the queen cells by moving the frame. If I damaged these to-be-queens, then this hive would be queenless, because there were no more eggs to make a new queen from, and wrecking the swarm cells may not stop them from swarming.
The hunt was on, then for the old queen. It didn’t look like they had swarmed already. They usually only take off when the swarm cells are capped. They also take a lot of honey with them, and this hive was still loaded. So Bianca must still be around. Having spotted her during my last inspection, white dot and all, I had good hopes, so I went through each frame a second time. She wasn’t in the honey super of largely not yet drawn out foundation, above the queen excluder. I couldn’t find her in the second brood nest (the medium with the swarm cells). And I couldn’t find her in the bottom nest box (a deep). The bees by now were rather ornery – who could blame them! I closed up.
I hope to go back later today, before the rain, for one last effort to find Bianca and put her in a nuc. I’ll monitor the new queen situation closely – luckily I have two mated queens coming, from Sam Comfort’s Anarchy Apiary stock, so if I need one, they’ll be here Tuesday or Wednesday.
I walked across that beautiful field to have a look at the swarm lure one of our other beeks had put there: it was still empty… Bianca had better be home and up for a change of venue today!
{UPDATE} Couldn’t find her. I moved frame by frame into another box: no sign of her. I did find some more swarm/supercedure cells (hard to tell), capped and safe on the side of a bottom box frame, so if they swarmed/are swarming, there will be virgin queens. I also found a nice clutch of eggs of Constanza’s, so Hive 2 is probably fine.
It’s definitely a swarmy season. Here’s one frame in Hive 4’s neighbor, another beek’s nuc: riddled with swarm cells. Those four bottom ones are all full and capped and ready to go.
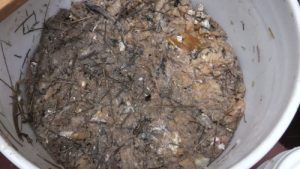
Another oft-used (and used in quantity) cohort of living allies in Korean Natural Farming is IMO: Indigenous Micro Organisms. The IMO “input” is made in several steps, from IMO 1 through 4. IMO 1 is the “catch” of said microorganisms, and in each subsequent step you get to culture these, growing their quantity until you potentially end up with a big pile. The first step, where you trap the organisms, is proving tricky for me. My first attempt got eaten and soiled by a mouse or some such; it went to the chickens. My second attempt at IMO 2 looked like this:
Closer, but that too isn’t going to cut it; it went into the steaming, youngest compost pile.
The recipe for the “bait” is pretty simple.
First soak a carbohydrate like rice for 24 hours, then pour it off (save wash water which is now full of starch, for LAB).
Hard-boil it with a ratio of 1:1.5 cups (rice:water), but this depends on the rice. In my experience basmati overcooks, so use less water. The rice should be dry and fluffy, not wet and soggy. Let cool.
Put the cooked rice in a wicker basket like mine, or in any container, wood, glass, plastic, porous like the basket, or not, as long as it is open up top and allows for half of its volume for head space. Place a cloth or old t-shirt or paper towel over it so no dirt can fall in, but it is not sealed, and optionally cover it with a metal mesh to keep mice out.
Bury this container in the leaf or compost pile, or under the duff in the forest, under an old tree.
After 4 to 10 days, depending on the temperature (colder = less microbial activity), dig up the basket.
You can find anything in your trap. What you want to find are certain aerobic microbes – hence the need for a fluffy rice with air pockets and head space for them to colonize. When you collect in a forest, among the leaf litter, you will catch mostly fungal hyphae. Among grasses, you will trap a more bacterial crowd. If you want to grow grass or grains, go for the latter. For growing veggies and perennials, the fungal stuff is the thing, because fungi are great companions for plants.
The fungal hyphae with which your rice is now “contaminated” should be white and fluffy and have a sweet smell. The stuff in my basket was predominantly red, yellow and black, and it smelled moldy, because I had caught mainly molds – which are also fungi, but not the kind you want (FYI, check out this amazing video on mold growth). I think this was because the rice was too wet.
The next steps, which I’ll write about as I get to perform them once I’ve managed to trap the IMO, are basically to feed this handful of organisms so they multiply to greater and greater quantities. To summarize, the IMO first colonizes 1 cup of rice (IMO 1), then rice and as much brown sugar (IMO 2), then 150 lbs of wheat bran (IMO 3), then all of the above plus as much garden soil, totaling over 300 lbs (IMO 4), at which point it is ready to be brought, with much fanfare, into the garden. (Go here for a nice reportage, with photos, of a workshop by Aaron Englander, similar to the one I took. It covers IMO 1- through 4.)
The whole point of IMO is to trap indigenous organisms, because of the ecological and economic advantages of closing the loops by not using imports, and because these indigenous micro organisms are already acclimated to the general environment where you want to put them to use – though of course it would be more accurate to say that they made and make that environment. So if you can, it’s best to look for them in the duff in undisturbed areas under the trees, at the bottom of an old leaf pile, or in a mature compost pile on your own property, or in the vicinity. The farthest distance the IMO travel is, in my case, about ten feet.
Notice the words old,mature and undisturbed. If your garden is a place of disturbance by digging, tilling, and applications of antibiotic chemicals, then the soil there will be “young” or “poor” at best, dead at worst. You want to bring in the robust, mature, complex life that has evolved to the most it can be in nature, away from modern man’s interference. And once you’ve brought in this life, you want to keep welcoming it by minimizing disturbance by going no-till, chemical free.
Ideally, as you let the IMO colonize more and more substrates, the garden itself becomes the IMO 5, as it were. But even the least disturbing farmers, treading the most gently on their soil, still have to dig for those potatoes, tuck in a seed or seedling, pull the occasional weed. Therefore IMO 4 is applied regularly on farms and in gardens. The poorer your soil, the more disturbing your gardening practices, and/or the further away your IMO was collected, the more it will need to be applied.
I made three more batches of rice and buried them in different places:
IMO 1 a. The same place as the failed one, just to try again with drier rice. It’s in a decomposing wood chip garden path where the King Stropharia likes to show itself, the duff there is shot through with mycelium.
IMO 1 b. In the oldest leaf pile on the property: the leaves at the bottom are about four years old, with successive layers for each year.
IMO 1 c. Under one of our biggest trees, in a shady spot where no one but the chipmunks go, where the soil is dark and springy.
This way I’m hedging my bets and, in the spirit of diversity, it makes sense that combining microbes collected from multiple sites will make for a more robust culture. Stay tuned.
A month ago I attended a workshop on Korean Natural Farming (KNF), led by Aaron Englander, at the Natick Organic Community Farm, where they implement a lot of KNF techniques. I deeply appreciate many of the ground tenets of KNF: make it cheap (and so available for even the poorest), use as many inputs as possible that are already in the environment (for instance, capture indigenous microbes instead of buying laboratory microbes in a bottle), minimize waste, be objective and scientifically rigorous, and take the long road. Take care of the soil life and all aspects of plant growth. As Aaron said: instead of forcing short breaths on your soil, enable the soil to take long, deep breaths. In other words: don’t add short-lived, chemical fertilizers and refrain from disturbing the life – the lungs, as it were – in the soil by refraining from tilling and pesticides, fungicides, herbicides, or anything that has the word “kill” in it.
The workshop was very demonstrative and hands-on, and I came home empowered. I immediately started a LAB, IMO, FPJ, WCa, OHN and, last but not least, the FAA. I don’t much like acronyms myself, but in KNF they’re kinda fun :)
So what is a FAA? It’s Fish Amino Acids – similar to the fish hydrolysate that costs $50 for a 9 lbs bottle at the garden center. You can make this stuff yourself, at home. All you need is a bucket, fish scraps and brown sugar. If you can’t get brown sugar, you can use just water and make the fish hydrolysate proper (*).
When I sourced the fish scraps from a local fish market I asked for all of it: guts, skin, bones, the lot. Apparently, the guts and even the skin are hard to get because they get removed on the boat, so I mostly got bones, tails, fins, some skin, and heads. I also asked them to mix up kinds of fish, hoping for some fatty fishes like mackerel. But beggars can’t be choosers, and I got only one kind, an unidentified white fish. Still, I was in business with 40 lbs of it! I also got 14 lbs of brown, raw sugar – approximating a ratio of 1:1 (v:v) (in KNF, approximating is just fine). This made for two buckets, each 29 lbs of fish, each 7 lbs of sugar.
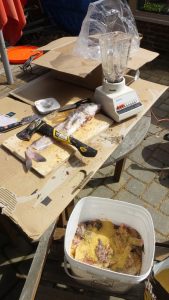
It’s a messy job and I don’t recommend you do it in your kitchen. Luckily the day I picked up the fish was sunny and relatively warm so I worked on the patio. I quickly exchanged the kitchen knife for the hatchet. The ancient blender was given to me by a friend and is now solely devoted to FAA. I added a little bit of rain water (avoiding the chlorine in the tap water), to make it easier on the blender, and it did a pretty good job. Liquifying or even blending the fish isn’t even necessary – you can just chop up the fish and layer it in.
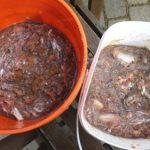
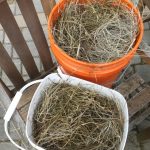
I chopped, blended, dumped the goop into the bucket, added a layer of sugar, and kept at it till the two batches were done and I had 1/3 of head space in each pail, in which I put some wet salt marsh hay – whatever is on hand is fine, to act as a smell filter. Then I put on the lids and put it in a cool, dark place.
Several things happen in the bucket: extraction of juices from solids through osmosis by the sugar(it basically sucks the moisture out of them), and all kinds of fermentation. I put water locks on the lids, mainly to ensure that gasses could escape (and the whole thing not explode on me!), and not so much to keep oxygen out. From other reading it now makes sense to me not to aim just for an anaerobic ferment, but to encourage the whole diversity of microbes, anaerobic and aerobic. When we will use the FAA, we’ll after all use it both as a foliar feed and surficial soil drench (aerobic) and as a deep soil drench (anaerobic). The bucket is large enough to have both kinds of ferments doing the digesting. I propose to keep this diversity mind set in all my fertility measures.
This fact sheet states that “after approximately 3 to 5 days, the fish waste will begin to break down and liquefy through fermentation and the osmotic pressure generated by the addition of brown sugar.” But after a couple of weeks nothing much was happening to my FAA. The top was pretty dry compared to the bulk of it underneath. I pushed the dry parts to submerge them, then topped off with a couple of chopped-up, organic, unwashed apples – which adds enzymes – and lastly some more raw cane sugar, so that no fish was left uncovered.
It takes 2 to 6 months to complete the fermentation and produce a mature FAA that will smell sweet and remain stable so keep for a long time.
FAA is high in nitrogen. As a rule, the higher the protein of the materials, when composted or fermented, the higher the nitrogen content. Mature FAA is applied in a dilution of 1:1000 (FAA:water) during the early or vegetative stage of development to boost growth and size. It isn’t applied to plants in the reproductive stages of their production cycle if you want them to flower or fruit, because the high nitrogen will stimulate leaf, not fruit or flower production.
(*) Fish hydrolysate involves not sugar but water. It too is minimally processed and cold-processed. Fish emulsion is a different beast altogether. It is heated, which represents a higher cost of production and which also denatures the proteins, carbohydrates and fats into simpler pieces, thus destroying many of the proteins, enzymes, hormones, amino acids and vitamins.
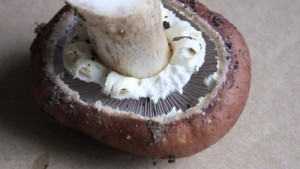
Back in winter, my friend Alex and I were planning on starting a mushroom farm on the property. Unfortunately our calls for logs (oak, birch, beech, etc.) didn’t produce any, and so the inoculation season passed us by. But all was not lost. In 2010 I bought and planted mycelium of King Stropharia. Stropharia rugosoannulata, also known as the wine cap stropharia, “garden giant” or burgundy mushroom, never materialized in the bed where I planted it, but a couple of years ago he started making regular appearances, all over the place, also in my vegetable garden. He did so again on April 5 after it had rained for a couple of days, and I was ready!
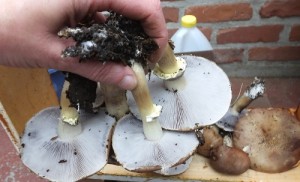
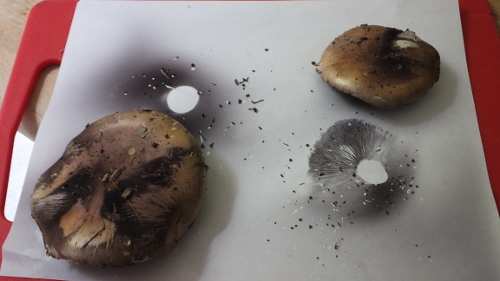
King Stropharia is easy to identify by the wrinkled, almost gilled ring around its stem – hence “rugosoannulata,” meaning “wrinkled-ringed”.
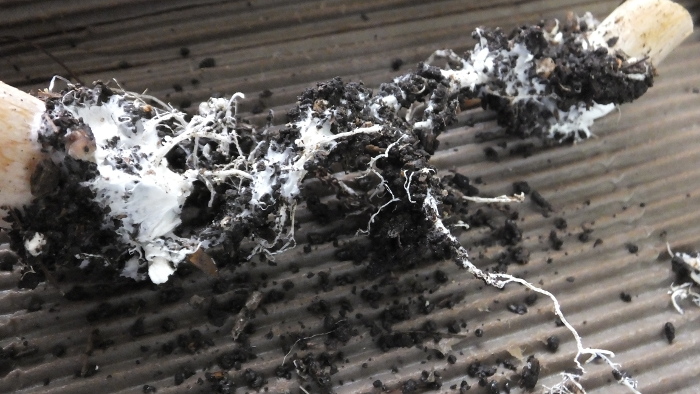
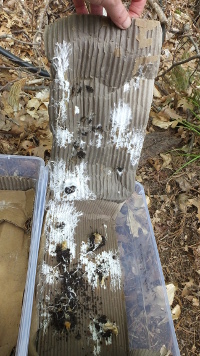
Alex and I had planned to buy spawn, but this was better. This was not some sterile, mamby-pamby lab-grown weakling but a rugged, over-wintered, tried and tested Stropharia who was already at home in my garden! I plucked some of the mushrooms (left some in the ground too) and collected the spores from several of them. Others I fried up with some onions, salt and pepper, but not before I cut off their stem butts and planted those in between two sheets of wet cardboard.
Gorgeous mycelium!Several stages of maturity.
Spore prints. I scraped these off the paper with a sharp knife, into a tiny box that now contains millions of spores. They will keep for years. I plan to make a spore slurry with them.
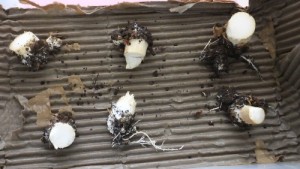
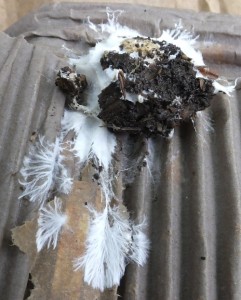
I put the butts in plastic boxes which I kept in my “cool closet,” where I keep all the medicinals. The mycelium grew steadily and today they are as ready as I’ll ever know they’ll be. Paul Stamets says something like: the mycelium runs and if you don’t let it, it will die. It is also overcast and threatening to rain, so the weather too said, let’s run with it!
I chose a spot underneath a small oak and my largest hazel (mushrooms and hazel nuts, can you think of a better combination?), carefully scraped off and set aside the top inch of duff/soil, then lay the cardboard mycelium down. Then I replaced the soil and added a healthy cover of decomposed leaves, then watered, with rain water, of course. Let’s see what happens!
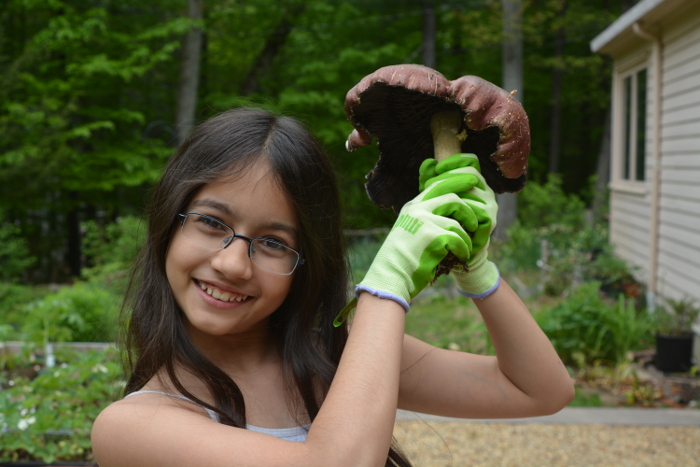
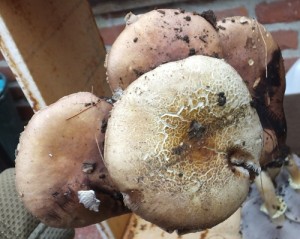
If you want to know why he’s called the “Garden Giant,” check out this mushroom, which popped up in wood chip heaven, that is, our front yard.
And this wasn’t even the largest one of the clutch. Am I concerned about fungi all over my vegetable garden? No, on the contrary, Paul Stamets has shown that many fungi, among them King Stropharia, are great companions to plants!
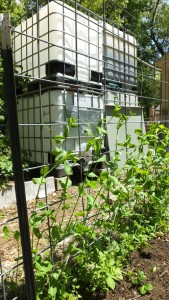
Four times 275 gallons. The two closest empty as yet. Peas in front.
From the beginning (2008), I have gardened organically – better than “organically,” actually. For instance, I always refused to use the hose, that is, tap water, in my gardens. Even as the garden grew larger and more labor intensive, I insisted on watering with buckets and watering cans. Some relief came when I installed drip in my big vegetable and berry gardens two years ago. And whenever I ran out of rain water, earlier and earlier each year even as I added more and more catchment, I still refused to use that tap water. That is because, in our town, the tap water is full of chlorine and fluoride, which are detrimental to the life in the soil.
And so, year after year, usually in August, I “lost” my gardens. Vegetables didn’t grow so lush, fruits didn’t ripen, berry bushes stayed small, hunkered down. But I insisted: the soil is more important than the plants that grow in it, because the soil is the long-term bank account, the wealth of nutrients, life and diversity that makes the plants possible in the first place.
I realize that I have the luxury of other food sources (our CSA, mainly) that make this attitude possible, and I am well aware that such a situation can make a body complacent. Truth is, I’d rather be a good tender of the soil and a good farmer/gardener, to triumphantly raise a handful of dark, thick, sticky soil shot through with worms and mycelium and a plump, juice, deep-red bell pepper or even a five pound water melon.
My first concern (but only for starters) was water. Our droughts have been getting worse and none of us expect it to get any better. So a friend and I arranged for another order of those second-hand 275 gallon IBC totes ($75 each), and soon other gardeners, schools and churches got in on it. One day a month ago a big trailer pulled up to my house and we shoved no less than twelve of those massive, ugly totes onto my driveway (the neighbors are used to it.) We rinsed out the left-over vegetable oils and then they were picked up, one by one, till I was left with four. We installed two of those next to my original two, making for 1,100 gallons of water storage. I plan to add a couple more smaller rain barrels in several places. As for the other two totes, the idea was to use one as a watering tank, the other as a dunking tank for mushrooms – about which later – but the mushroom inoculation season escaped us while we waited for logs to become available. I may hook them up into another tower in the chicken yard… One can never have enough rain water stored away!
{UPDATE 5/28} One can have as much storage as one wants, but first of all it needs to rain! Since I wrote this post, no rain has fallen, and I am down to 1/8 of the first lower barrel. Tomorrow let’s dance for the rain gods.
Both my colonies perished over the winter. When I opened them up in early spring I found only a handful of dead bees (no queen, that I could see), and quite a bit of honey left. It was too late, the bee bodies were too decomposed, to send off a sample to the Beltsville Lab, where they would try to diagnose the cause of the demise (for free, too). So I can only speculate about what happened. One scenario is that on warm days foragers left to look for pollen or water and, for some reason (pesticides, mite disease), didn’t return, then a new group was roped into foraging, dispatched, didn’t return, and so forth, till there was only a handful left. Or they all left en masse, in a massive death exodus…
I asked my neighborhood beekeepers. The results alarmed all of us: some (strangely enough those with apiaries with more then six hives) did well, but most of us with smaller apiaries has 50-100% losses. Altogether, of the 23 hives that I know of (kept by 10 backyard beekeepers), 16 did not make it: a 70 percent loss. And in 90% of those cases the same scenario played out: a handful of bees left, and lots of honey stores. This situation is alarming because we don’t know the causes, so are groping for solutions – with a wide-spectrum approach on all fronts (pesticides, acclimated bee populations, mite treatment, etc.) a big task for the usual backyard beekeeper, and especially for beginners. It is also unsustainable. We can’t keep buying bees and queens from the state of Georgia…
Time to do something.
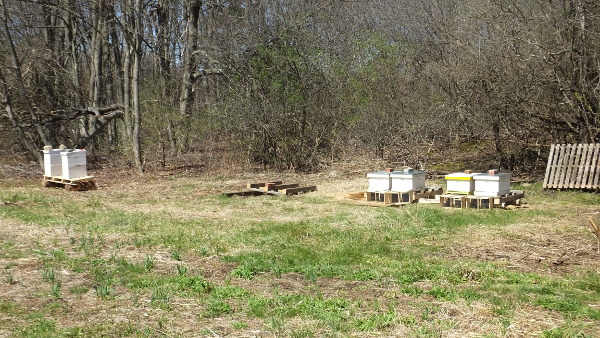
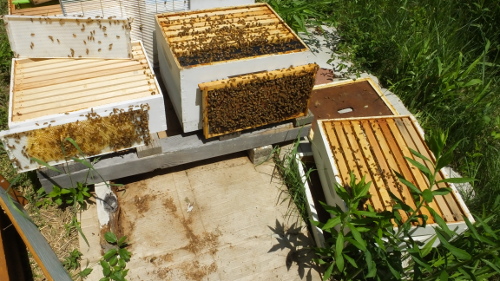
As a first step I put all my thoughts down in a letter to all my neighbors in our local newspaper (copied below). Then I ordered no less than four packages (yes, those Italians from Georgia – one last time) and started sourcing local queens. I also successfully petitioned the Wayland Conservation Commission to let me, and any local backyard beekeeper, keep those bees near the Community Gardens (pollination services), which is also near the Sudbury River and large stretches of conservation land (lots of bee forage).
My four on the right. The two double nucs to the left are a fellow beekeeper’s. The empty pallet in the middle soon gained another colony from yet another beekeepers. It’s a community yard!
I hived those packages on April 11 and they are thriving. Soon I will check for mites with a sugar roll – a new bee friend showed me how to do it properly, so I won’t have to repeat my one disastrous attempt. Then, if necessary, I will treat with the oxalic acid fumigator. I will also start the bees on rearing some extra queens from the Italians, and I’ll buy, beg, or borrow some other queens (local Russians, Carniolans, and mutts), for optimal diversity. And then I will split those four packages, and split again, and again, aiming to go into winter with around twenty colonies (half in Langstroths, half in nuc boxes – let’s experiment with that as well). The ones that overwinter will be split again and will be made available to the local beekeepers – no more packages and queens from Georgia for them either! Sorry, Georgia, but it isn’t working out.
Stayed tuned for lots of bee fun!
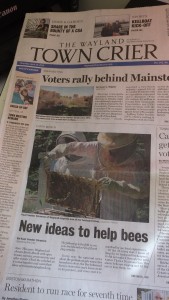
Wayland Earth Month: New Ideas to Help Bees, by Kaat Vander Straeten (Wayland Town Crier of April 15, 2016)
Every year the national news about the pollinators gets worse (for honeybees alone, the Bee Informed Survey shows this year’s losses at 40 to 45 percent), and every year it is matched by our local experiences. Of the 23 hives that I know of (kept by 10 backyard beekeepers), 16 did not make it through this mild winter. That’s a 70 percent loss. The alarm bells are ringing and I’d like you to hear them, too.
But to most of you, the complex of stressors assailing the bees (explained below) may seem like one of those Big Ones that is not 100 percent studied yet, or inevitable, or so difficult that there is nothing you feel you can do about it.
Let me tell you, when year after year I open my hives and find most of my bees dead, I know it’s 100 percent a sure thing, and I know that it’s not inevitable, and that there is a lot we can do.
The problems are complex, no doubt about it, but science and beekeeper experience have identified plenty of opportunities to contain them. Here’s one. Some years I have found my bees dead of starvation with plenty of honey only 3 inches away, but the long-lasting “troughs†of deep cold prevented them from breaking their warm cluster to get to it. I wrap my hives with insulation, and this year I will switch to a hardier breed.
Every year I see an abundant nectar flow in spring, with good amounts of honey to “rob†in early summer, but I’ve learned not to rob too much, because late summer and fall nectar flows increasingly disappoint. This indicates the gardeners and landscapers in my suburban neighborhood favor bee-friendly flowering plants in the spring, but not in late summer and fall, and that they’re good at eradicating the late-flowering weeds like goldenrod. Fall honey is the honey these colonies need to survive winter. Feeding sugar is a Band-Aid we often use, and we are switching to bee breeds that eat less in winter.
We also see more “shotgun frames,†capped brood frames in which many cells have been emptied out. Often this means that the queen mated with one or more drones too closely related to her. She is now laying “inbred,†nonviable eggs. The nurse bees have a way of sniffing these out, and they get rid of them. When the beekeeper replaces that queen, she may find the next one is just as bad. That is because the genetic diversity of our bees is coming up on a major bottleneck. Parasites and viruses, pollution and loss of habitat have wiped out the genetically rich feral bees with whom our queens could mate, and commercial queen breeders use too few queen mothers (it is estimated that less than 500 queen mothers are used to produce around 900,000 daughter queens annually for commercial sale in the U.S.). Moreover they breed queens for honey production and gentleness, not for longevity. All this is not so easy to solve, but breeders are working on it, and adding diversity to the backyard apiary will help.
We also see increasing pressure from varroa mites. Imagine a parasite the size of a rabbit sinking its teeth into you, spewing all kinds of viruses and diseases into your body. That is “varroa destructor,†the pest that, in the ’80s, killed off almost all the feral and “kept†bees (those were hard years). Injudicious use of pesticides soon created “super-mites,†which we cannot get rid of. Beekeepers can use Integrated Pest Management and organic treatments. We can also switch to so-called “hygienic†bees, which groom each other of most mites.
The lost bees of Wayland may have suffered from any or all of the above – not acclimatized, lacking in forage, compromised by their breeding, weakened by mites and diseases. Marla Spivak, in a TEDtalk that I recommend, asks you to think back to the last time you had the flu. Now imagine you have to search a long time to find any nutritious food, and that when you find it, it is poisoned.
Our bees may, at the end of fall, have had the misfortune of foraging a patch of late blooming and exceptionally toxic flowers. Or they may, over the course of the year, have foraged several below-threshold toxic fields of flowers – below threshold for one dose. Usually the toxin in question is a neonicotinoid, a type of systemic pesticide used in monocultures of corn and soy and in gardens all over our town. This would have weakened their immune systems even further and/or messed up their orientation. And so they didn’t make it home.
The last thing I want is for this lineup to masquerade as “hopeless.†It truly isn’t. With our BEElieve beekeepers group, I plan to change my beekeeping practices and start raising a diversity of local, acclimatized, hygienic bee – a “Wayland Bee.â€
May I ask you to stop spraying the neonicotinoids, to ask your landscaper to stop spraying them and your favorite garden center to stop selling them? “Neonics†come in two forms. The first is in a bottle that anyone can grab at the garden center or hardware store. If the list of active ingredients names one of the following, that bottle contains a neonic – Acetamiprid, Clothianidin, Dinotefuran, Imidacloprid, Nitenpyram, Thiocloprid, or Thiamethoxam. You can safely dispose of it by returning it to the store or by bringing it to Household Hazardous Waste Day at the Transfer Station, which takes place twice a year, the next one on June 18 (register here).
The second way you may be importing neonics is in seeds and plants. Neonics are systemic in that you need to treat only one part of the plant, or the soil in which it grows, or even just the seed, and it will suffuse the entire plant, including the nectar and pollen. More and more ornamental plants are being grown by a few ultra-large suppliers, and virtually all of them use neonics. Ask your garden center if the plant you like has neonics in is history. If it does, or they’re not sure, leave that plant on their counter.
But wait, there is even more you can do! Grow bee-friendly gardens that set out a nectar buffet from early spring to late fall. Join me in asking our town, the state’s Highway Division, and the utilities to plant low-growing flowers in fields, along roadsides and under power lines. You will be helping not just honeybees, but all the pollinators.
We can do this out of admiration for these amazing, hardworking creatures, and also simply because we like to eat. Without pollinators, we’d have no broccoli, cucumber, tomato, eggplant, lettuce, watermelons, apples, pears, almonds, cotton, and much less meat (alfalfa, the main livestock food, needs pollination). Let’s make it safe for the pollinators to feed themselves, meanwhile feeding us as well.
Kaat Vander Straeten lives in Wayland and has been a beekeeper for six years. She can be contacted at kaat@transitionwayland.org.
I got a comment from Ashley about her mead. My apologies, Ashley, for responding so late, but in any case I can’t help much. I’m just a dabbler in mead myself, and do most mead making by the seat of my pants, eyeballing it and experimenting. I’ve not yet had to throw away any mead, but some (usually a melomel) has tasted better than others! If you would still like some ideas, I’d say your yeast didn’t have enough sugar, or lacked something else, and so consumed all it could then died too quickly. I’d rack the mead to get rid of the graveyard at the bottom and to oxygenate anew, then add new yeast and sugar.
As for my mead, DH will need the two big carboys soon for his wine, and so I had to empty the one with an old mead that was still sitting in the basement (started in August 2014). It was flat and tasteless, but it hadn’t turned to vinegar, so instead of chucking it, I decided to experiment. I racked it into two smaller bottles. In one I put dried apples and peach leather. In the other, one fresh green apple and a large spoonful of a friend’s raspberry jam. I put the bottles in the porch to warm up a bit and will add fresh champagne yeast and some more honey and let it ferment away again. Like I said, it’s all an experiment.
Music is such a large part of our lives. Amie is playing classical pieces that truly ask the best of her. It is a marvel to see her small fingers dance on the fretless fingerboard, touching each note. Her playing folk with some of the kind folks of the 12 Georgia is a lot of fun. So far, the guitar sings Twinkle Twinkle and House of the Rising Sun. I love it when she practices. When I bring her with me to visit our friend Rebecca, we bring her cello and she plays. Rebecca, who can no longer speak, studies her intently, like she is trying to engrave her, or her song, in her memory – I like to think so she will remember them on the other side of life.
As for myself, I never had any musical education and can’t even read music, but I do have a good singing voice. Never very confident, I’ve always kept silent, but now I am changing my mind about that. IÂ may never play the cello, but I can honor the world with my song and tell story and make beauty that way. So I picked up my courage and sang, full-breasted, Â “The Wind That Shakes The Barley” for Rebecca. Apart from my closest family, she was my first audience and she liked it very much, I could tell.
Because it is for the world I want to sing, I want to sing songs from all over the world, songs that go way back or way deep too. Right now I’m learning Gaelic “Song of Amergin,” which according to some sources means “Birth of Song”. It is an ancient wizard riddle that may go back to the 4th or 5th century. The language is wicked hard to pronounce and then to memorize, and so are the subtle pitch changes, the unexpected melodies, and the tremelos. I take it line by line and it becomes an invocation. My guide on this song too is Lisa Gerrard of Dead Can Dance (she sings it here, but I wish it didn’t have the ever louder background music).
With song comes wine. We measured the specific gravity of the crushed grape juice (1.04 for the Malbec, 1.08 for the Cabernet), then put the yeast to it. We need to feed it in a months time.
I just went into my two hives. One of them at least has overcrowded and hot – indicated by the massive bearding that begins in the late afternoon and continues through the night until the foragers go out again in the morning. They don’t abandon this way of keeping the hive cool inside even when it rains: scores of bees drown then. No swarming, though. Knock on wood! But if these hives survive the winter, I’d better be ready come spring!
I harvested 90 pounds of honey at the end of July. Considering these were first-year packages (on fully drawn-out frames, however), that was a gift. For the harvest  I used a bee escape built and lent to me by a friend. It was the first time I used it and it worked  great, on both hives (24 hours each). No more brushing angry bees off the individual frames, what a relief!
Today’s quick inspection when the hives were in the shade was pretty mellow. I just took a peek in the supers. There’s some honey in there, not much, and nothing capped. This was expected as the nectar flow has been bad, what with the drought. I had one and a half supers still dripping with honey from the harvest, so stuck one on top of each hive to let the bees clean out the frames. I’ll take them off again in a few days, before they start putting new honey in there or putting burr comb all over them.
Hopefully there will be another honey harvest after the fall nectar flow. We’ve had a week of good, mostly gentle rains, so hopefully the flowers will get going and flowing again.
I’ve become a much more hands-off beekeeper over the years. In my first year I used to go in every two weeks. Now, every time I prepare (lighting the smoker, getting into my gear in the backyard) and walk over to the apiary, I need to take a bit of a breath to calm my heart. Over the years I’ve come to realize that these are massive organisms I am messing with, often 50,000 bees busily doing their complex and enigmatic thing, who knows in what kind of mood, under what stress. That I am bigger may mean nothing to them: they’re 50,000, I’m just one. I often imagine what it would be like to accidentally drop a full frame or box, to go in at the very wrong moment, smelling of the wrong thing. Yes, there’s some fear there, but not the paralyzing kind, so I am not hands-off because of it. If anything, it makes my experience when I go in so much more intense and pleasurable. No longer thinking I am in control, but more there, with them, more respectful and awed (I for them, if they respect me, I wouldn’t know or presume), and more myself, too. So, if we realize Neighborwoods –  a bit more land – I think that I’ll build a much bigger apiary. Twenty, even fifty, hives, with room for queen and bee rearing,  now that would be life!
 Then came hive 4 (Italian queen: Bianca). Even visually, walking into the bee yard, she was clearly the heaviest in population. As I started my visitation of each frame, a suspicion was soon confirmed. These girls were getting ready to swarm! No eggs at all, and no less than six massive, occupied, but as yet uncapped swarm cells.
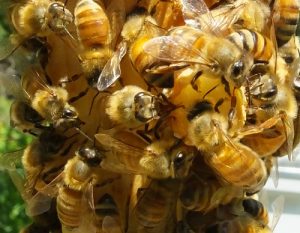
 I hope to go back later today, before the rain, for one last effort to find Bianca and put her in a nuc. I’ll monitor the new queen situation closely – luckily I have two mated queens coming, from Sam Comfort’s Anarchy Apiary stock, so if I need one, they’ll be here Tuesday or Wednesday.
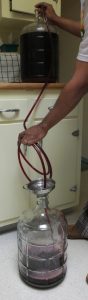
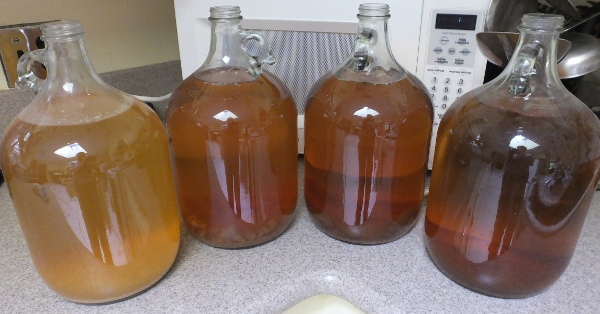 Yesterday we racked DH’s two wines (3 gallons each of Cabernet and Malbec) and my four meads (one of which turned into vinegar).
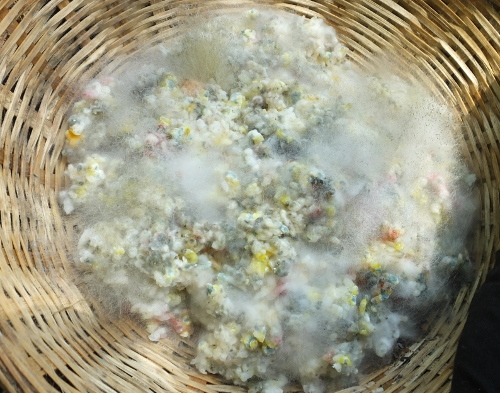
 I chopped, blended, dumped the goop into the bucket, added a layer of sugar, and kept at it till the two batches were done and I had 1/3 of head space in each pail, in which I put some wet salt marsh hay – whatever is on hand is fine, to act as a smell filter. Then I put on the lids and put it in a cool, dark place.
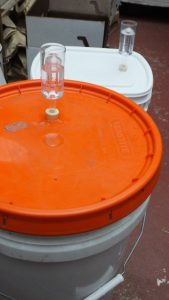
 I chose a spot underneath a small oak and my largest hazel (mushrooms and hazel nuts, can you think of a better combination?), carefully scraped off and set aside the top inch of duff/soil, then lay the cardboard mycelium down. Then I replaced the soil and added a healthy cover of decomposed leaves, then watered, with rain water, of course. Let’s see what happens!