Stones, Stones, Stones

We had a glorious weekend. After 5 days of noise and dust, the patio is finished. I’ll take a picture of it once the coming rains have washed it clean. The challenge now is to level the surrounding soil and clear it of stones, stones, stones, and to grow grass and plantings around it. I found that Home Depot has a neat little tractor for rent with a scoop, a leveler, a trencher and augers. It’s not too  expensive and it will fit through our garden gate. It’s on our list for the next rainless weekend.

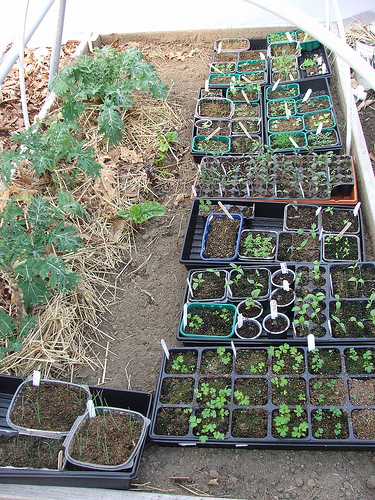
The seedlings (except for the brassicas and spinach) went out twice for some sun, the first time in the diffuse light of the hoop house, the second time in the morning sun on our balcony. I also fed them (fish emulsion) for the first time. Some of them are ready for transplanting, but I’ve been moving things around on my garden plan and haven’t settled on a place for them yet.

4450018721_5171645c06

I also dug two more new garden beds (each 4 x 8′). The first one took 3 hours. The second one took about 10! It’s only the5 feet West of the first one, but the ground was full of glass, tree and other roots, marbles, small liquor and medicine bottles, broken tiles, and stones (bricks), stones (boulders), stones (slate).

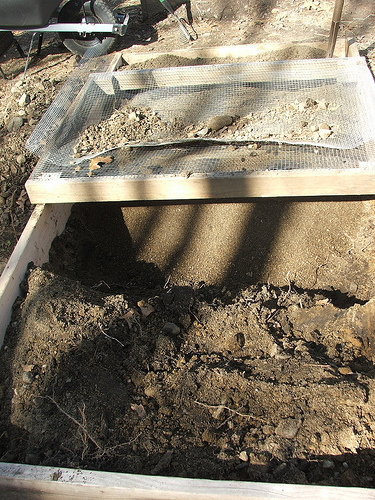
In the picture below you see the operation. I dig half the bed, 1 foot down, dumping that soil on the other half. I place the screen (1″ and 1/2″ hardware cloth) over the hole and sift the soil from the other half through it. It takes some manouvering, especially in the end. That fills the hole, and for the bed itself (the extra 9″) I use the soil from the old potato towers and the excavation for the new patio (also full of rocks). It’s good not to bring in new (already sifted) soil and to use the materials on the property, but that material is quite a challenge.

4450791764_0de585493c

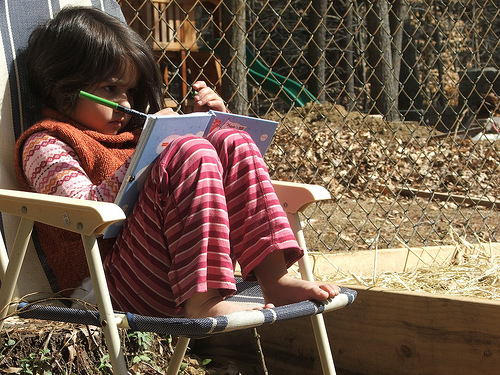
What was best of all was Amie making herself at home in the garden while I worked. Here she is, writing secret messages in her diary.
4450021945_a08aa1563f

Rain Catchment System

rainwatersystem2

Part of our plans for the front garden – the flower garden – is a pond system at the bottom of the hill that will catch the runoff from the hill and from our roof. The pond will be a wildlife pond, its overflow a wetland. The pond will not be for watering our garden – for that we’d need a pump, and we’d like to keep this as simple and non-automated as we can. We want it for wildlife, for the bees – honey bees need a source of standing water to process the honey – for (edible) fish and for relaxation.

But I’ll write more about the pond and wetland later. Here I am concerned with the “top part” of the system: the connection between our roof and the system.

We want to catch water on top of the hill because (1) that’s where our veg garden is and (2) that’s where our house is, and we take the water from those barrels to flush our toilet – the latter is still a simple bucket system but we’re looking for a way to hook the barrels to the toilet cistern (again, later). For that reason we bought four big rain barrels last year, and we might purchase a couple more as our Town now offers a good deal.

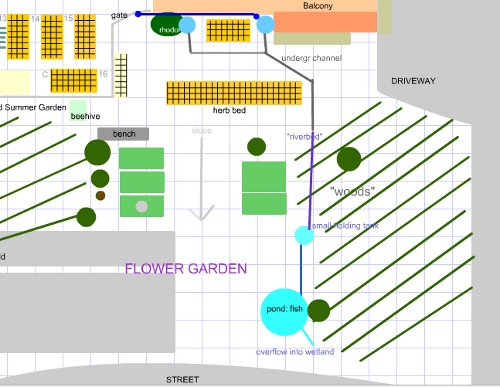
We could put 3 barrels up front, connected to 2 downspouts that take water from the biggest part of the roof, and 2 in the back, where one gutter takes an equal amount. The front part gets more barrels because they can service (by bucket) both the veg garden and (by gravity) the herb beds and the flower garden downhill – consult this (not recent) map.

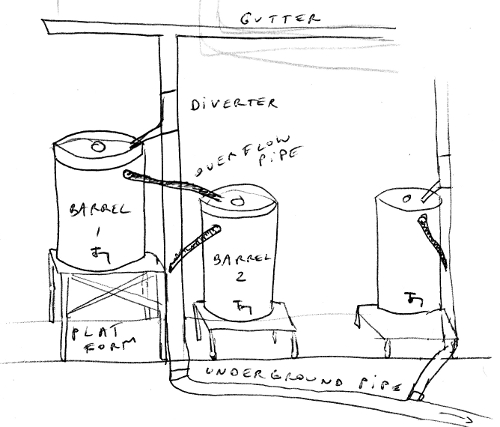
We’ll put simple diverters on each downspout to get the water into the first barrel, which will be on a high platform. We want the simple kind of diverter because we found a cheaper solution to overflow. Once that barrel are full, its overflow pipes will guide the water to the next barrel in line (positioned on a lower platform for access to the tap). Once the last barrel on the line is full, its overflow pipe will guide the excess back into the gutter.

Here’s another sample of my atrocious (or just plain rusty) drawing skills:

rainwatersystem

In the back of the house, the overflow will disappear into the dry well which will feed it to the groundwater and so on to the aquifer that is under our neighborhood.

In the front we will connect the downspouts to underground pvc pipes that will “surface” on the rim of our hill. Where the underground pipe surfaces, in a patch we call the “woods”, we want to create some sort of brook bed that will take the water to the flower garden pond. We’re thinking we might saw a pipe in half, bury the halves and fill them with stones and pebbles, and plantings. But, about that part, later.

First lets get the downspout/underground system in place, so my herb bed plantings and the reseeding of the grass on the slope won’t be washed away by the rains that are sure to come (back). That’s our plan for this weekend!

All I Got Done Was…

1. Topped off the large new bed.
2. Sowed 60 peas (5 kinds) in it (along its entire length next to the fence).
3. Didn’t forget to inoculate them.
4. But forgot to chit them. I figure if I keep the bed wet till germination we’ll be okay. (Okay, this is cheating.)
5. Built frame for new bed (4 x 8′).

dscf1127

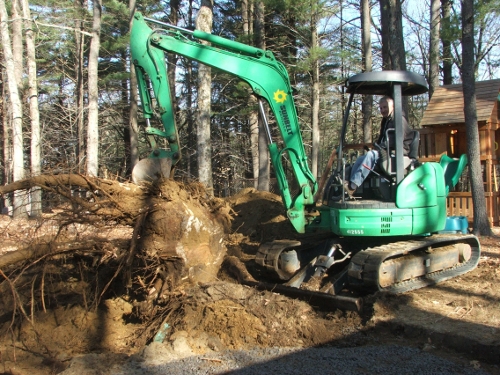
6. Watched excavator dig out the stump of a 50-year-old pine and (a) enjoyed renewed faith in these trees to stay upright in high winds, (b) dreamed about all the things I could do if I had a little machine like that! (this one’s for One Straw, really).
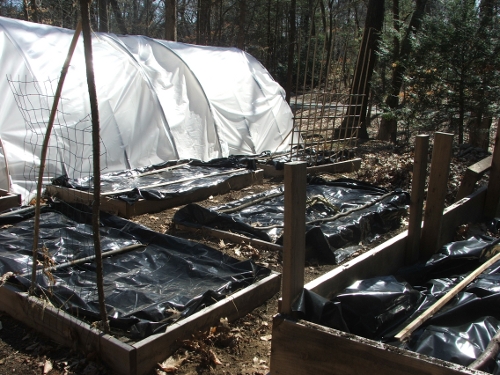
7. Tidied all beds and saw that the black plastic and the warm weather – today was 60F! – had done their work: no more frozen soil. We’re a go for many seeds and seedlings to go in.
8. Cleaned out hoop house.
9. Collected all the sticks I want to use in the windbreak for the hive.

dscf1139

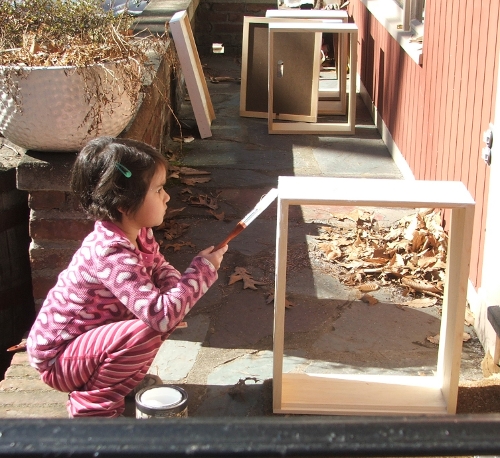
10. Painted the hive with Amie’s help. I know, I went for just safe bet: white – read that it confuses the bees if you paint it different colors.

dscf09661

dscf09731

11. Harvested tiny carrots, mache, mizuna and two something-elses that I can’t identify from the hoop house. Unfortunately, when I put these seeds in at the beginning of Winter, I didn’t take notes. Any ideas? The second one has bumps, like goosebumps, all over the leaves. {UPDATE} The first one is Claytonia.

dscf1145

12. Took pictures of Amie loving the mache. She just pinched off the leaves and ate them on the spot. This is a miracle, for up until now she would not eat anything that is green.
13. Drove through my flooded town to bee class and learned that bears go after hives not for the honey but for the bee larvae and pupae. That puts Winnie the Pooh up there with Popeye (*)
(*) What’s that about Popeye, you ask? Though spinach contains a lot of iron, none of it can be absorbed by humans.

Real Food Challenge: Soil and Bread

real_food_challenge_large1

A neighbor was walking by when I was digging and filling the new garden bed (our side-yard veg garden is fully visible from the street) and he came up the hill to tell me: “You’re hard at work again! And always with a smile!” I smiled but refrained from telling him what I was thinking about that made me smile so.

I was wondering what I could learn from the taste or smell of the soil. A trained palette or nose should be able to pick up certain chemicals and chemical combinations, how wet the soil is, its temperature, its crumb. Crumb… mmmm. It sounded so yummy and enticing as I was running that thick, black soil through my fingers.

No, I didn’t taste it, I only smelled it. But I did go inside to plunge my hands and nose into the Real Food Challenge that stumps me the most: baking -  anything with flour.

~

dscf1120

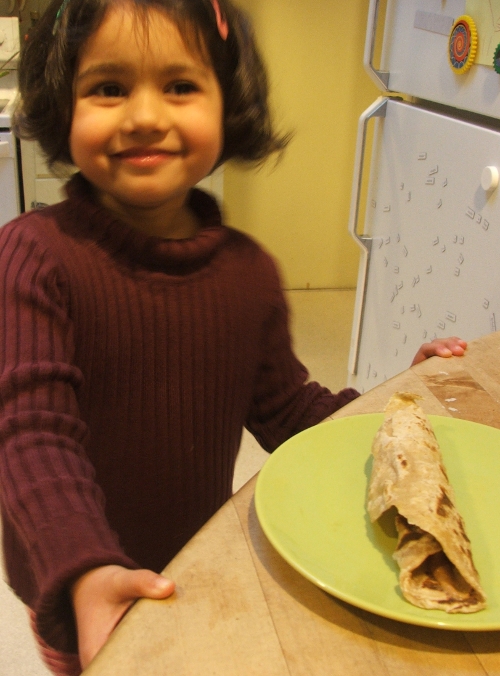
I made these tortillas. They’re easy, quick and yummy. Healthy, too, as I made them whole wheat and all eight of them contain in all 2 teaspoons of oil, and you cook them in a dry skillet. They’re Tex-Mex flour tortillas but I called them chapatis for the sake of combining them with this curried red lentil soup – equally quick, tasty and healthy. Amie enjoyed hers with peanut butter. We won’t be buying any more tortillas at whole Foods.

dscf1110

Also flour-related, this week I want to make homemade spinach pasta. A friend, hearing of my pasta cravings and despairing she’ll ever get round to making her own again, lent me her pasta machine: the real deal from Italy. I can’t wait to get those rollers going.

~

It has been promised that tomorrow the rain is finally going to stop. I plan to transplant chard, lettuce and spinach seedlings from the basement into the hoop house and to sow the peas. I also need to move the compost bin that’s closest to the kitchen, as it’s in the way of the stonemasons who are coming to redo our 20-year-old patio. I also want to try my hand at somehow constructing a windbreak/fence for my hive out of the sticks, branches and bark I’ve been collecting since we arrived here.

Mushroom Spawn Order

The mushroom growing in one of the veg beds in the hoop house is yet more proof that we have a fungal (as against bacterial) soil. We also have wild patches, which we call “the woods,” with plenty of room for  edible mushrooms of our own choosing.

From Field and Forest Products, for growing on substrates (wood chips, straw, pine needles, etc.) I ordered:

  • Italian Oyster (Pleurotus pulmonarius): 2 lbs of grain spawn
  • Blewit (Clitocybe nuda): 2 lbs of grain spawn {turns out they don’t carry this anymore}
  • Wine Cap (Stropharia rugosa annulata): 2.5 lbs of sawdust spawn

For on logs (oak):

  • Shiitake (Lentinula edodes) WR 46: 250 plugs (inoculates 5 logs)

I can ask my neighbor, who cuts down trees and/or sells firewood, for wood chips. Those will be free, as are the billions of pine needles and twigs and old leaves strewn around our backyard. I chose more of the substrate mushrooms for this reason: we use what we have on the property. And I like the idea of beds.

I still haven’t made the bush and vine order. It’s a lot of money,  and I don’t know if we have enough sunlight – even for the shade loving ones. I don’t know how to prune… Another steep learning curve to climb and as always I need a bit of a run-up to get going. Reculer pour mieux sauter: taking a couple of steps back for a longer jump.

Wild Is Old (Owls)

The other night my birdwatching neighbor came over to tell me there are is Barred Owl (Strix Varia) nesting in the trees behind our property and that I should listen for its calls. That evening, there it was, that typical “Who Cooks For You” call. By the time we got the mike out there, the call had changed to:

owlhoot1 and owlhoot2

(We are thinking of placing a mike on top of our roof, and whenever we hear something – the fisher cat, or the owls – we plug it into a laptop and record it. Yet another scheme here on our Hill!)

As we listened that evening I said to DH how wild it was, how I love how wild this place is (I wrote about the contrast with Europe here). DH remarked that surely an owl is not that wild – maybe he had jaguars in mind, and grizzly bears.

I replied an owl is pretty wild. What do I mean by wild, or wilderness? It took me not a second to answer it: Wild is Old.

That owl up there, high up in the tree, in the wind and the total darkness, is calling for a mate as it has been calling, with that exact same call, for millions of years.

Compare this with us, humans, our many, many languages, our many more ways of wooing, of saying “I want you” and “here I am”. And we’re changing  those every thousand years, every generation, every day. We are constantly adapting, transforming, cultivating, culturing.

The owls, the fisher cats, the bees, they don’t change. They stay wild. Their wild ways work for them as they did millions of years ago. That is wild. Wild is Old.

Hoop House 3.0: Modular, Still Movable

{UPDATE} look here for the finished product!

Like I said in an earlier post, I would not recommend our present hoop house design to anyone who has gust of wind and lots of snow. It has served the purpose of getting us going, of experimentation, and we are still hoping for a Winter Harvest (I’ll be sure to harvest something before March 20). But the idea is to have a movable hoop house, and to move it on our last frost date (predicted by yours truly to be 1 May) to its Summer position. And before we move it, we want to redesign it.

We want it sturdier, more wind and snow-proof, more airtight, with more ventilation possibilities, and a sturdy tight door (or two). We’d like heavier, more durable and more transparent poly (this one looks good but it’s expensive).

To get all this, the new design will involve some wooden and metal parts (where at present the whole thing is pvc). And because we still want it to be movable in the sense of pick-up-able (so as to avoid soil and pest problems), we will have to make it modular. It will be made of pieces, fit together, that can be taken apart and moved and refitted by 2-4 people in the span of a couple of hours.

We are copying some ideas from this design (which is not movable).

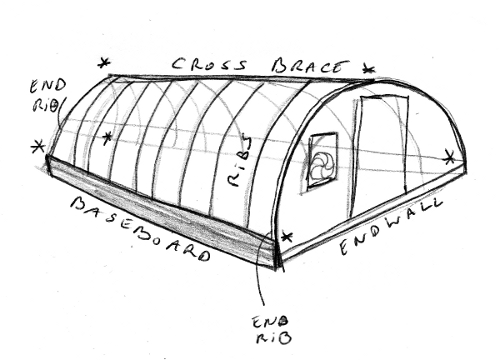
So here is the first draft:hoophouse2_b

  • 20′ pvc pipes for the ribs, so they will be 1 piece across, so no breaking connectors (definitely the weak points in our first design).
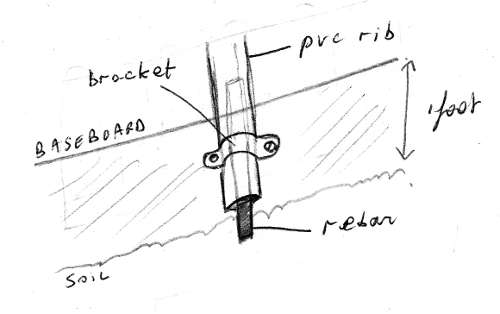
    Rebars are pounded into the ground and the ribs are fitted over them so they are tensed in an arc.
  • Along each long side of the house a wooden baseboard (of no less than 1 foot high, to guide sliding snow away from the base) is  attached to these “rebarred” ribs by brackets. This will prevent these 2 long baseboards from warping and will anchor the whole structure to the ground.

hoophouse2_a

  • To these 2 long baseboards are fixed (in a removable manner) (*) to the end walls.
  • These end walls are made of plywood. They will probably be the heaviest components. In each are cut two holes, for a door and a window.
  • These windows are opened either by automated arms or are fitted with fans that vent when it gets too hot inside.
  • The doors can be homemade of light wooden frames with poly stretched over it, or freecycled doors, preferably with glass in it, and frames, in which case they need to be easily removable by lifting them off their hinges.
  • The cross brace on top is 1 piece of rigid metal or pvc (probably pvc as that would be lighter). The apexes (apices?) of the ribs are fixed to this bar by ties.
  • Also this cross brace is fixed (again in a removable manner) (*) on either side to the end walls by brackets.
  • The poly is 2 big sheets bonded or glued (still have figure this one out) so it makes 1 seamless sheet.
  • The poly is stapled (permanently) to 1 of the wooden baseboards (call it A). On the other side, it is (permanently) stapled to a long wooden piece that gets screwed to (and can be unscrewed from) the other baseboard (call it B).
  • Along the end walls the poly is stretched over and around and fastened to the end ribs with the pvc clips we have at present (they’re pretty sturdy and handy). These end ribs are then fastened to the end walls with removable brackets.

So you get the idea. When we move the house, we

  1. detach the end ribs from the end walls (unscrew)
  2. detach the poly from the end ribs (undo the clips)
  3. detach the poly from baseboard B and move it over the ribs, setting it aside next to baseboard A to which it is still attached.
  4. detach the top cross brace from the ribs (cut the ties) and from the end walls (unscrew the brackets) and move it aside.
  5. detach the ribs from the baseboards (pull ’em out of their brackets and off the rebars).
  6. pull the rebars out of the ground.
  7. detach the baseboards from the end walls and move the end walls aside (possibly remove the doors first).
  8. move the baseboards (poly still attached to one) to the new position.
  9. reverse process.

We’ll be playing around with this. We also need to figure out how to make the 6 crucial structural attachments – (*) of baseboards to end walls and of top cross bar to end walls. A simply click system would be great, or some kind of bolting system. All removable screws and bolts need to be durable enough to stand up to repeated bolting and unbolting.

We still want this thing to be inexpensive, but we know that, with a better poly, the venting system, the wood and the hardware, we’ll be looking at something twice the price of what we have now. What we have now cost us about $200 – and we’ll reuse it as a shelter for our woodpiles.

Let me know what you think!

~

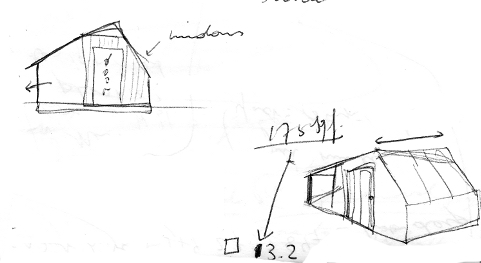
I’m also playing with some potting shed designs…

shedddrafts1

{UPDATE} look here for the finished product!

Cost of Beginning Beekeeping

dscf1031

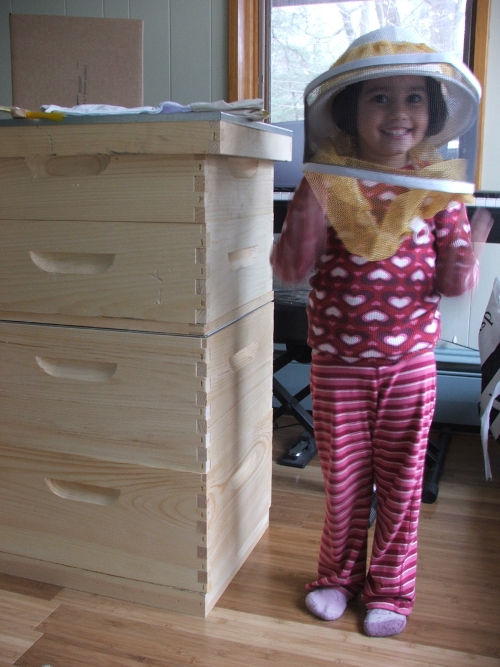
“When I grow up I’m going to be a beekeeper because i really like the hat”

I brought home the hive yesterday. Amie is so excited about it; it is finally becoming real, as in, not just Mama talking. She’s going to help me paint it, though she’s not happy about it having to be white or something close to that.

Having just purchased all the stuff necessary for begin a hive, I can break down some of the costs for you.

  • Beepackage: $88
  1. 3 lbs of bees
  2. 1 Italian queen (marked)
  • Hive kit: $209
  1. bottom board
  2. two deep supers with 20 one-piece Pierco frames
  3. metal queen excluder
  4. two medium supers with 20 one-piece Pierco frames
  5. inner cover
  6. outer cover
  • Accessories and clothing: $119
  1. one standard hive tool
  2. one hook end hive tool
  3. one 4×7 in stainless steel smoker
  4. one bee brush
  5. one protective veil (hat and veil)
  6. one set of goat skin gloves
  • Medication and feed: I’ll know more about this next week, but my informed estimate is about $40.
  • Others: entrance reducer, open bottom board, mouse excluders, etc.: next week, but about $30. Add around $35 for extra set of veil and gloves, for DH, perhaps.
  • Honey extraction: Professional beekeepers and beekeeping clubs rent equipment for honey extraction. One harvest costs about $20.

Total: $541

Garden Work

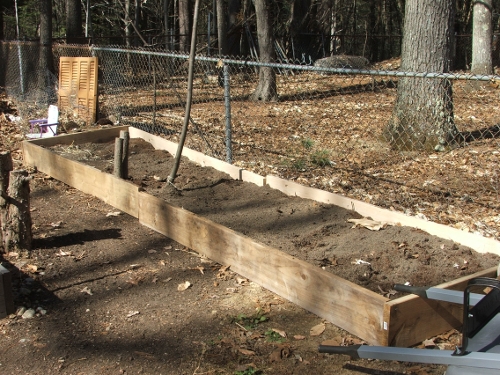
I did a lot of work in the garden today, another glorious Spring day. I filled up almost the entire new bed against the fence (4 x 16 feet). I am using the soil from the potato towers, which after sitting still for a good 7 months is showing its true nature: it’s full of pebble-sized cement crumbs. I’m sifting them out. The bed is about 2/3 full. It was back-breaking but feel-good work.

dscf1008

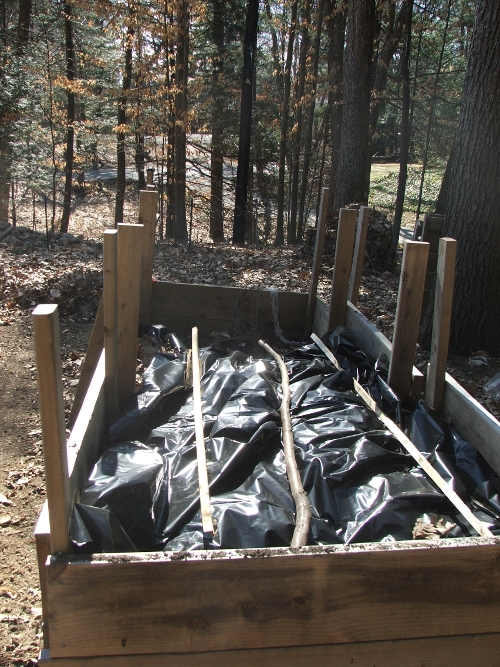
I’m only able to take off the top foot of the soil in the towers, the rest is still frozen. I covered it with black plastic so it will defrost quicker.

dscf1011

I also covered up most of the beds. They have straw on them, which has a high albedo, being light-colored and shiny, and the soil underneath it is more frozen than the beds without it. Amie said they finally do look like “beds” now.

dscf1012

She also laughed when Laura and Ma speculate that the moon is made of green (unripe) cheese, at the end of Little House in the Big Woods. “That’s so silly,” said Amie. I asked here “So what do you think the moon is made of, then?” And she very seriously replied: “Creamy soy milk.”

Well, that aside.

I brought my beehive home today, along with the veil, smoker, gloves and tools. I’ll write about that tomorrow. I’ll be moving the hive around on the property to see where it would be best – and to see how the neighbors react! About those neighbors, I have more ideas…