Whiskers on Chickens – Continued!

DSCF2943

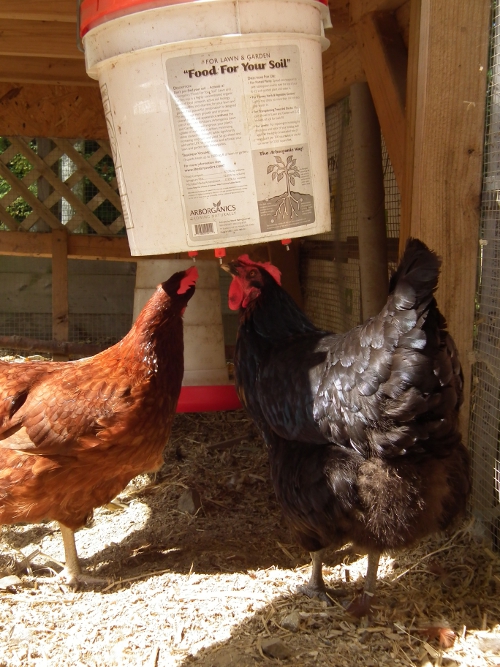
I can’t believe I never reported on this. About a month ago, on the recommendation of my chicken mentor  and fellow-blogger at This One Good Life, I ordered the Avian Aqua Miser from the good people at the Walden Effect, Anna and Mark. I installed three valves onto a five gallon bucket and hung it in the coop.

It took the hens a while to get it. I stayed with them because it was very hot and I didn’t want them to get dehydrated. The red color did attract them, but they just stared at it. Not one peck. I nudged the valves myself to make them drip but the ladies only drank from the dusty puddles in the soil. Finally I caught two of them and forced their beaks to the valves.  Still nothing. What to do? I got some yogurt (their favorite food) and dabbed it onto the valves. They went for it! Once one of them got it, they all followed suit.

They’ve been happily sipping since then. I like the tick-tick sound when they do.

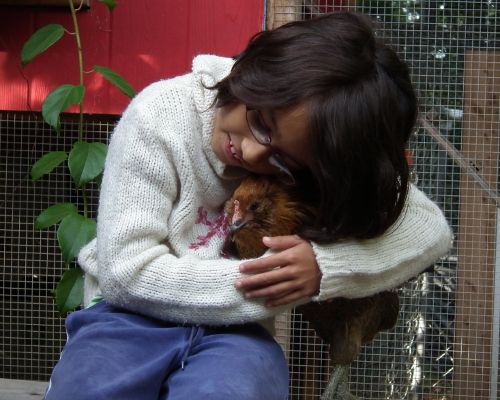
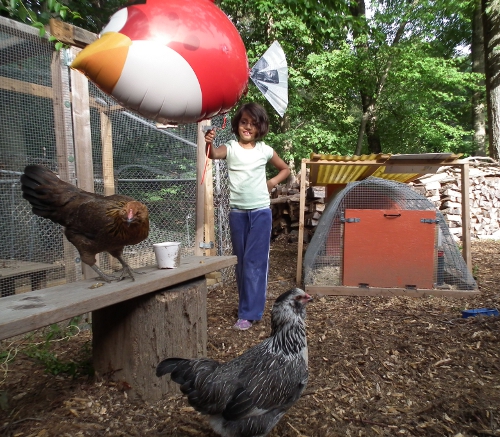
Remember that picture of Nocty-of-the-Whiskers that I took last week? I entered it into Anna and Mark’s new EZ Miser Waterer contest and it won second prize! I chose the EZ Chicken Watered Kit. This new system will be great in the run, where I can set it on a tree stump (on the old system the nipples go on the bottom, so you have to hang the bucket, but in the run there’s nothing strong enough to hold it).

Soon we will “solarize” the coop, and one of the elements will be to heat the waterer(s) so in winter the water doesn’t freeze. More on that later!

Thank you, Ana and Mark!  You are an inspiration!

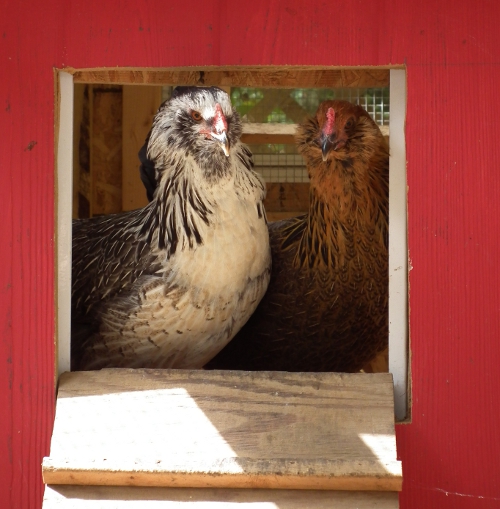
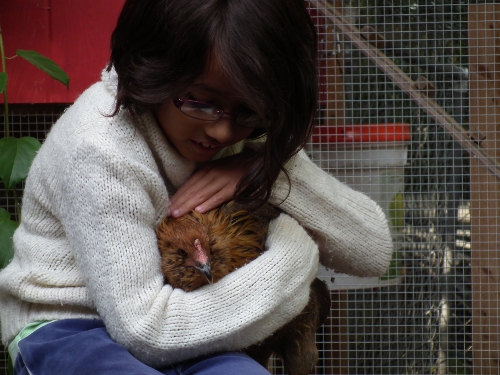
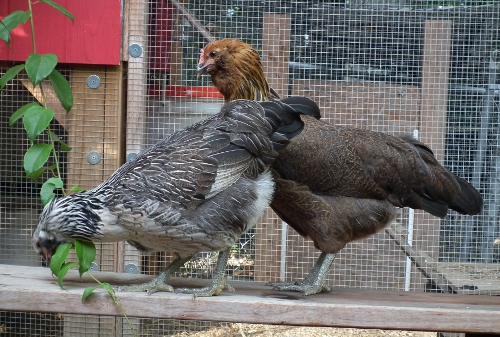
In the meantime, the newly introduced pullets Nocty and Oreo are looking on from the relative safety of the coop. I’m sure they’re hungry and thirsty, but they’ll just have to get their courage up and go down there.

DSCF2933

A Field, Friends, and Work!

As gardeners we often don’t get to work in a field.  It’s a different thing altogether to work in a field than in a garden. There is all that space, sky, sun. You walk from one end to the next (diagonally, so as to get the most out of it) and throughout the soil is soft and pliable underfoot. There is also a lot of work, so in this field one gets to grow not just food, but community as well.  And of course, none of us being farmers, we also grow an attitude of adventure, a tolerance for making mistakes, a thirst for experimentation.

A lot has happened with the Transition Wayland community garden plots. We began with two weedy plots, pulled all those weeds, rototilled it, then sowed heaps of dry beans. The beans came up beautifully, and we watered and weeded, and then they were eaten, probably by the bunnies. The weeds then took over and we pulled and mowed them, then sowed buckwheat as a smother crop and soil conditioner. While that took in about 50% of the area, (the rest became weeds), growing to shoulder height in some places, we decided to not grow grains there but to turn it into a permaculture (perennial) garden.

This was the state of the garden on Monday:

DSCF2877

Friends brought a weed whacker (we couldn’t locate a scythe) and a rototiller and two hours later it looked like this:

DSCF2878

Today – in the surprisingly hot sun – we evened it all out, raked out some more of the straw, then sowed winter rye. Everyone got to throw up those smooth seeds in great arcs of fecundity!

DSCF2891

Here’s a close-up of the intrepid farmers:

DSCF2889

Aren’t they just silly?

DSCF2890


Last Potato Harvest

DSCF2883

Almost a bucket full of potatoes. 5.5 lbs of Red Marias and 14 lbs of Salem from one bed (22 feet). That’s similar to the potato bed up front, of earlies, which yielded 12 lbs from 16 feet. Also some last squashes, cherry tomatoes, cukes and some errant onions.

What’s left is kale, chard, a couple of winter squashes and lots of green cherry tomatoes, and the sweet potatoes still going strong in the hoop house.

The hens are back to 3 eggs a day, mostly. I’ve re-reintroduced the two pullets to the flock and am steeling myself against their protests and cries for help, because it’s getting nippy and they really need to start spending the nights in the big, warmer coop.

Earth Oven, Phase 2: the Base

The Earth Oven series:

  1. foundation
  2. base
  3. hearth
  4. thermal mass
  5. first drying fire and door arch
  6. insulating layer and chimney
  7. Patching up, and first pizza!

Wow, third blog post today! Be sure to scroll down!

Today we finished Phase 2 of the Earth Oven works, the Base. (Yes, we had a busy day today.) For Phase 1, the Foundation, read here.

We thought about building a circular brick wall with an opening in front and leaving it empty inside, so we could store wood there, but the issue was then what to top it with for the oven to rest on. The only thing we could think of that would hold the weight were the 4×4 pressure-treated landscape timbers that we could place side by side and cut to size and shape. But we didn’t like introducing the chemicals they treat those with, or the wood itself, as wood absorbs a lot of moisture. Again, you want to avoid moisture  because it expands when it freezes, thus moving the base and cracking the oven. So we decided to build the brick wall – having heaps of old bricks which used to make up our old patio – and filling that with more urbanite.

DSCF2498

I had never put down brick before, but as DH was travelling it was up to me. (Not that he had laid brick before either.) I put down six rows in two days. On the first day I discovered it’s a lot easier and a lot more fun to work the mortar with your hands, not that clumsy trowel. At the end of that day I also discovered there’s a reason why masons don’t use their hands. By the time I became aware that the sharp sand particles had scratched up and even invaded my finger tips, it was too late. Ouch. On the second day I donned nitrile gloves, which afforded good enough protection and still allowed my more tactile approach.

DSCF2513

We filled up those six rows with more “urbanite” from a big pile of rocks and stones we dumped at the edge of the property five years ago, when we dug out the veg garden. Who knew that would come in handy some day! Then we added another three rows of brick yesterday, and another two today to reach a recommended, comfortable height of 36″ at which to have the hearth – so as not to have to bend over when filling with firewood or pizzas.

We thoroughly tamped down the fill so that it won’t move. Here’s me putting all my weight to/on it, the queen of the castle ordering: There is to be no moving! 

DSCF2802

Here’s DH and the finished base: 11 rows of bricks, tons of urbanite. Tomorrow we add Phase 3, the Hearth.

DSCF2811

Earth Oven, Phase 1: The Foundation

The Earth Oven series:

  1. foundation
  2. base
  3. hearth
  4. thermal mass
  5. first drying fire and door arch
  6. insulating layer and chimney
  7. Patching up, and first pizza!

For our wedding anniversary DH took the day off so we could start building our earth oven. Yes, that was our anniversary present to one another. People tell us we’re the most romantic couple they know! We’re following Kiko Denzer’s Build Your Own Earth oven, which I highly recommend and are making the 22.5″ (internal) diameter oven. Phase 1 was to dig down to below the frost line.  We finished this phase on my birthday. Yes, that was my birthday present! Well, one of them (you may remember I also got an axe).

We began by excavating a pit, 50″ in diameter, three feet deep to get below the frost line (except for a “shelf,” where the installers of our patio had already dug down and laid foundation). There were some huge boulders in there.

DSCF2331

We sifted the soil  from the rocks as we went along, using our compost sieve, a very handy thing built in 2010 and still standing.

DSCF2327

Then, in the last foot and a half or so, we found a lot of yellow, fine soil that we got very excited about.

DSCF2337

We thought it was clay. You need clay for the earth oven itself, and we really wanted to harvest it from our own property. However, when we did the clay test, we were disappointed. It precipitated (separated from the water and sank down) way too fast.

sedimenttrest_700

Another test is the brick test. We made seven bricks in the end, each with different ratios of the stuff we thought was clay and the soil above that.

DSCF2356

While we waited for the bricks to dry in the sun, we started re-filling the pit with a mix of “urbanite,” a term for anything and everything you can find on your property, with however as little fine soil as possible. You want minimal compaction as well as really good drainage so that there’s as little possible water in the foundation that can expand when it freezes, thereby moving  the base and causing cracks in the oven.  Hence the sifting, which was a pain we would otherwise have dispensed with. So we threw in the boulders we had just dug up, all the rocks and pebbles, as well as broken pavers and bricks. We filled up the small spaces  in between these and stabilized the whole mess with coarse sand and crushed pea stone that we got in bags from Home Depot.

DSCF2361

We topped the whole thing with gravel (also from the ‘Depot).

DSCF2362

On top of that we placed cement pavers left over from the patio project, taking care that they were level. These made the foundation for our base.

DSCF2498

Of the seven bricks one seemed strong enough to be used as the “earth” (clay) for our oven. It remains to be seen if it will be enough. About that, in “Phase 3.” But first, Phase 2: the Base.

Honey Extracting with the New Extractor

Today I robbed seven frames from the two hives in my beeyard. Many  more frames were only half or three fourths capped, but with some luck in weather and nectar flow, the bees will cap those fully and I’ll have more to rob.  There’s also the third hive at our friend’s place: I’m curious to see how that one did. Both populations looked very strong, and I saw no sign of mites (will do a proper test, though) but I did see some of those nasty hive beetles scurrying around. Robbing the frames was no problem. I never cease to be amazed at how docile these creatures are.

After that K, a new member of the BEElieve beekeepers club, came over and we extracted the honey together. Her first-year hives had no extra honey as yet, but she wanted to see how it’s done. We used the new Maxant extractor, which the club bought with the money from our honey fundraiser. What a joy to use it: so simple, so easy. The machine is simply and well designed, very robust. Here it is, with K uncapping one of the frames.

DSCF2820

Three of the frames held a dark yellow honey, darker than Spring honey. But the other three held an even darker and, we saw as it started oozing out, dark red, almost wine red honey. This honey was heavier and more viscous and therefore took more spinning to extract. It tastes, not so much sweeter, but more  specific, rather. Almost cinnamony. I guess it’s the purple loosestrife. I’ll ask around.

DSCF2816

This picture gives a good idea: a “red” frame being un-capped, the dark yellow frames already uncapped behind it.

DSCF2821

The harvest totaled 20 lbs, from 7 frames. What a bounty!

Whiskers on Chickens

Many big plans are forming, constantly, where we’re at. First things first, though. Hens!

  1. We are reintroducing the pullets to the flock. The temperatures are dropping fast, at night, and they’ll need to feel at home in the warmer coop before long. Amie and I chatted about the goat plan while all six of them free ranged in what might (also) become the goat yard. As long as they can help it, there are still at least 5 feet between the pullets and any hen.
  2. We need to run electricity to the coop because I don’t want to repeat last winter’s -20F night when, in the bitter cold and dark night, I was trying to run a line to the coop for a heat lamp. It didn’t work back then and the hens were none the worse. Still, I anyway want to put a heater into the Aqua Miser from which the hens now sip, because having to run out every two hours to break the ice is a hassle. Then we might as well have an outlet to create the possibility of a heat lamp. And why not add a light bulb too? {UPDATE} We’ll probably make that solar!

DSCF2781 DSCF2765

Chicken love. Nocty practically falls asleep when Amie hugs her.

DSCF2678 DSCF2675small

Love those Americauna whiskers!

DSCF2667 DSCF2747

Oreo can rest her chin on your finger for minutes on end. These two are such a delightful comic duo! And last but not least:

DSCF2722

Amie got one of these steerable Angry Birds as a birthday gift. None of the real birds were very impressed.


The Goat Question

astyksgoat

For a while now we’ve been considering adding milking goats to our menagerie, but it seems like such a step up from bees and chickens.  Still, we got some encouragement recently.

My friend from a neighboring town, Kath of This One Good Life, would love goats too, and promised to be a goat buddy if we go ahead. Blogger Leigh from 5 Acres and A Dream recommended Nigerian Dwarfs, writing that they have wonderful personalities and that, being aseasonal breeders, they can be bred almost any time of year (which means if you have two, it’s possible to breed them in opposite seasons and have year round milk between the two). She also has a long resource list of “Goat Links” on her blog. I also revisited Sharon Astyk’s blog post on “The Lazy Goat-keeper,” which puts so much of goat-keeping into perspective (also read this blog post). (The goat in the picture is hers, a buckling called Cadfael.)

So, to goat or not to goat? We would love the milk, cheese and butter – we go through so much of it, and I hate buying it in plastic. I think the skills of keeping mammalian livestock and processing their food will be good to have. I believe we can fit two goats onto our property and into our daily lives. I’ve seen how good the hens are, for all three of us, for animal companionship and lessons in life, death and gratitude (I thank those hens every day when I take their eggs). And I inordinately look forward to taking the goats for a walk in the neighborhood. Amie is of course ecstatic and DH is open to the idea.

We do need to do some more research, but I’m aware that at some point research becomes an excuse to put off taking the risk and that one just has to take the plunge. Goats are resilient creatures, and I think they’ll forgive us our first mistakes.

My only concerns are getting a permit from the town, potential vet bills, and taking holidays.

At the end of the month we will all be going to Western Mass, me to take a training, Amie and DH to have  a trip. We found a wonderful place to stay: a community farm with permaculture, gardens, herbs, bees and… milking  goats! Getting some hands-on experience would be major encouragement and perhaps the final step forward.

On other animal news, we finally got back to four eggs (four hens). The broody hen, which we decided not to break, just to experiment, has finally started laying again!

Compost

DSCF2652

It’s geology! Layer after layer of compost.

This pile had gone cold. I lifted up the Earth Machine, which you can see in the background. I love the design of the Earth Machine: as it tapers up, it’s easy to lift off while keeping the shape, making it easy to fork up. It took two heaped wheelbarrows, because it had compacted so much (cause of its going cold), to move to an open compost bin in the back.  The top stuff, which had just been added, ended up at the bottom and so I’m fairly confident the critter won’t even know there’s raw egg and some meat in there.